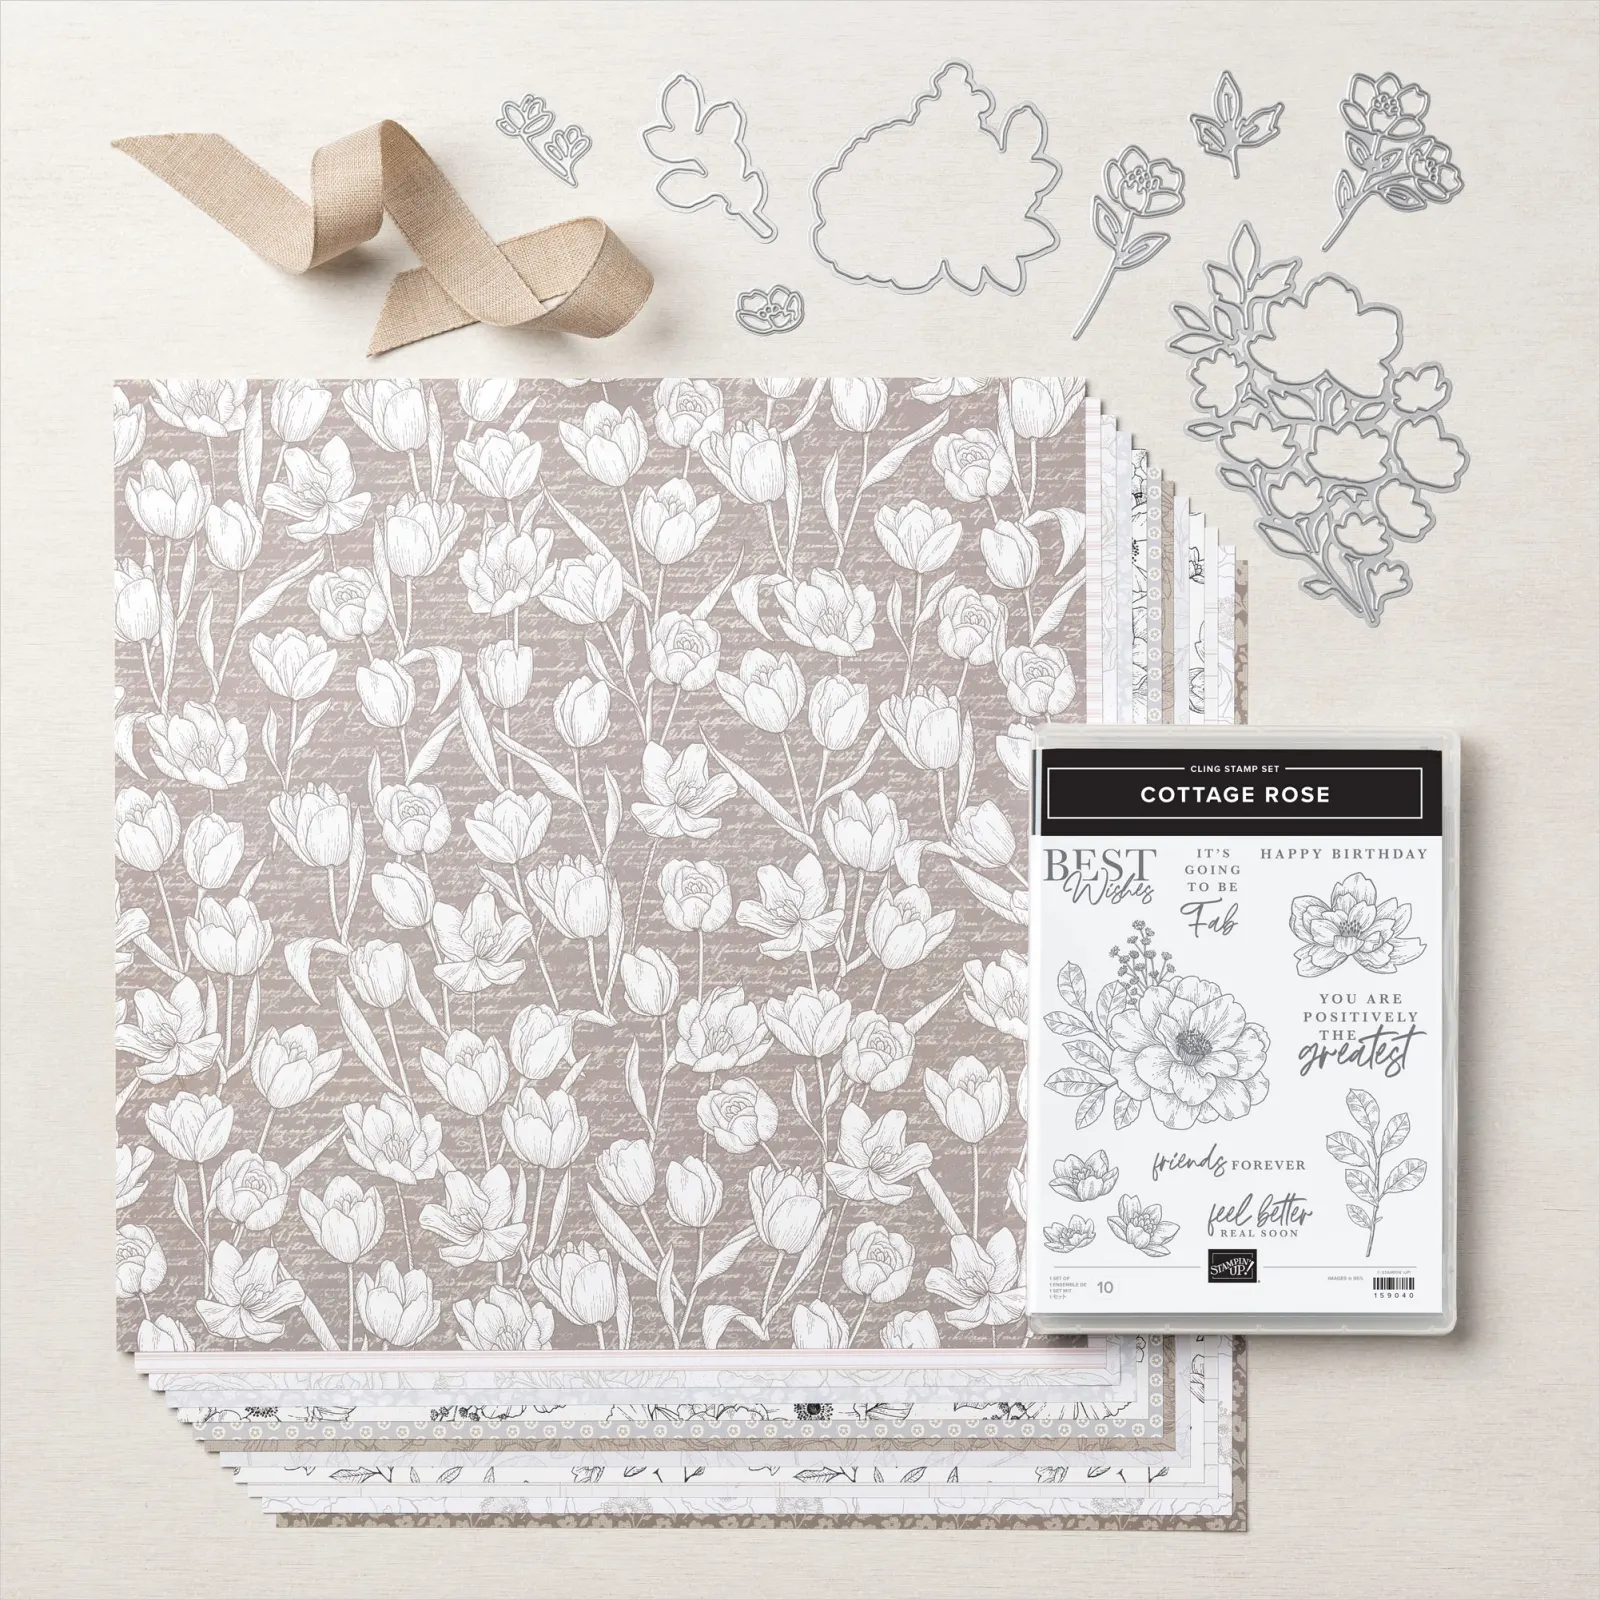
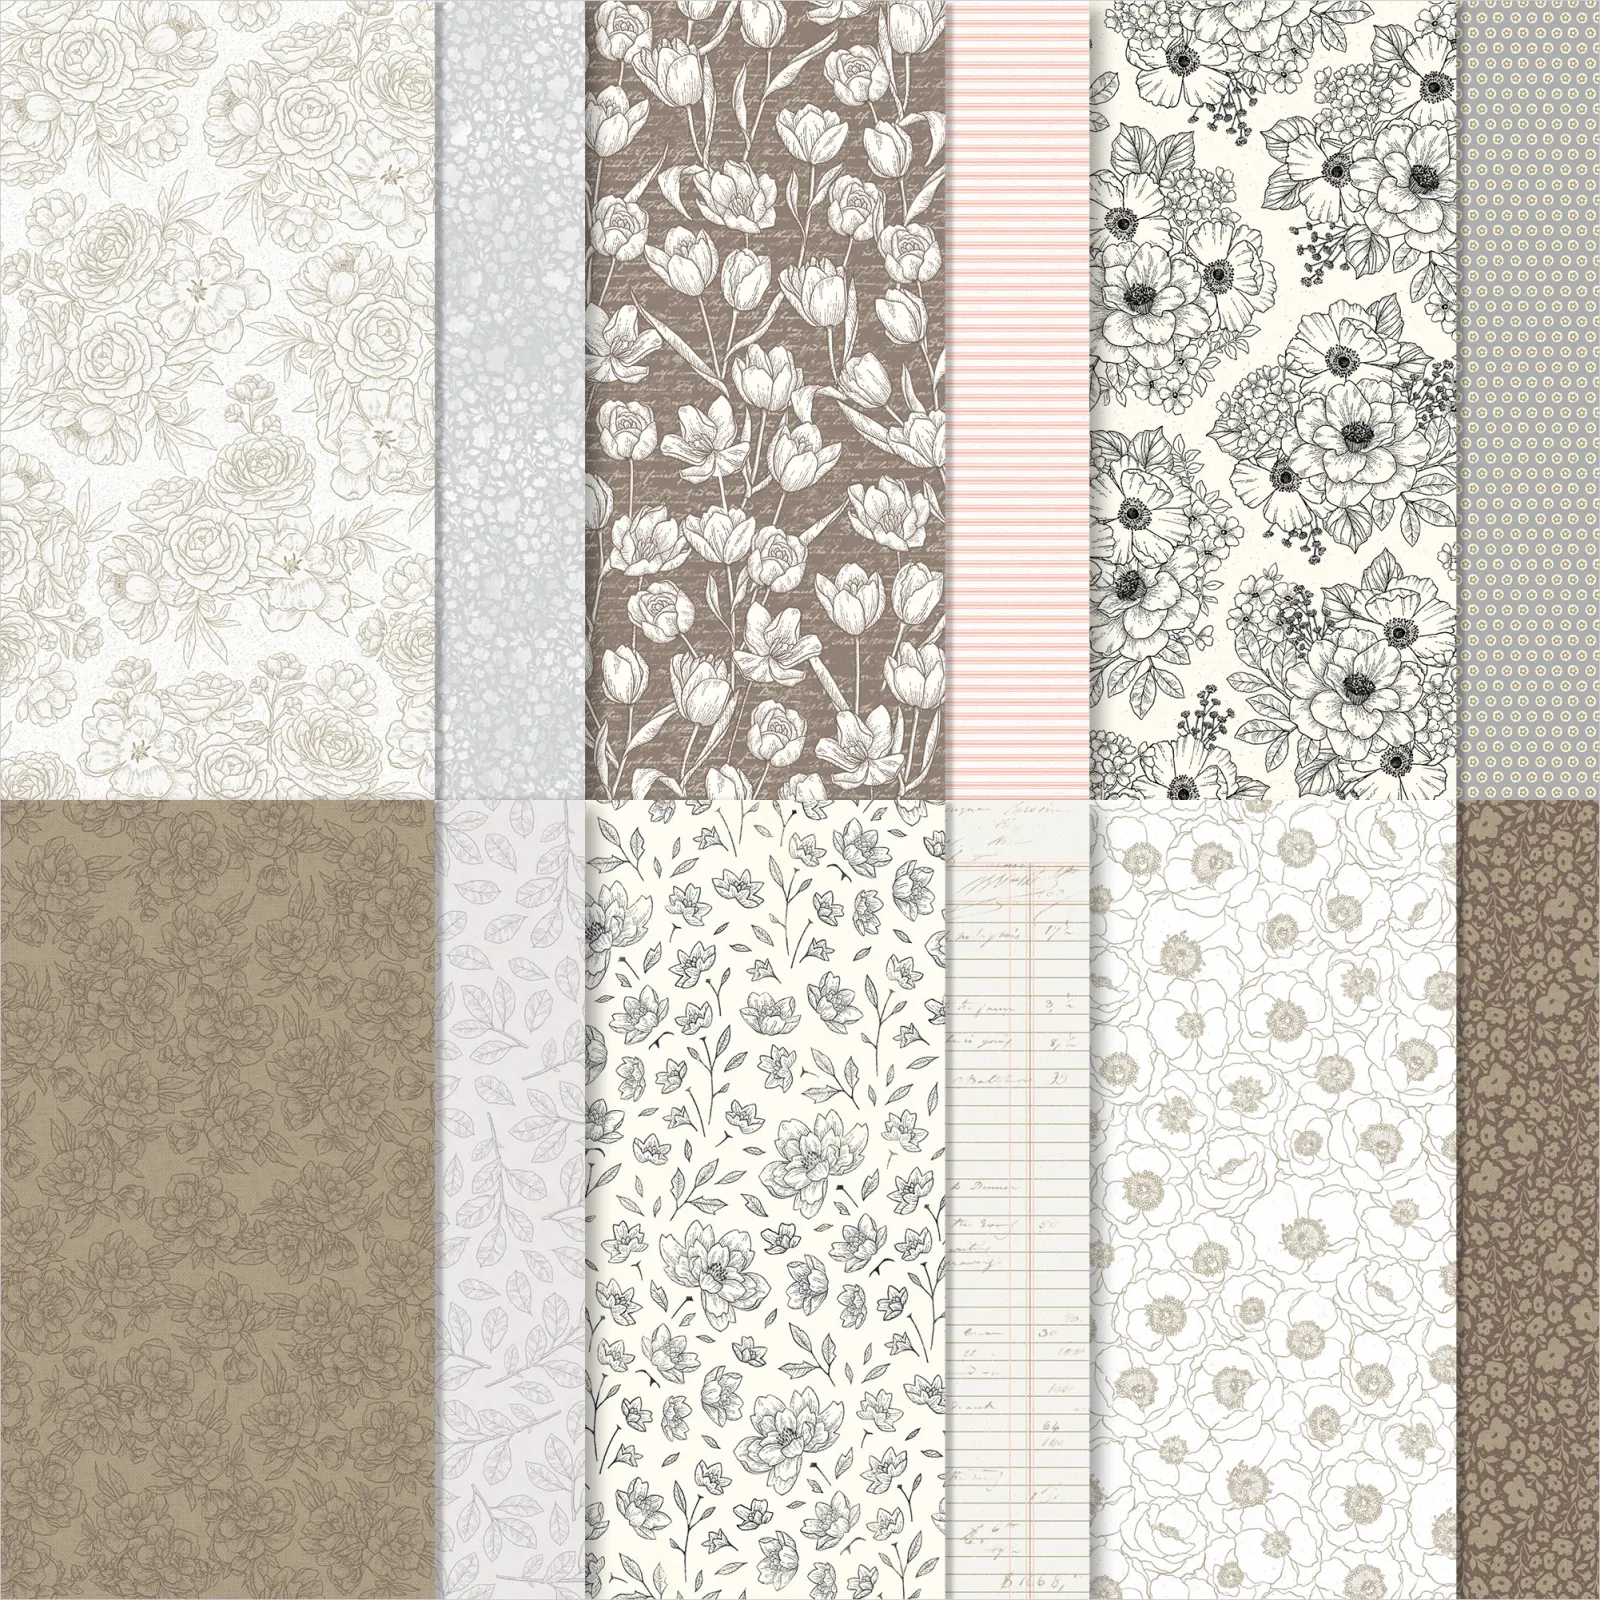
Abigail Rose Suite Collection
Abigail Rose
I have always loved vintage prints (anything vintage really), roses, foliage and enjoy creating something new with a vintage look. Abigail Rose Suite Collection from the 2022-23 Annual Catalog is just stunning and uses the pale neutral shades and light subtle colors for a lovely collection of prints and images.
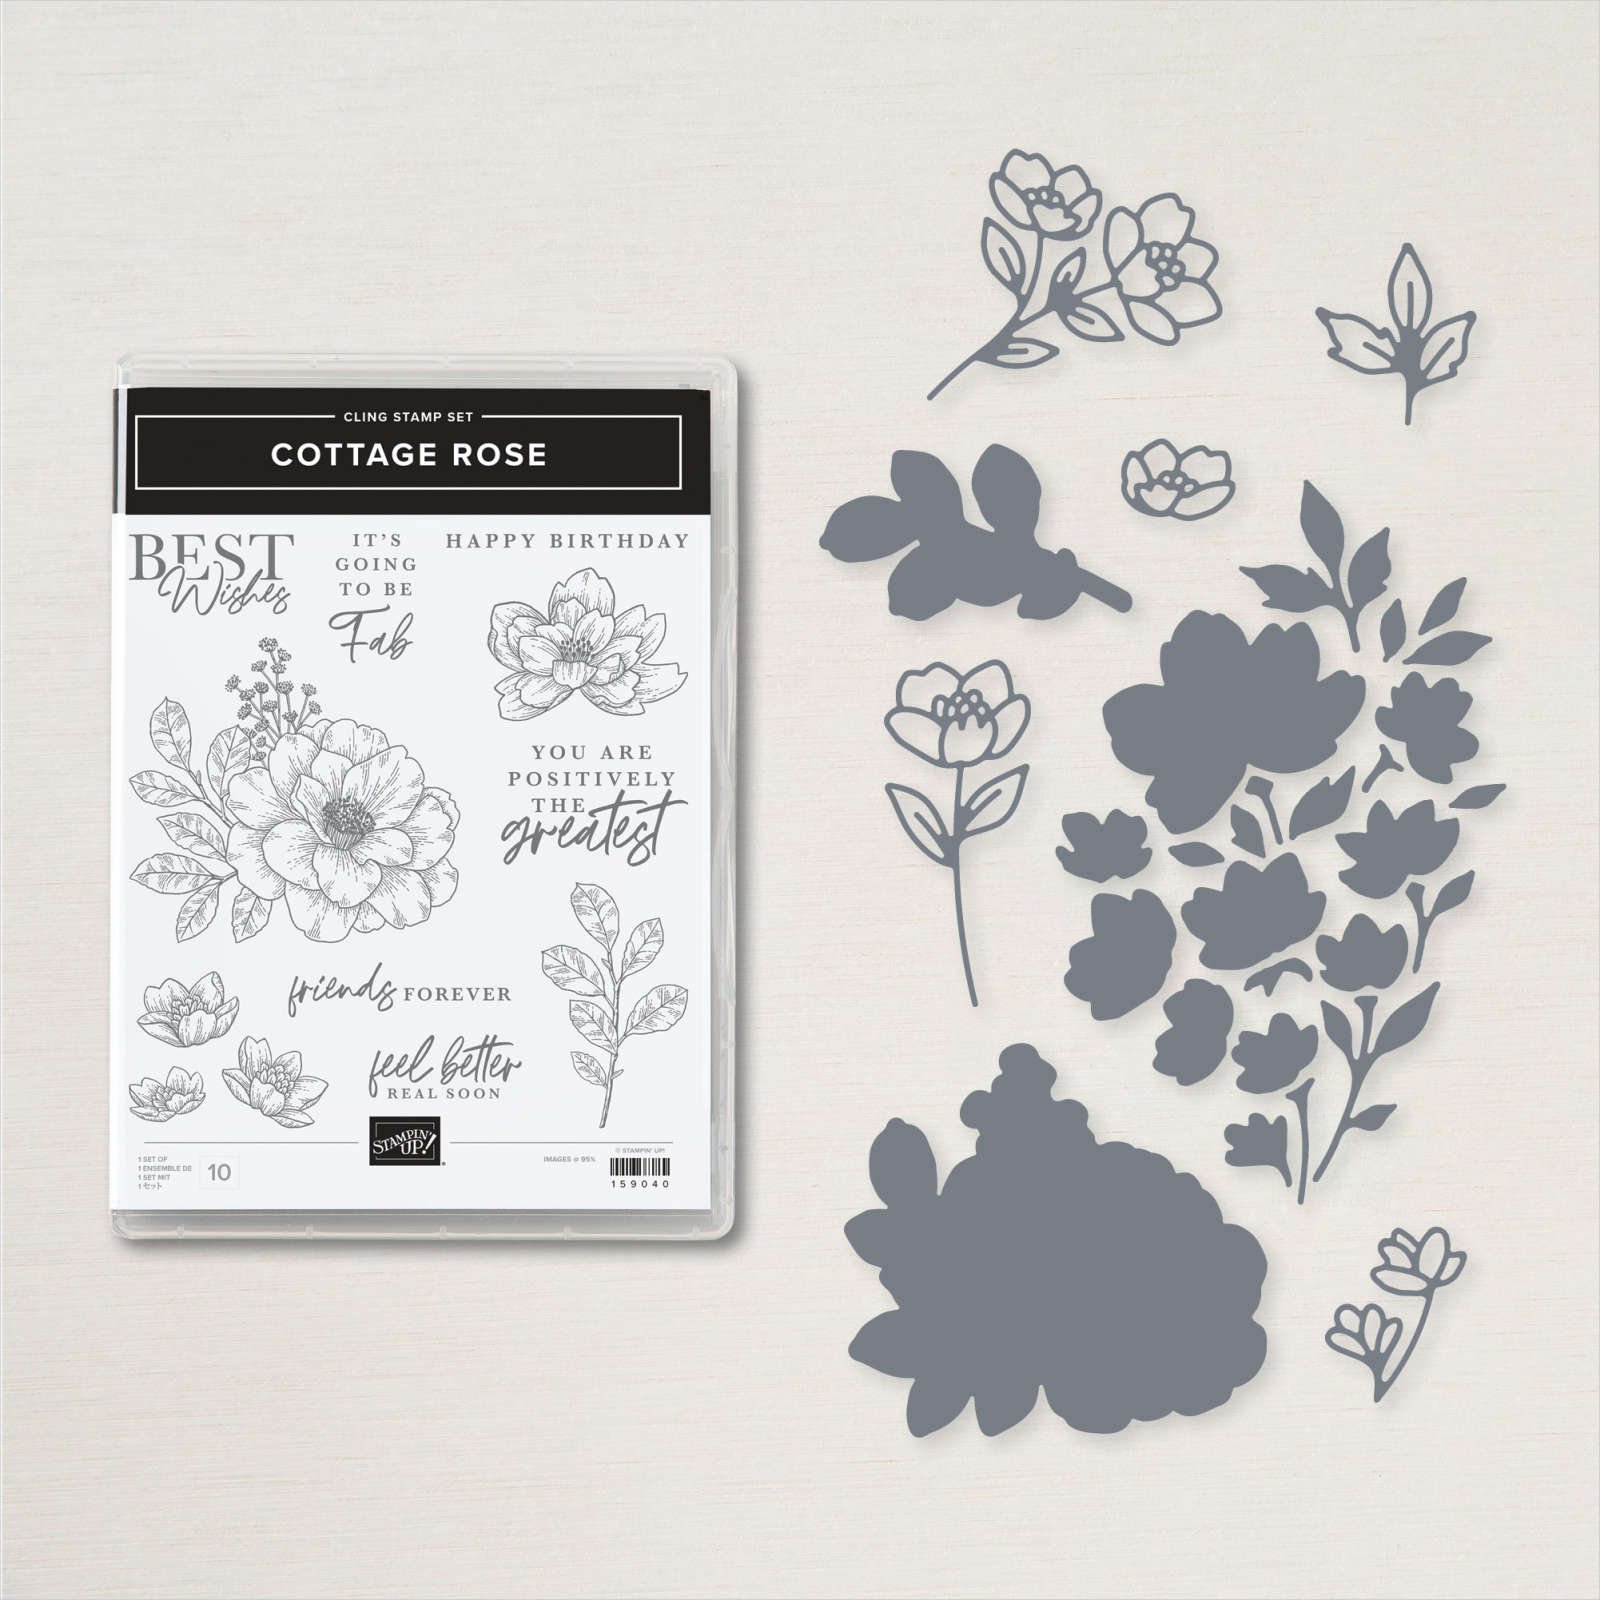
The collection includes the Cottage Rose Bundle, Abigail Rose 12”x12” Designer Series Paper, and the Natural Finish 7/8” Ribbon.
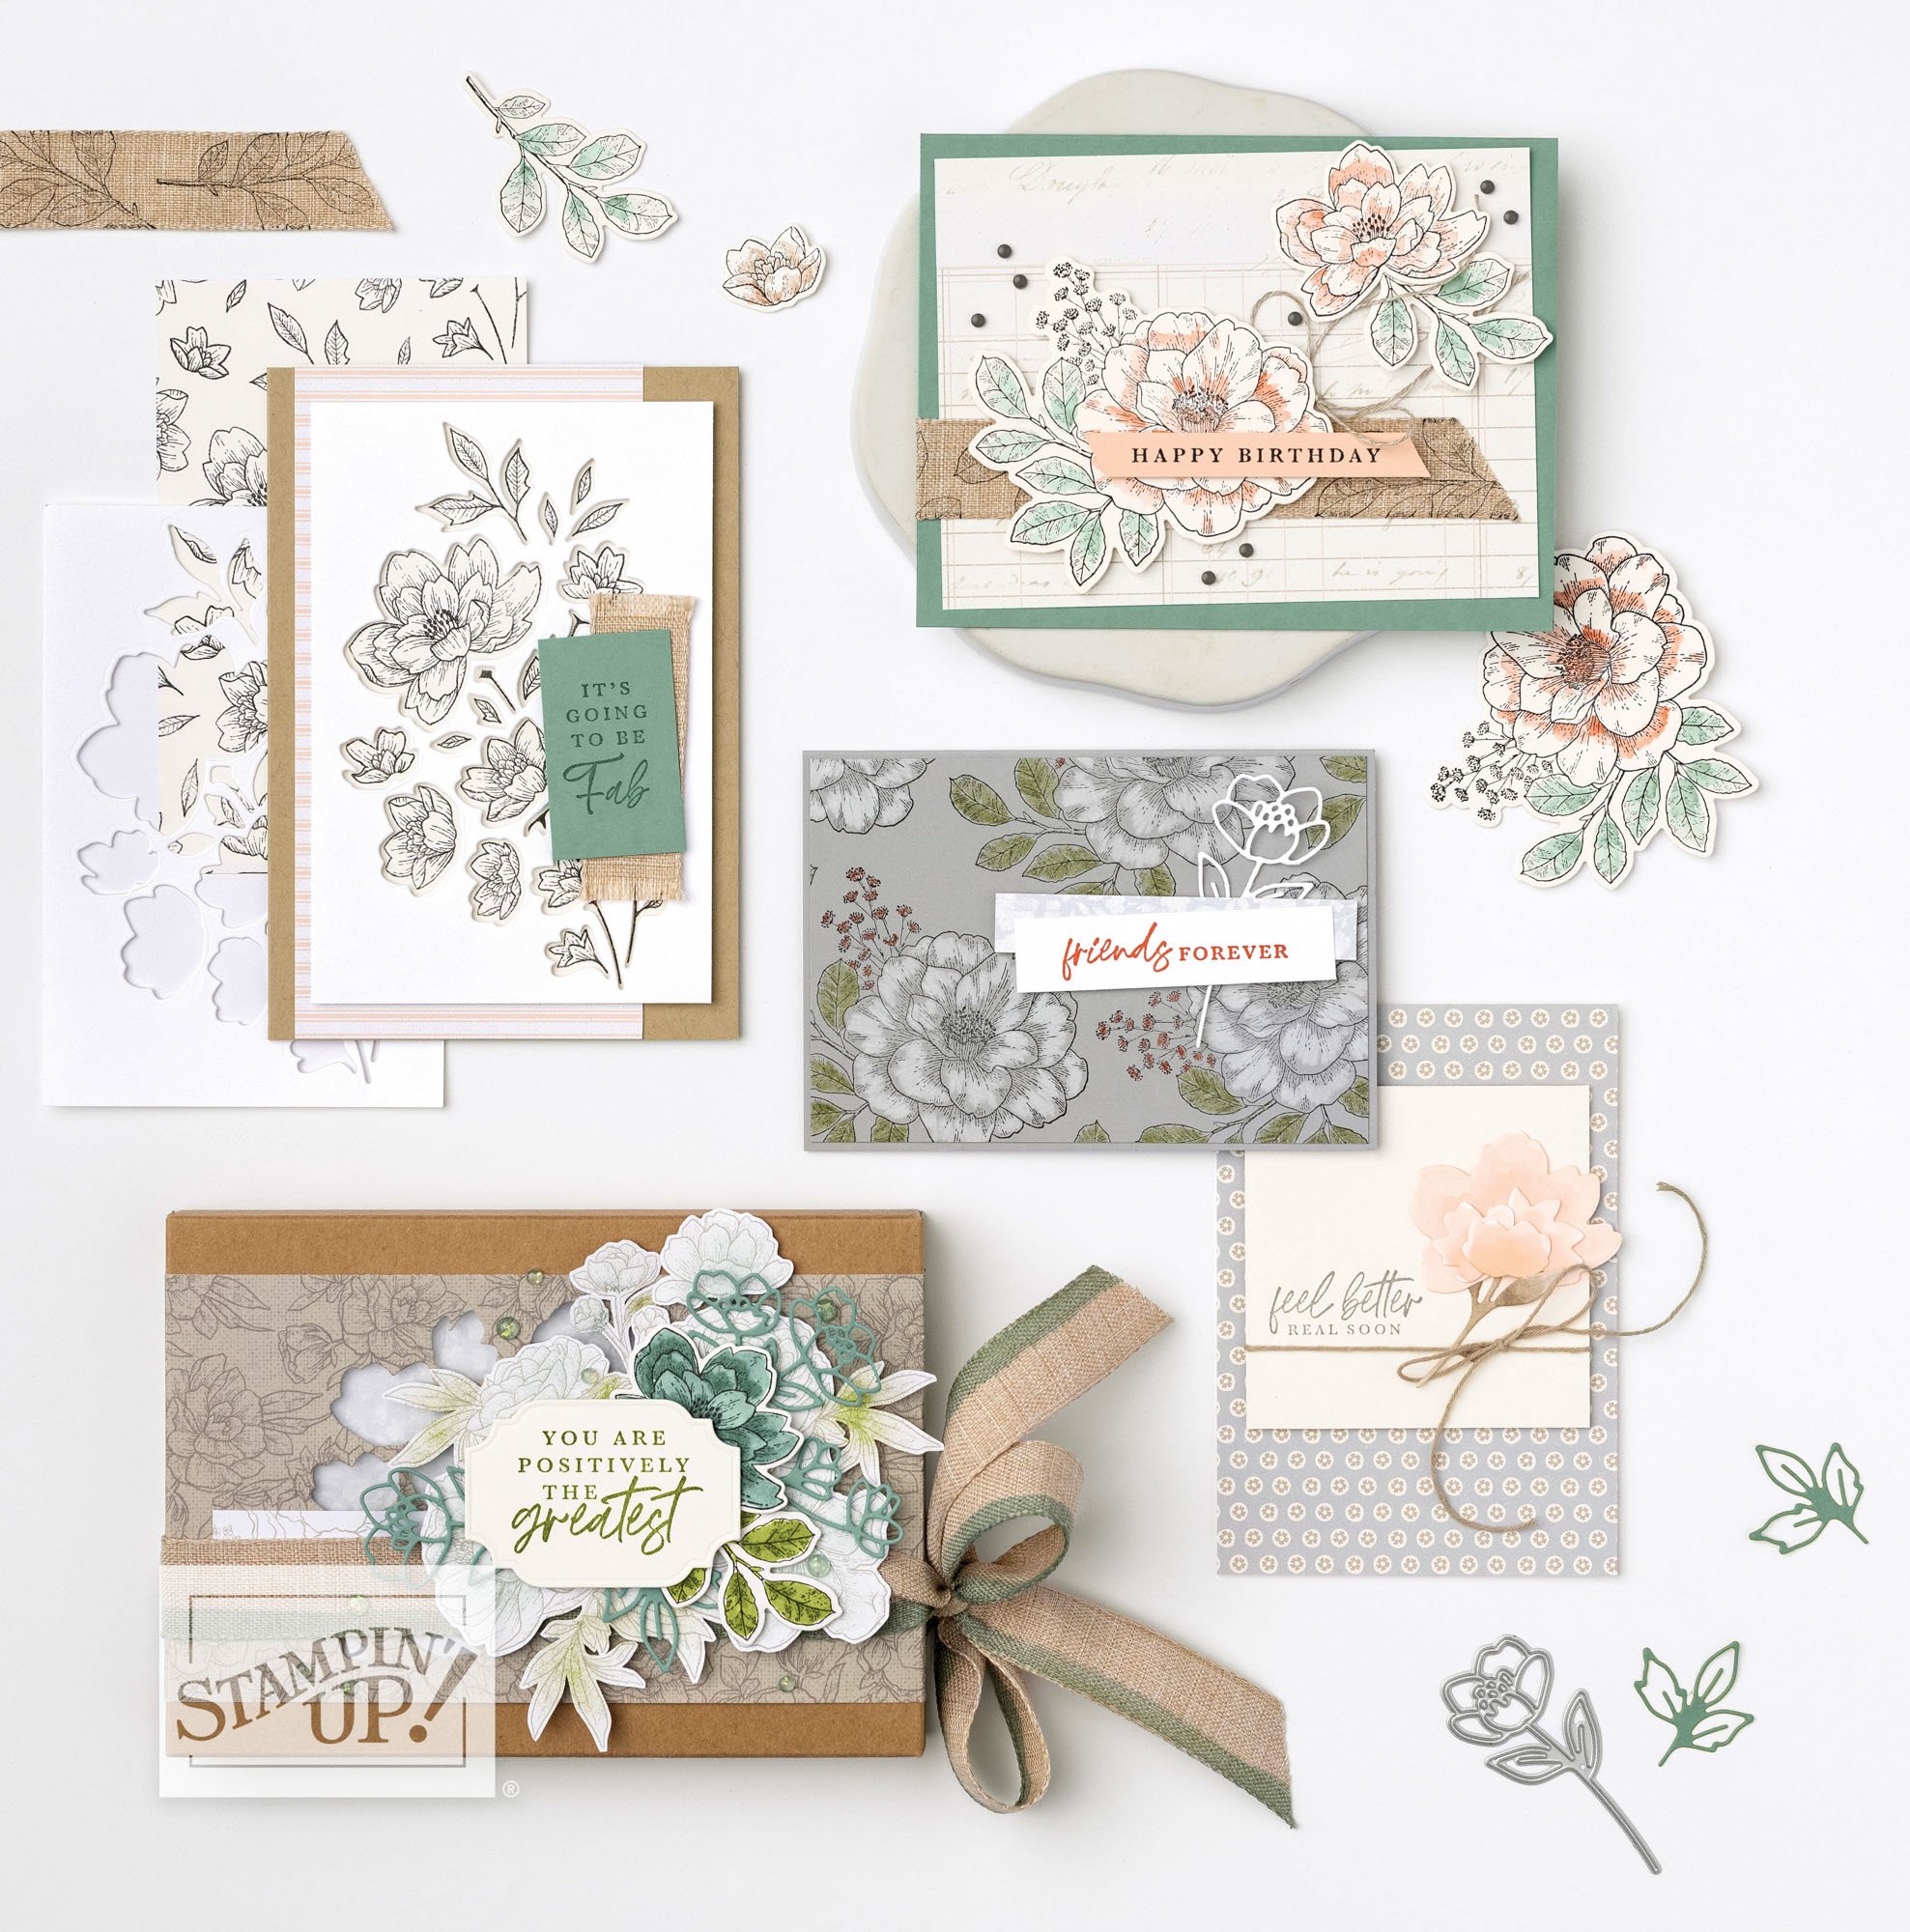

Happy Birthday
For my June stamp class, I featured the Abigail Rose Suite Collection exclusively. It is so soft and beautiful, it was an easy choice for lovely projects.
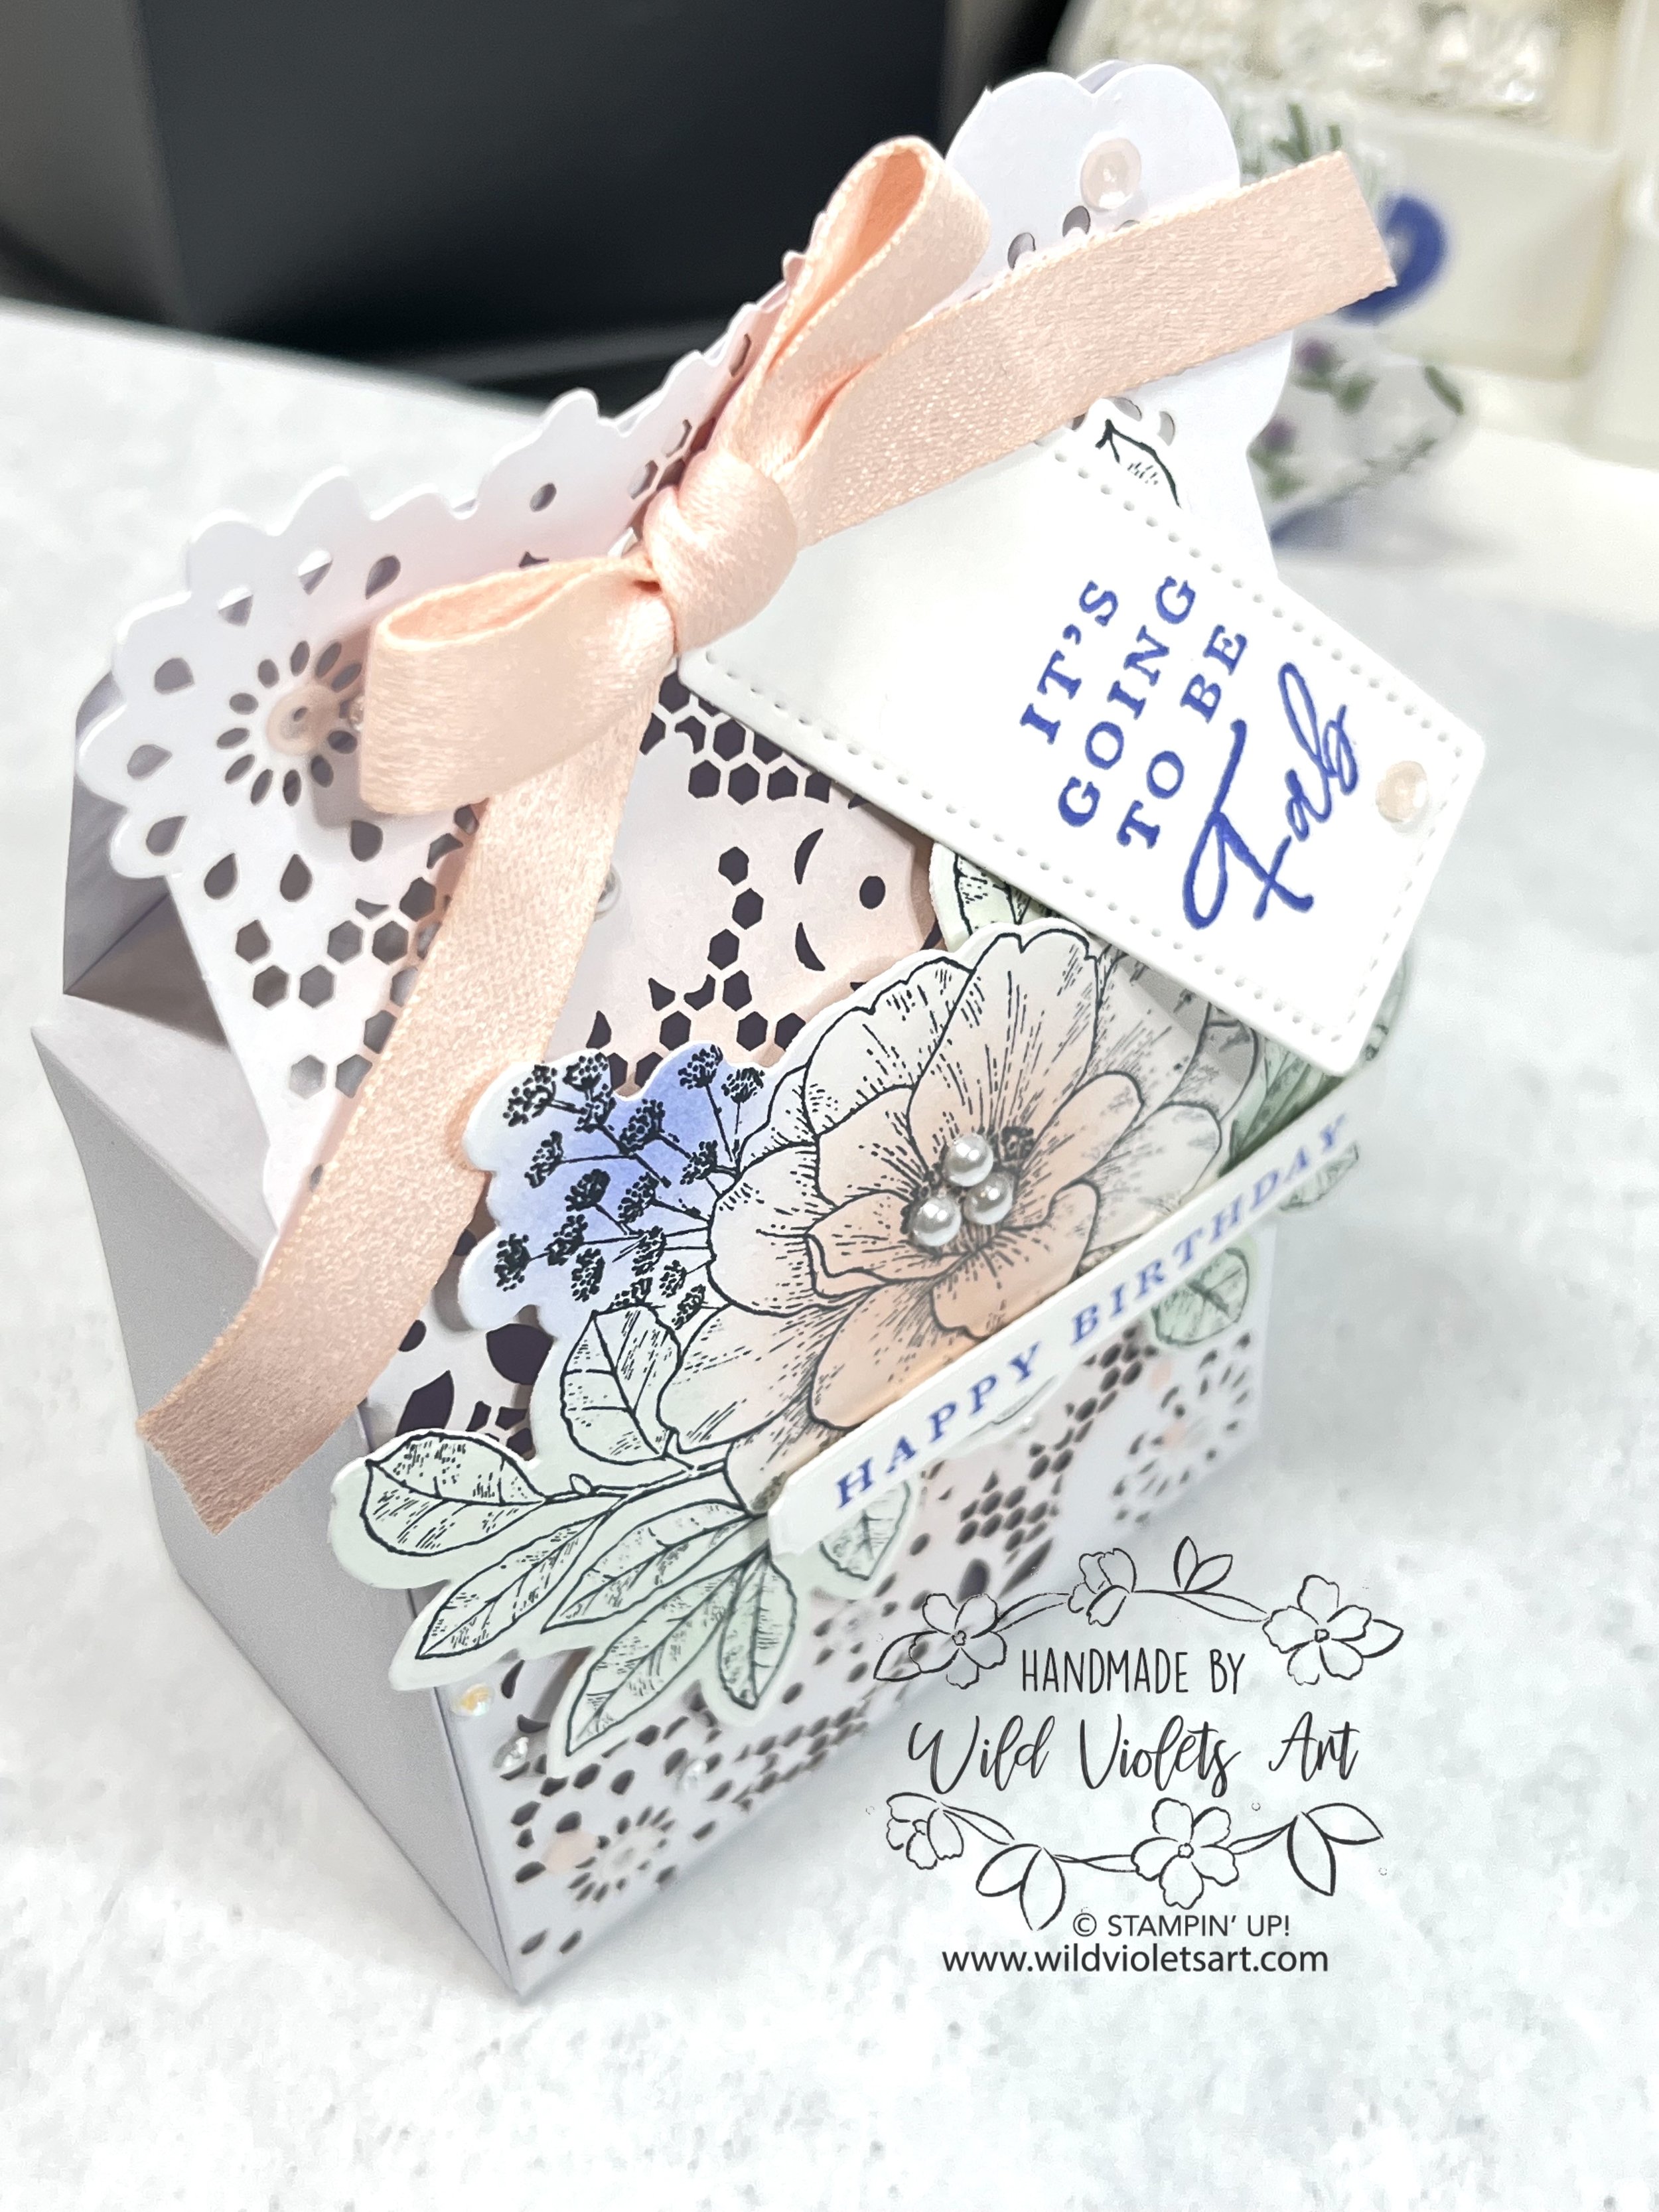
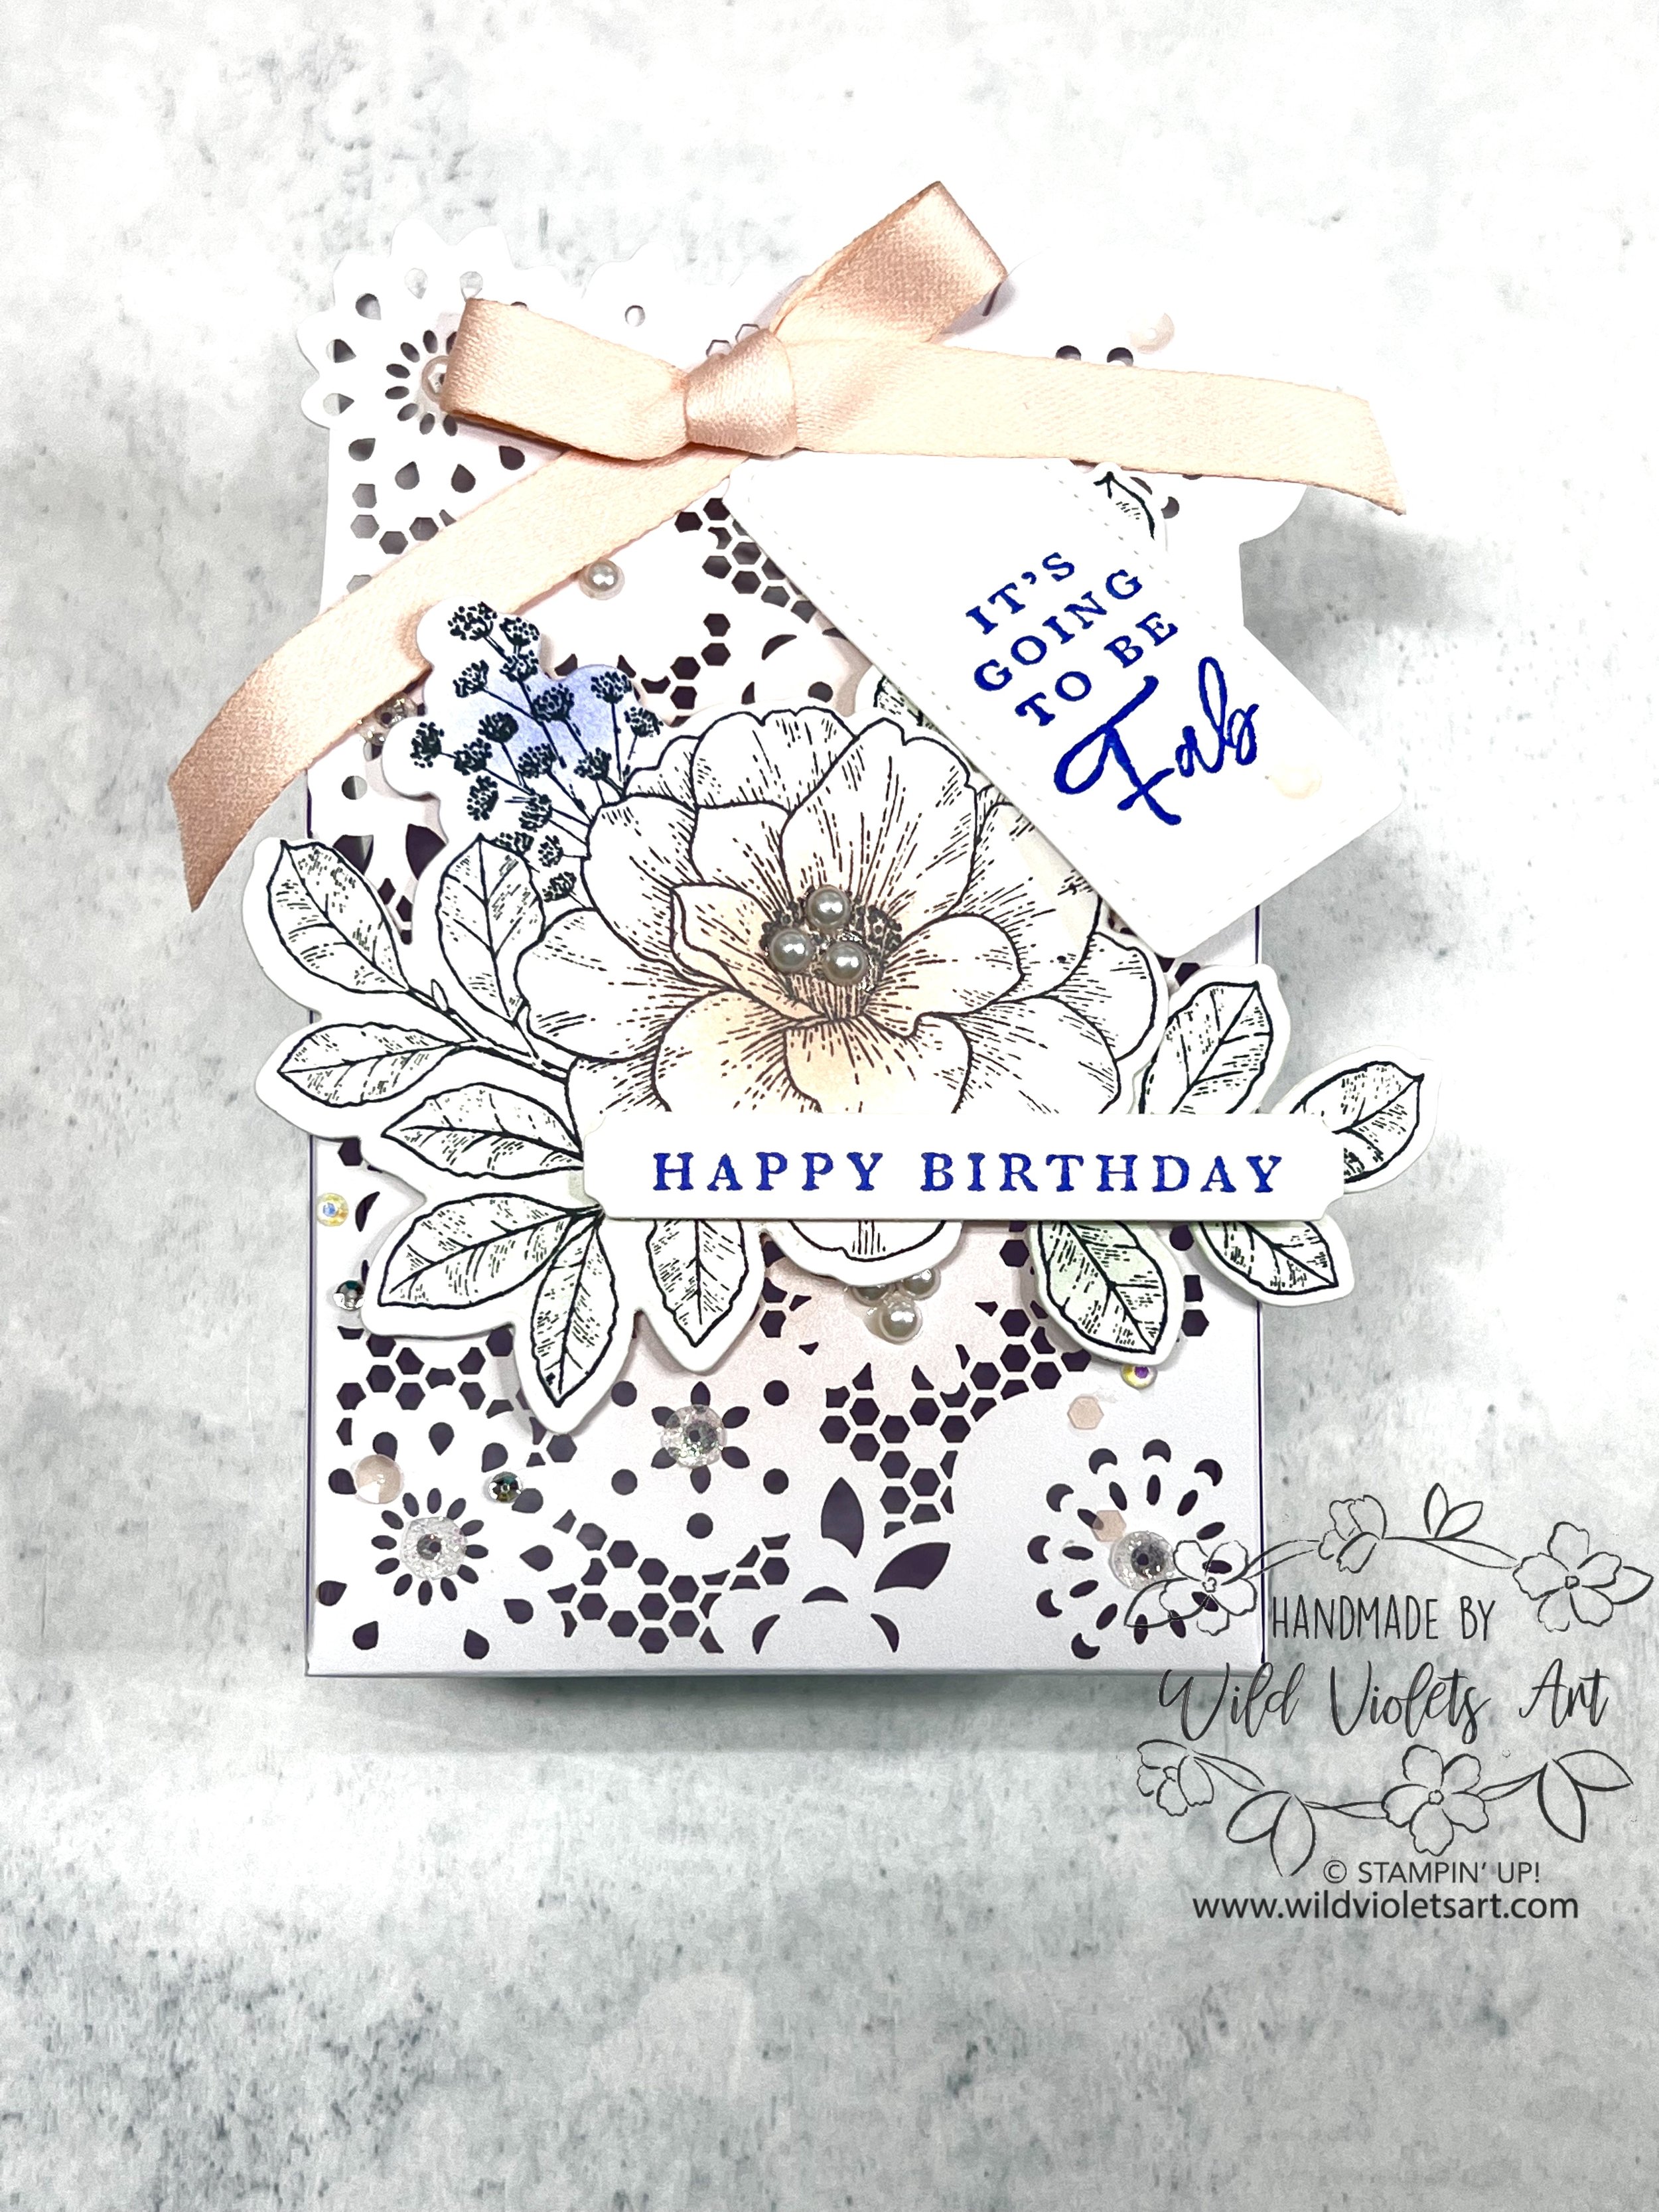
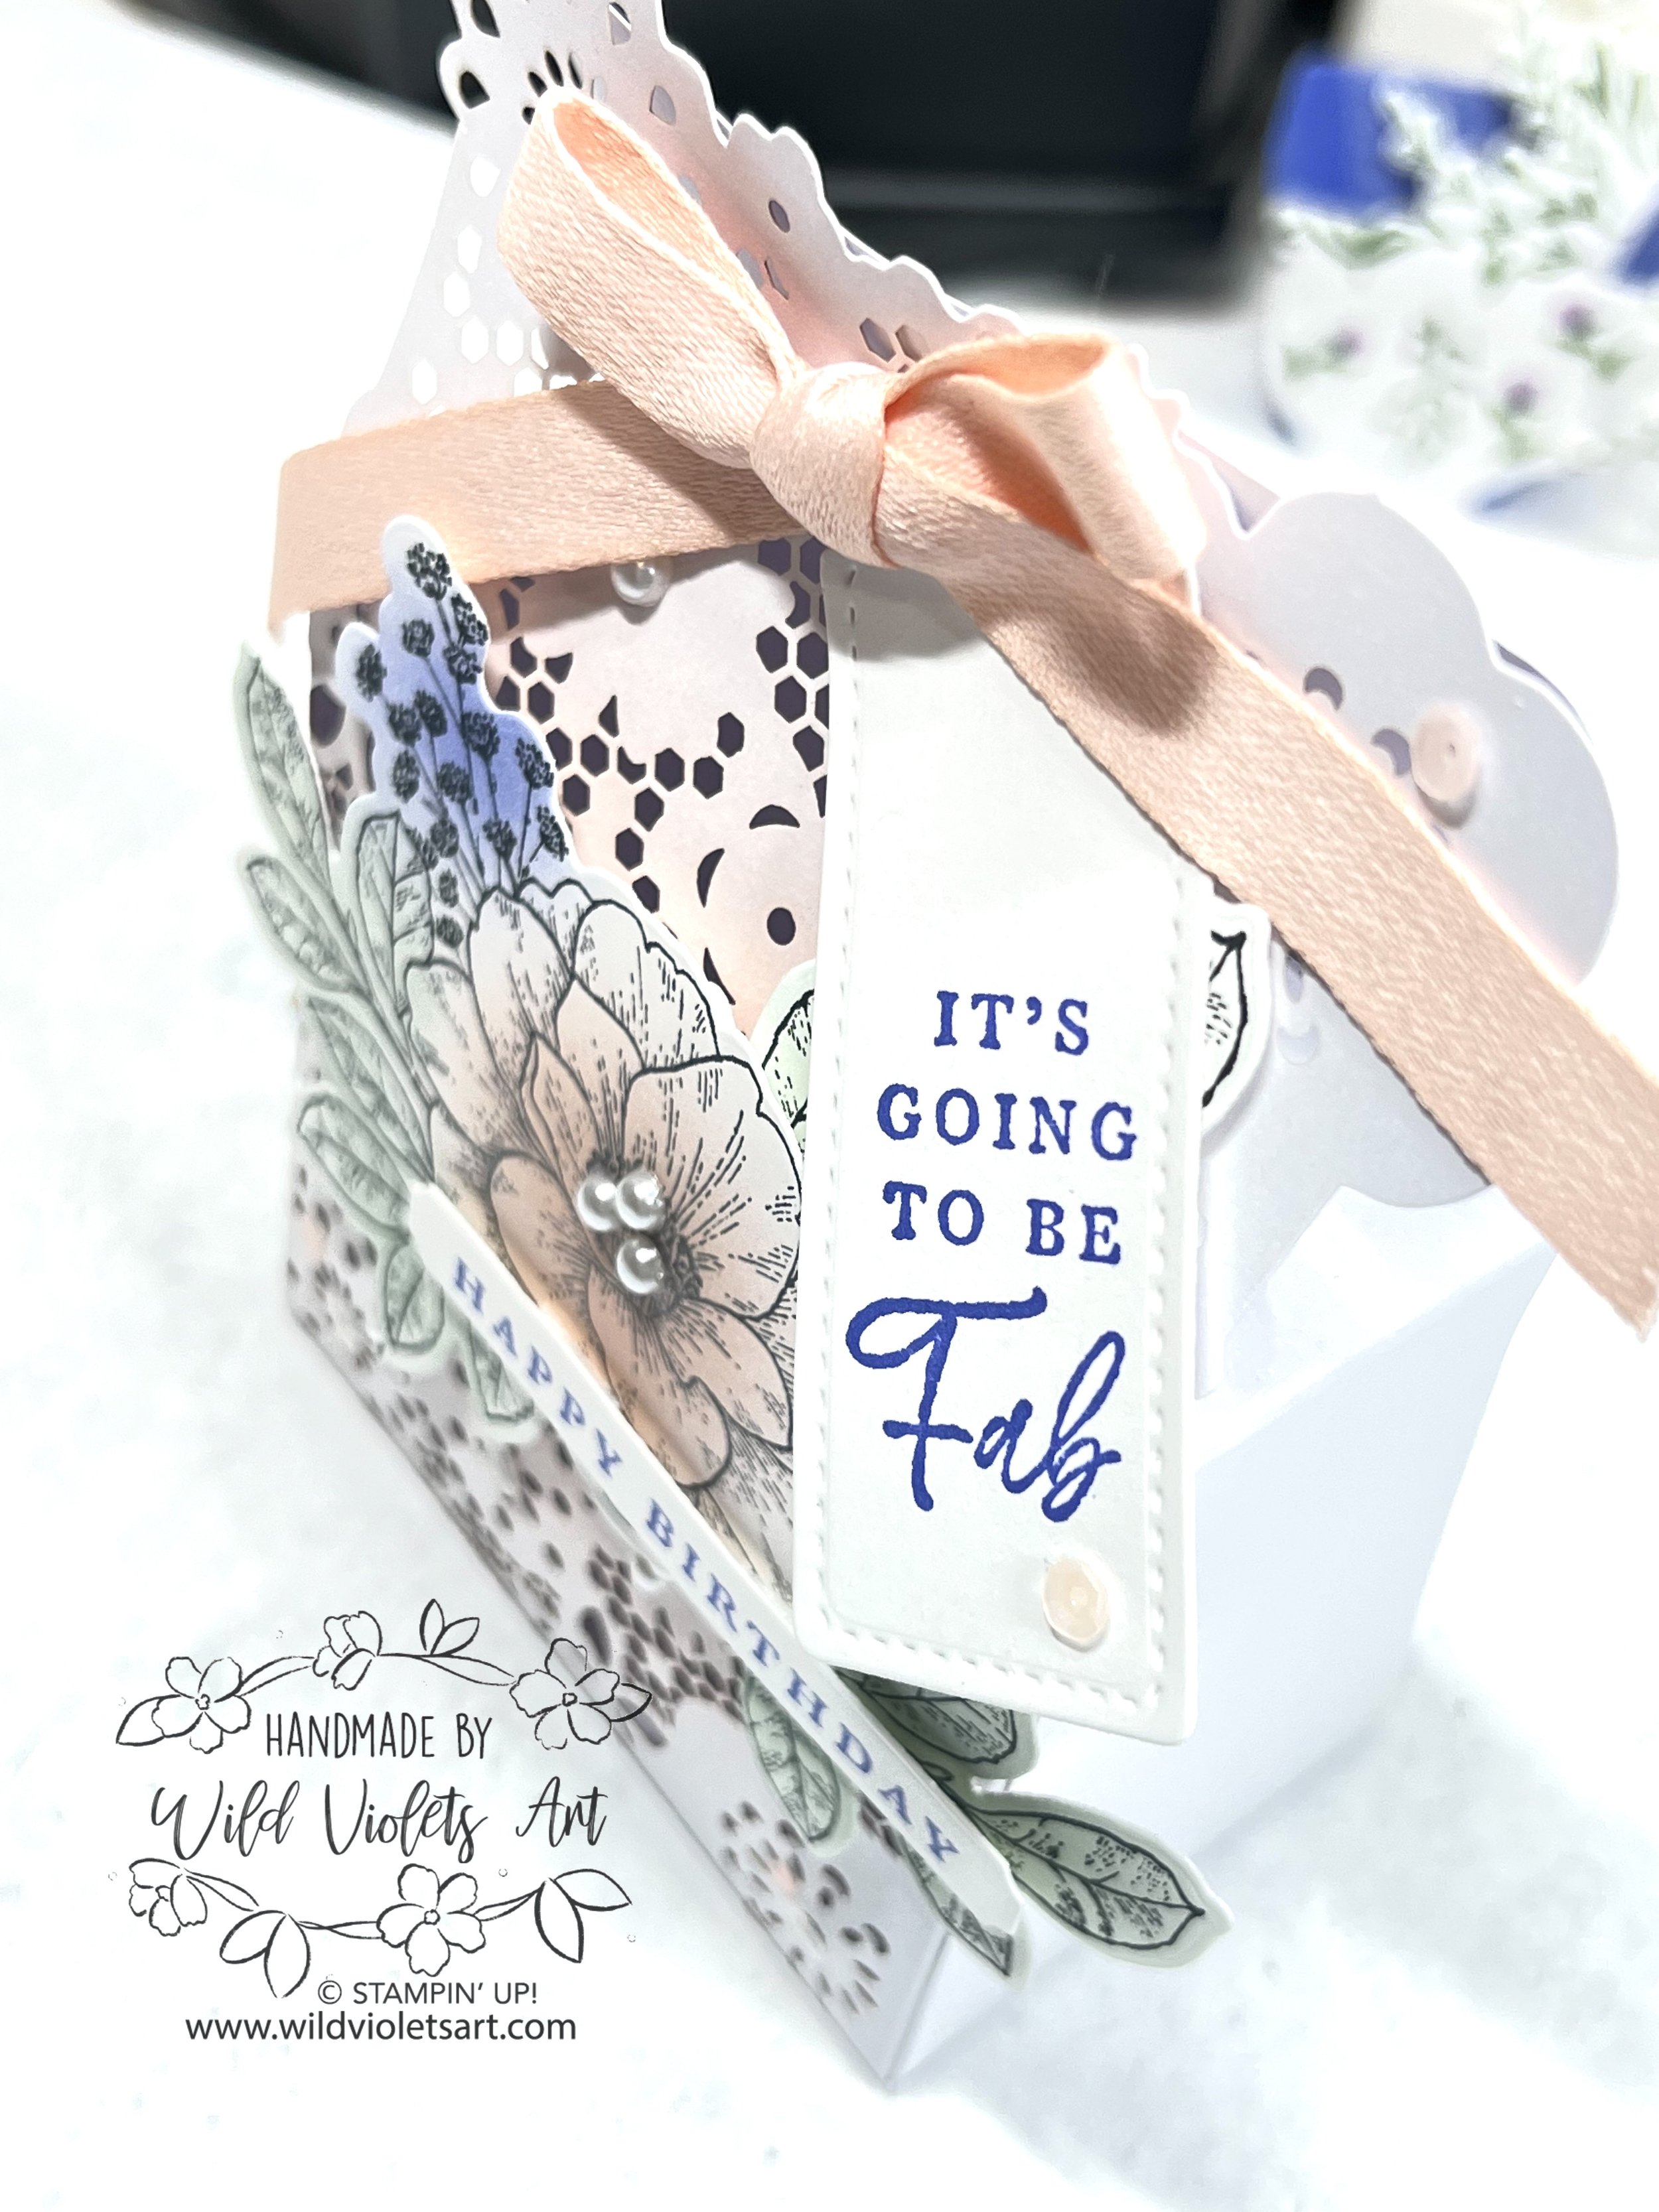
The first project was using the Delicate Detail Treat Box from the new 2022-23 Annual Catalog. These white boxes have an intricate laser-cut pattern that lends them a vintage lace look. Tuck a card or a treat inside and you have the complete gift package!
Items needed to make this project
Memento Tuxedo Black Ink Pad #132708
Blushing Bride Classic Stamp Pad #147100
Soft Succulent Classic Stamp Pad #155778
Orchid Oasis Classic Stamp Pad #159214
Blending Brushes #153611
Tailor Made Tags #155563 (for “it’s going to be Fab” sentiment)
Sending dies #159271 (for birthday sentiment)
Delicate Details Treat Box #159248
Basic White CS #159276 – 4-1/4”x5-1/2” for flower & leaves
For Everything Fancy Sequins #159187 (in pink)
Petal Pink 3/8” Soft Polyester Ribbon #159192

Add a light amount of Blushing Bride ink using the blending brush to the lacy front of the treat box. Put the box together, then set aside. Using the Memento Tuxedo Black Ink, stamp one rose and two leaf clusters on the Basic White CS piece. Using the Blending Brush add a light layer of Blushing Bride Ink to the center of the rose, Soft Succulent Ink to the leaves and the Orchid Oasis Ink to the mini buds (sorry this photo is so bad). Die cut the rose and leaves out using the Cottage Flowers Dies. Pop up on front of the bag using Stampin Dimensionals.

Instructions:
With the remining Basic White CS and using the Orchid Oasis Ink to stamp the sentiments then die cut them out using the Tailor Made Tag Dies and Sending Dies. Pop up the “Happy Birthday” using Stampin’ Dimensionals on the lower right side of the rose. Using the Petal Pink ribbon, thread into the tag then into the front and back of the treat bag holes and tie into a bow. As a final touch, add the sequins to the bag front and tag as desired.

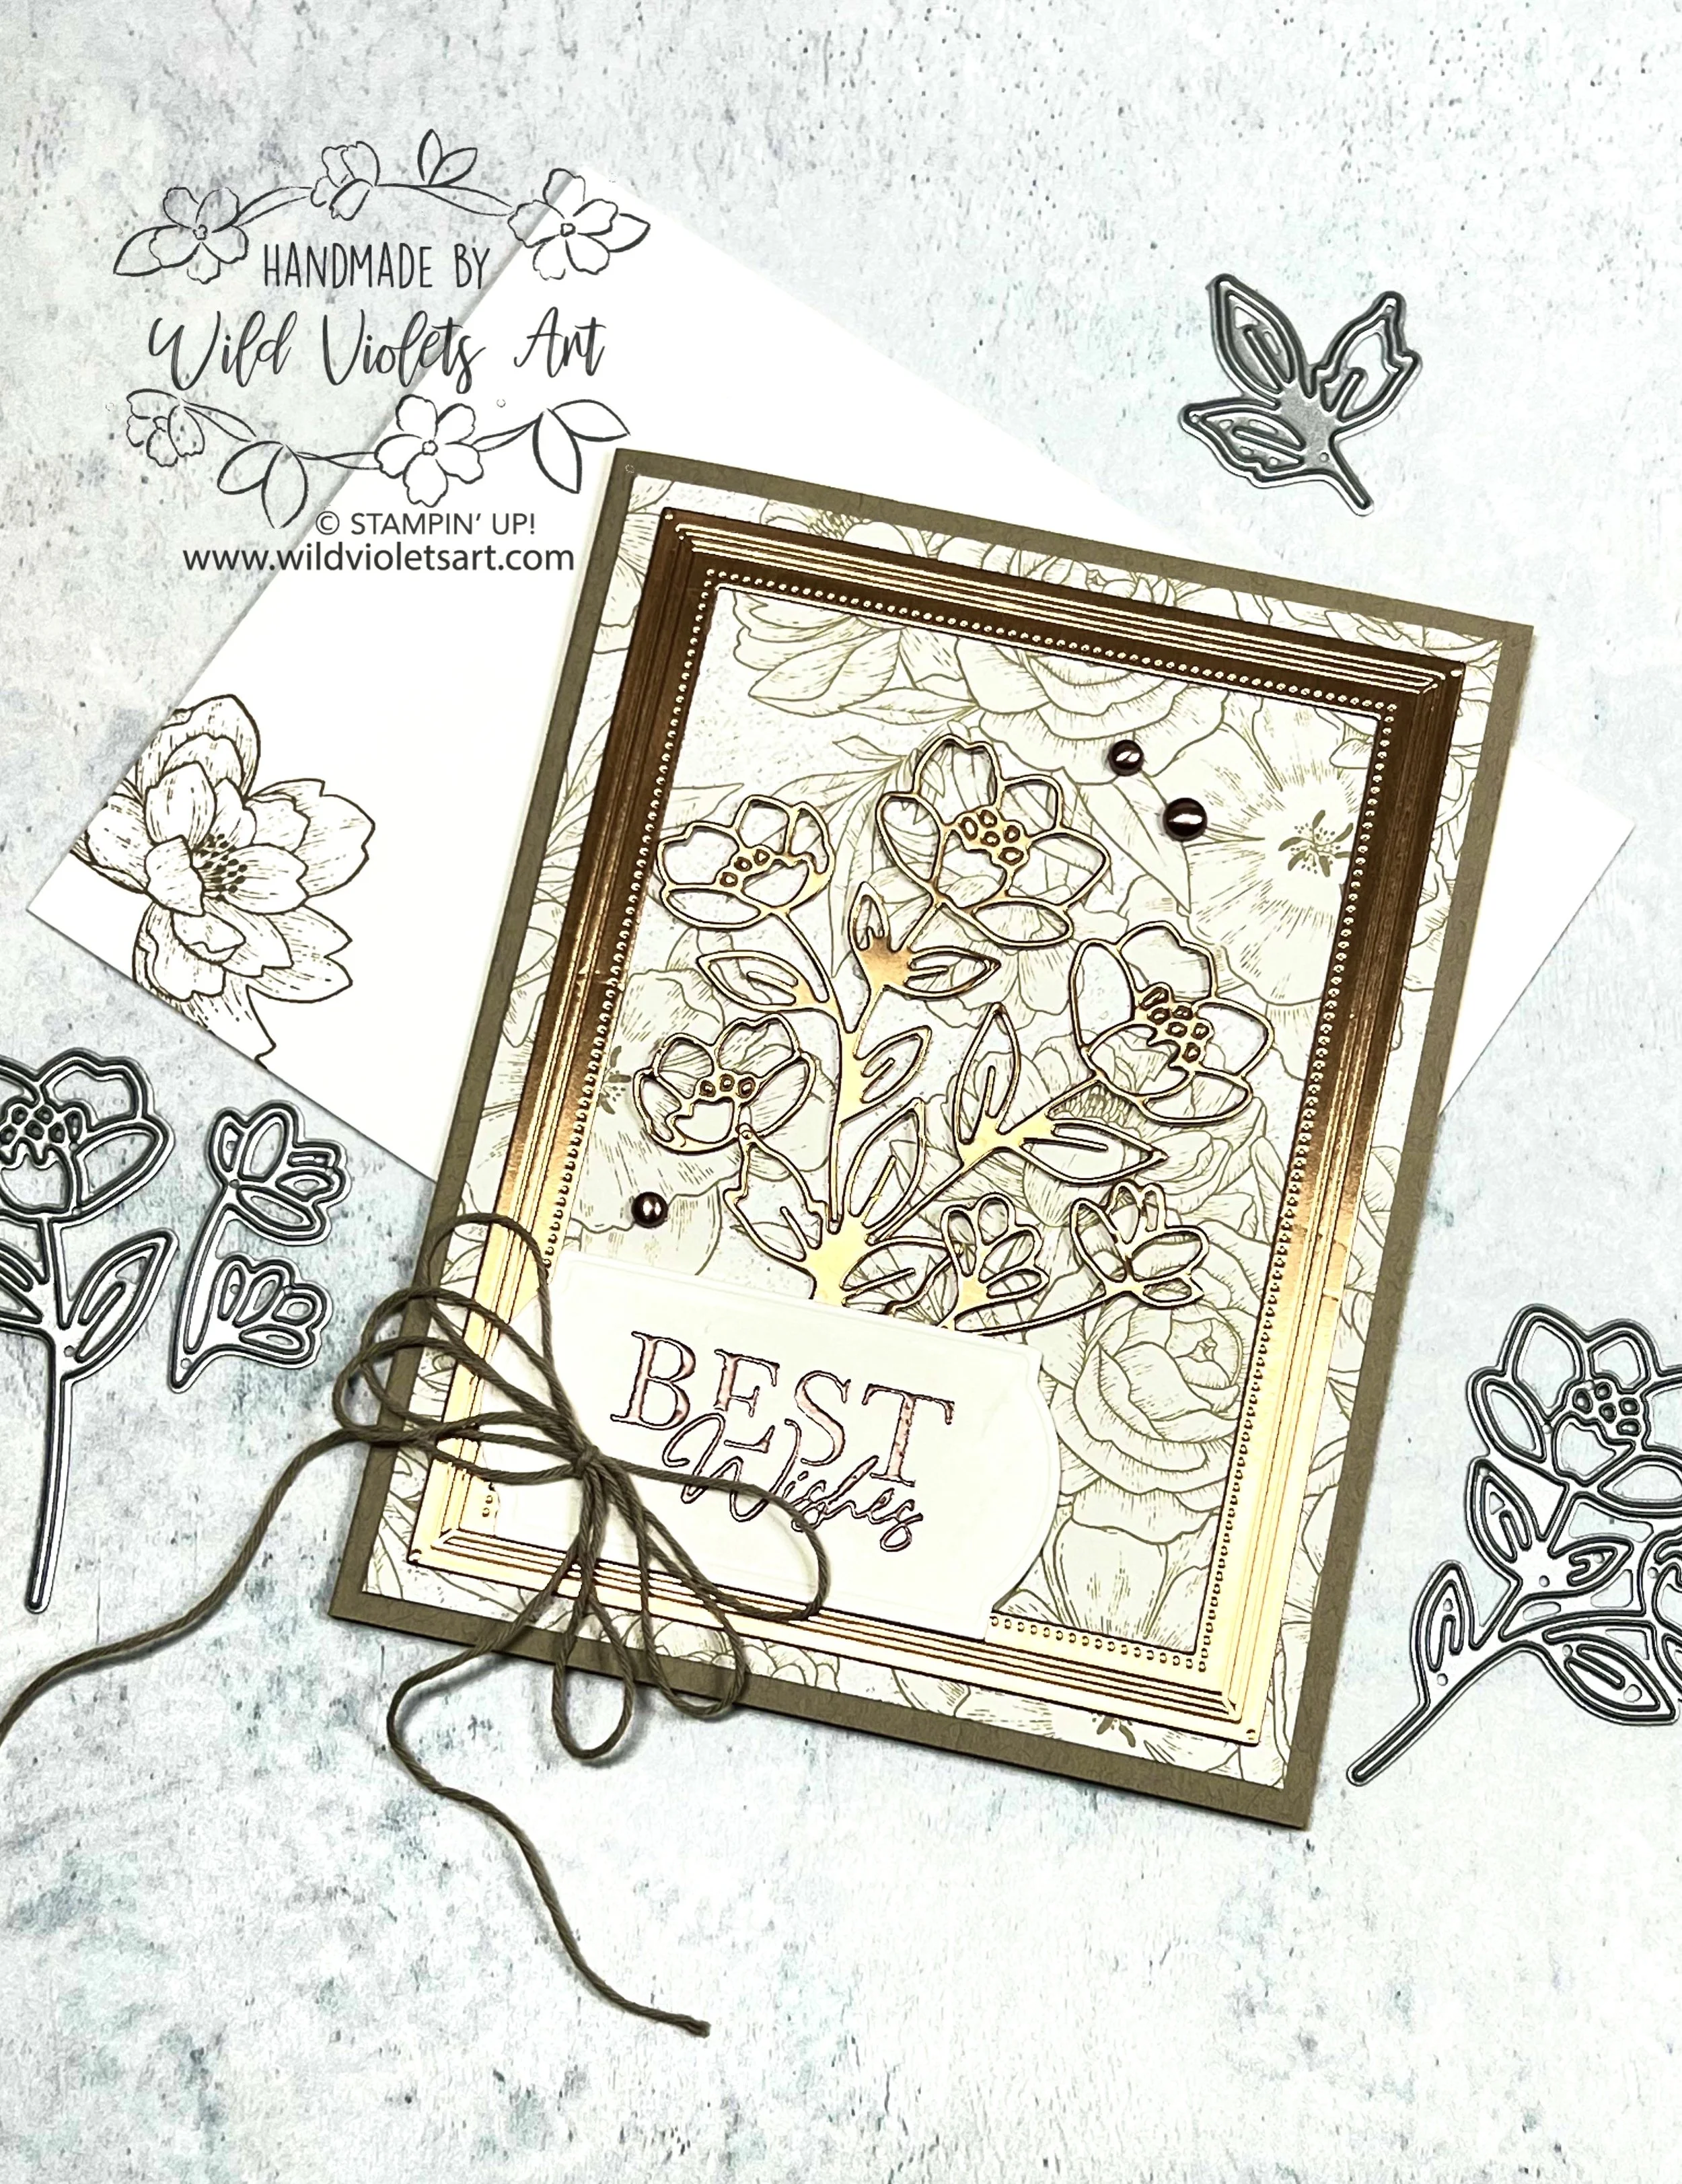
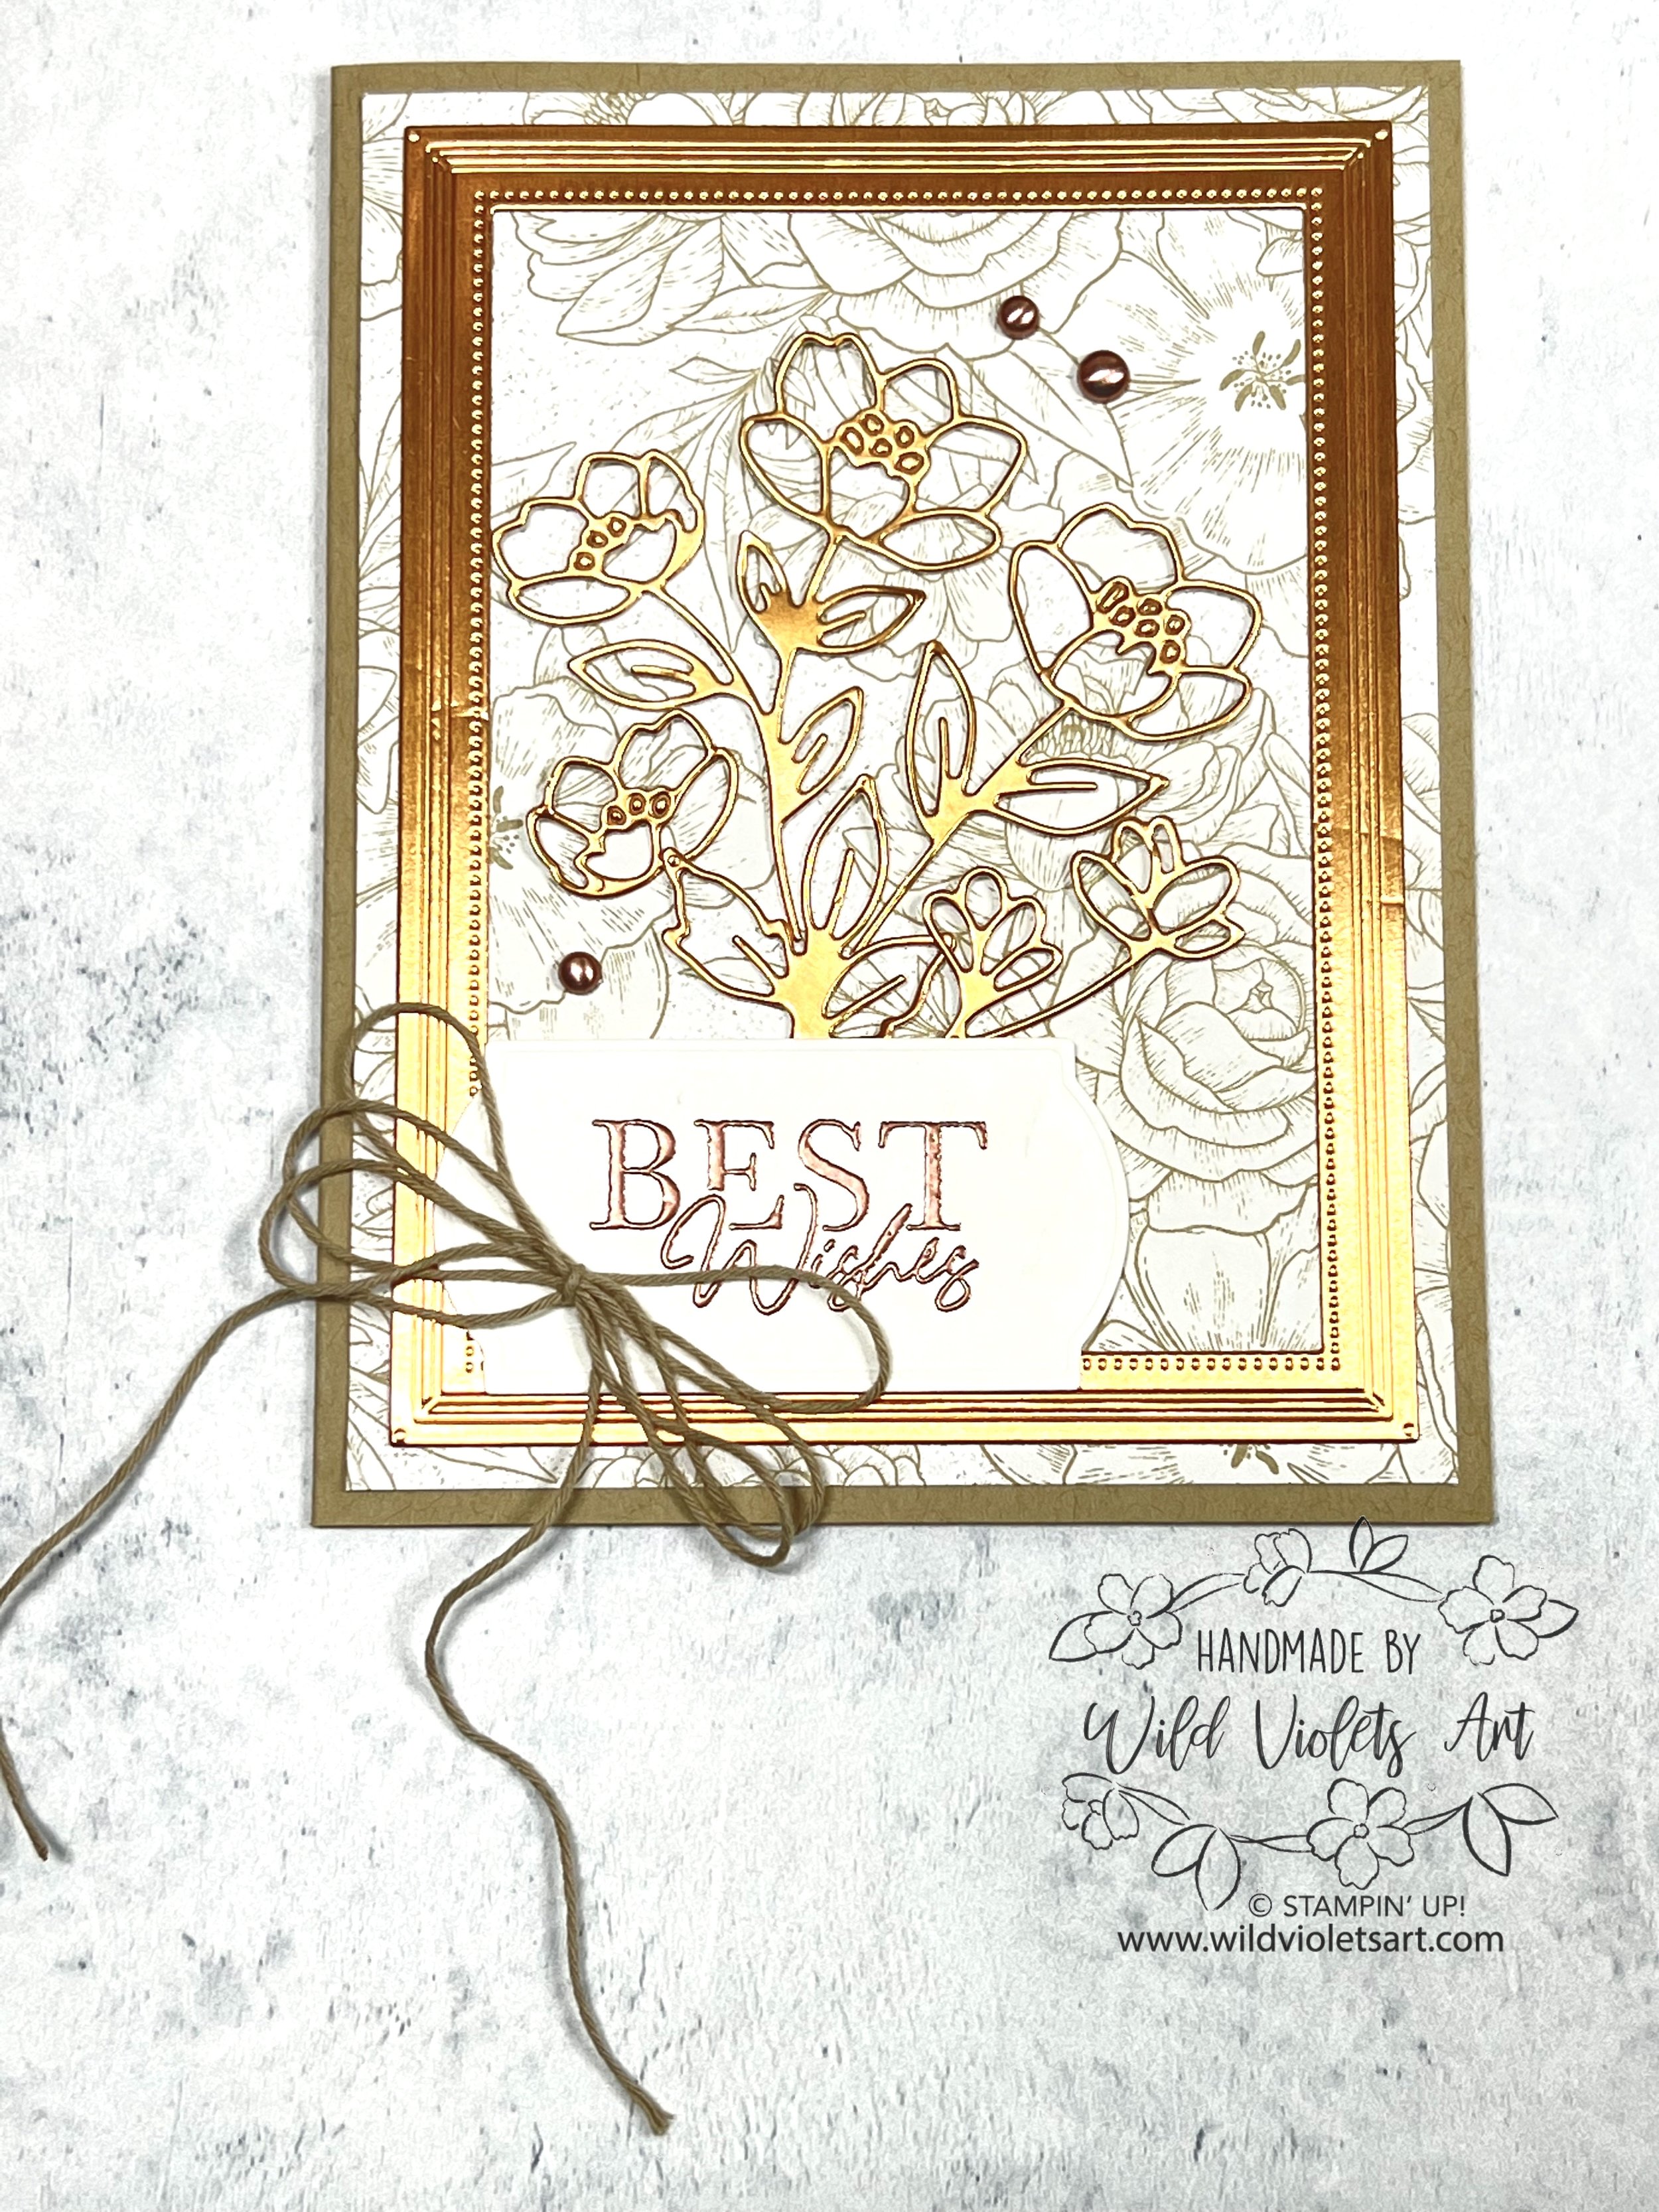
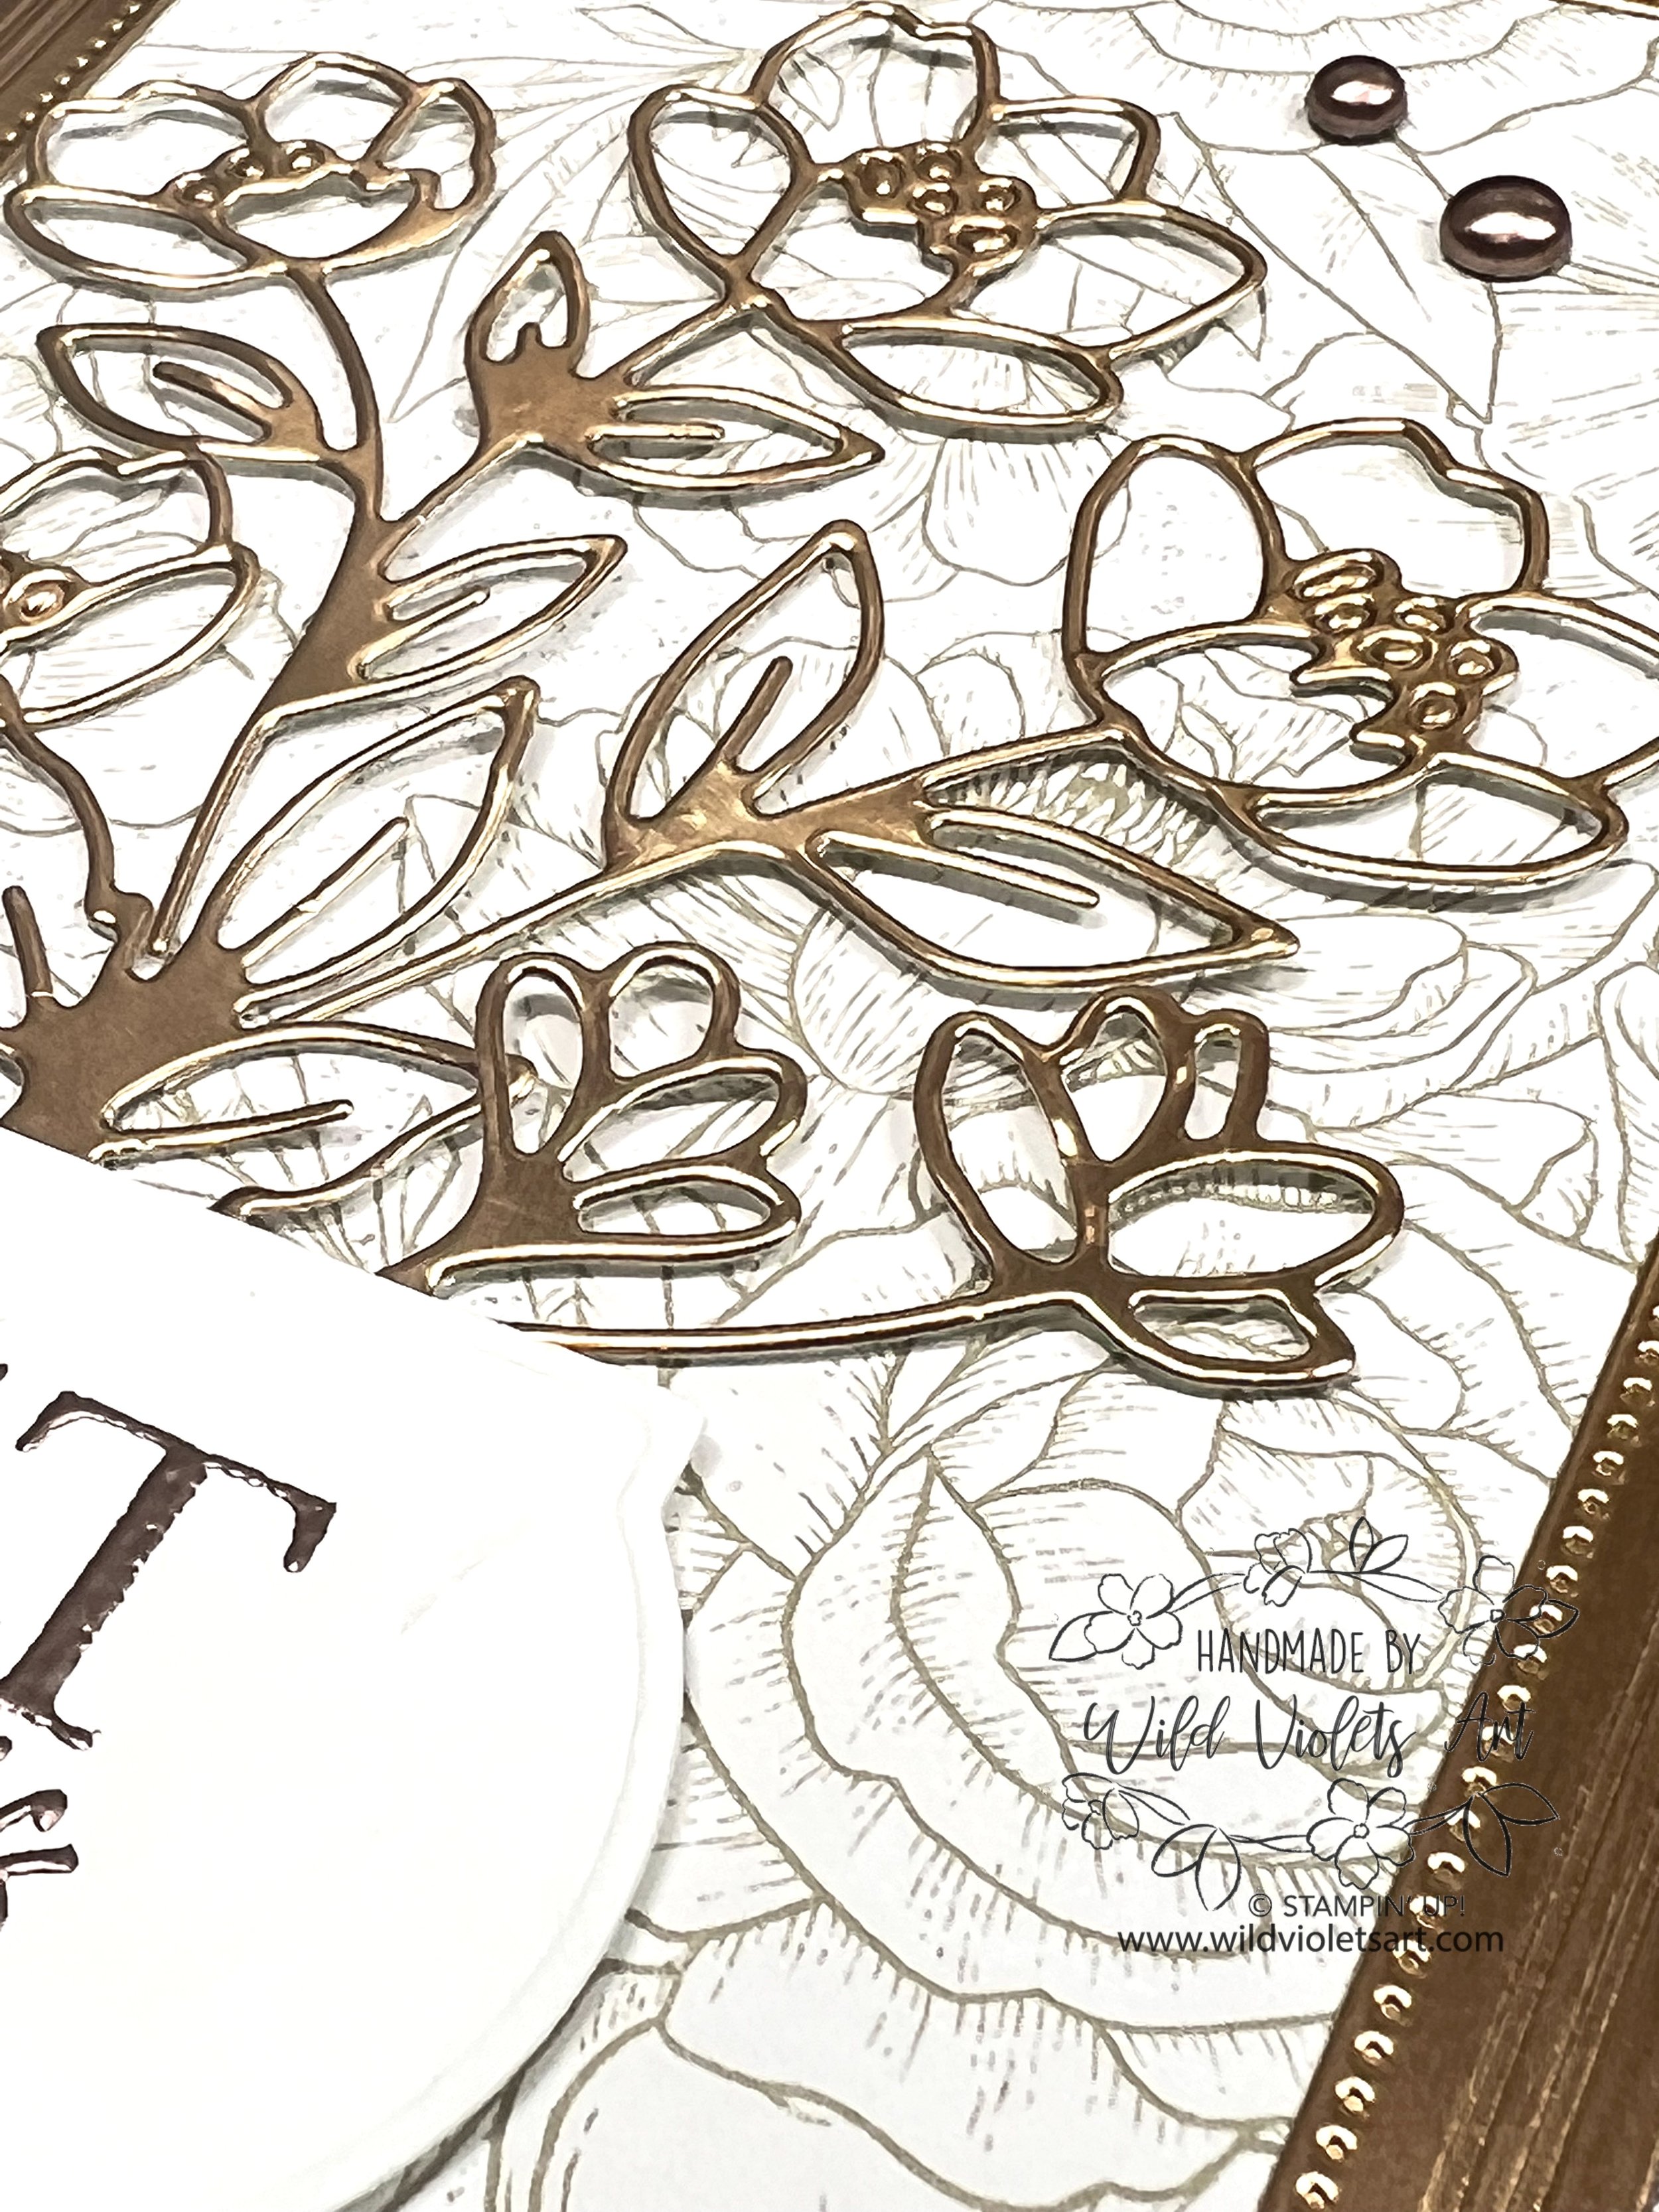
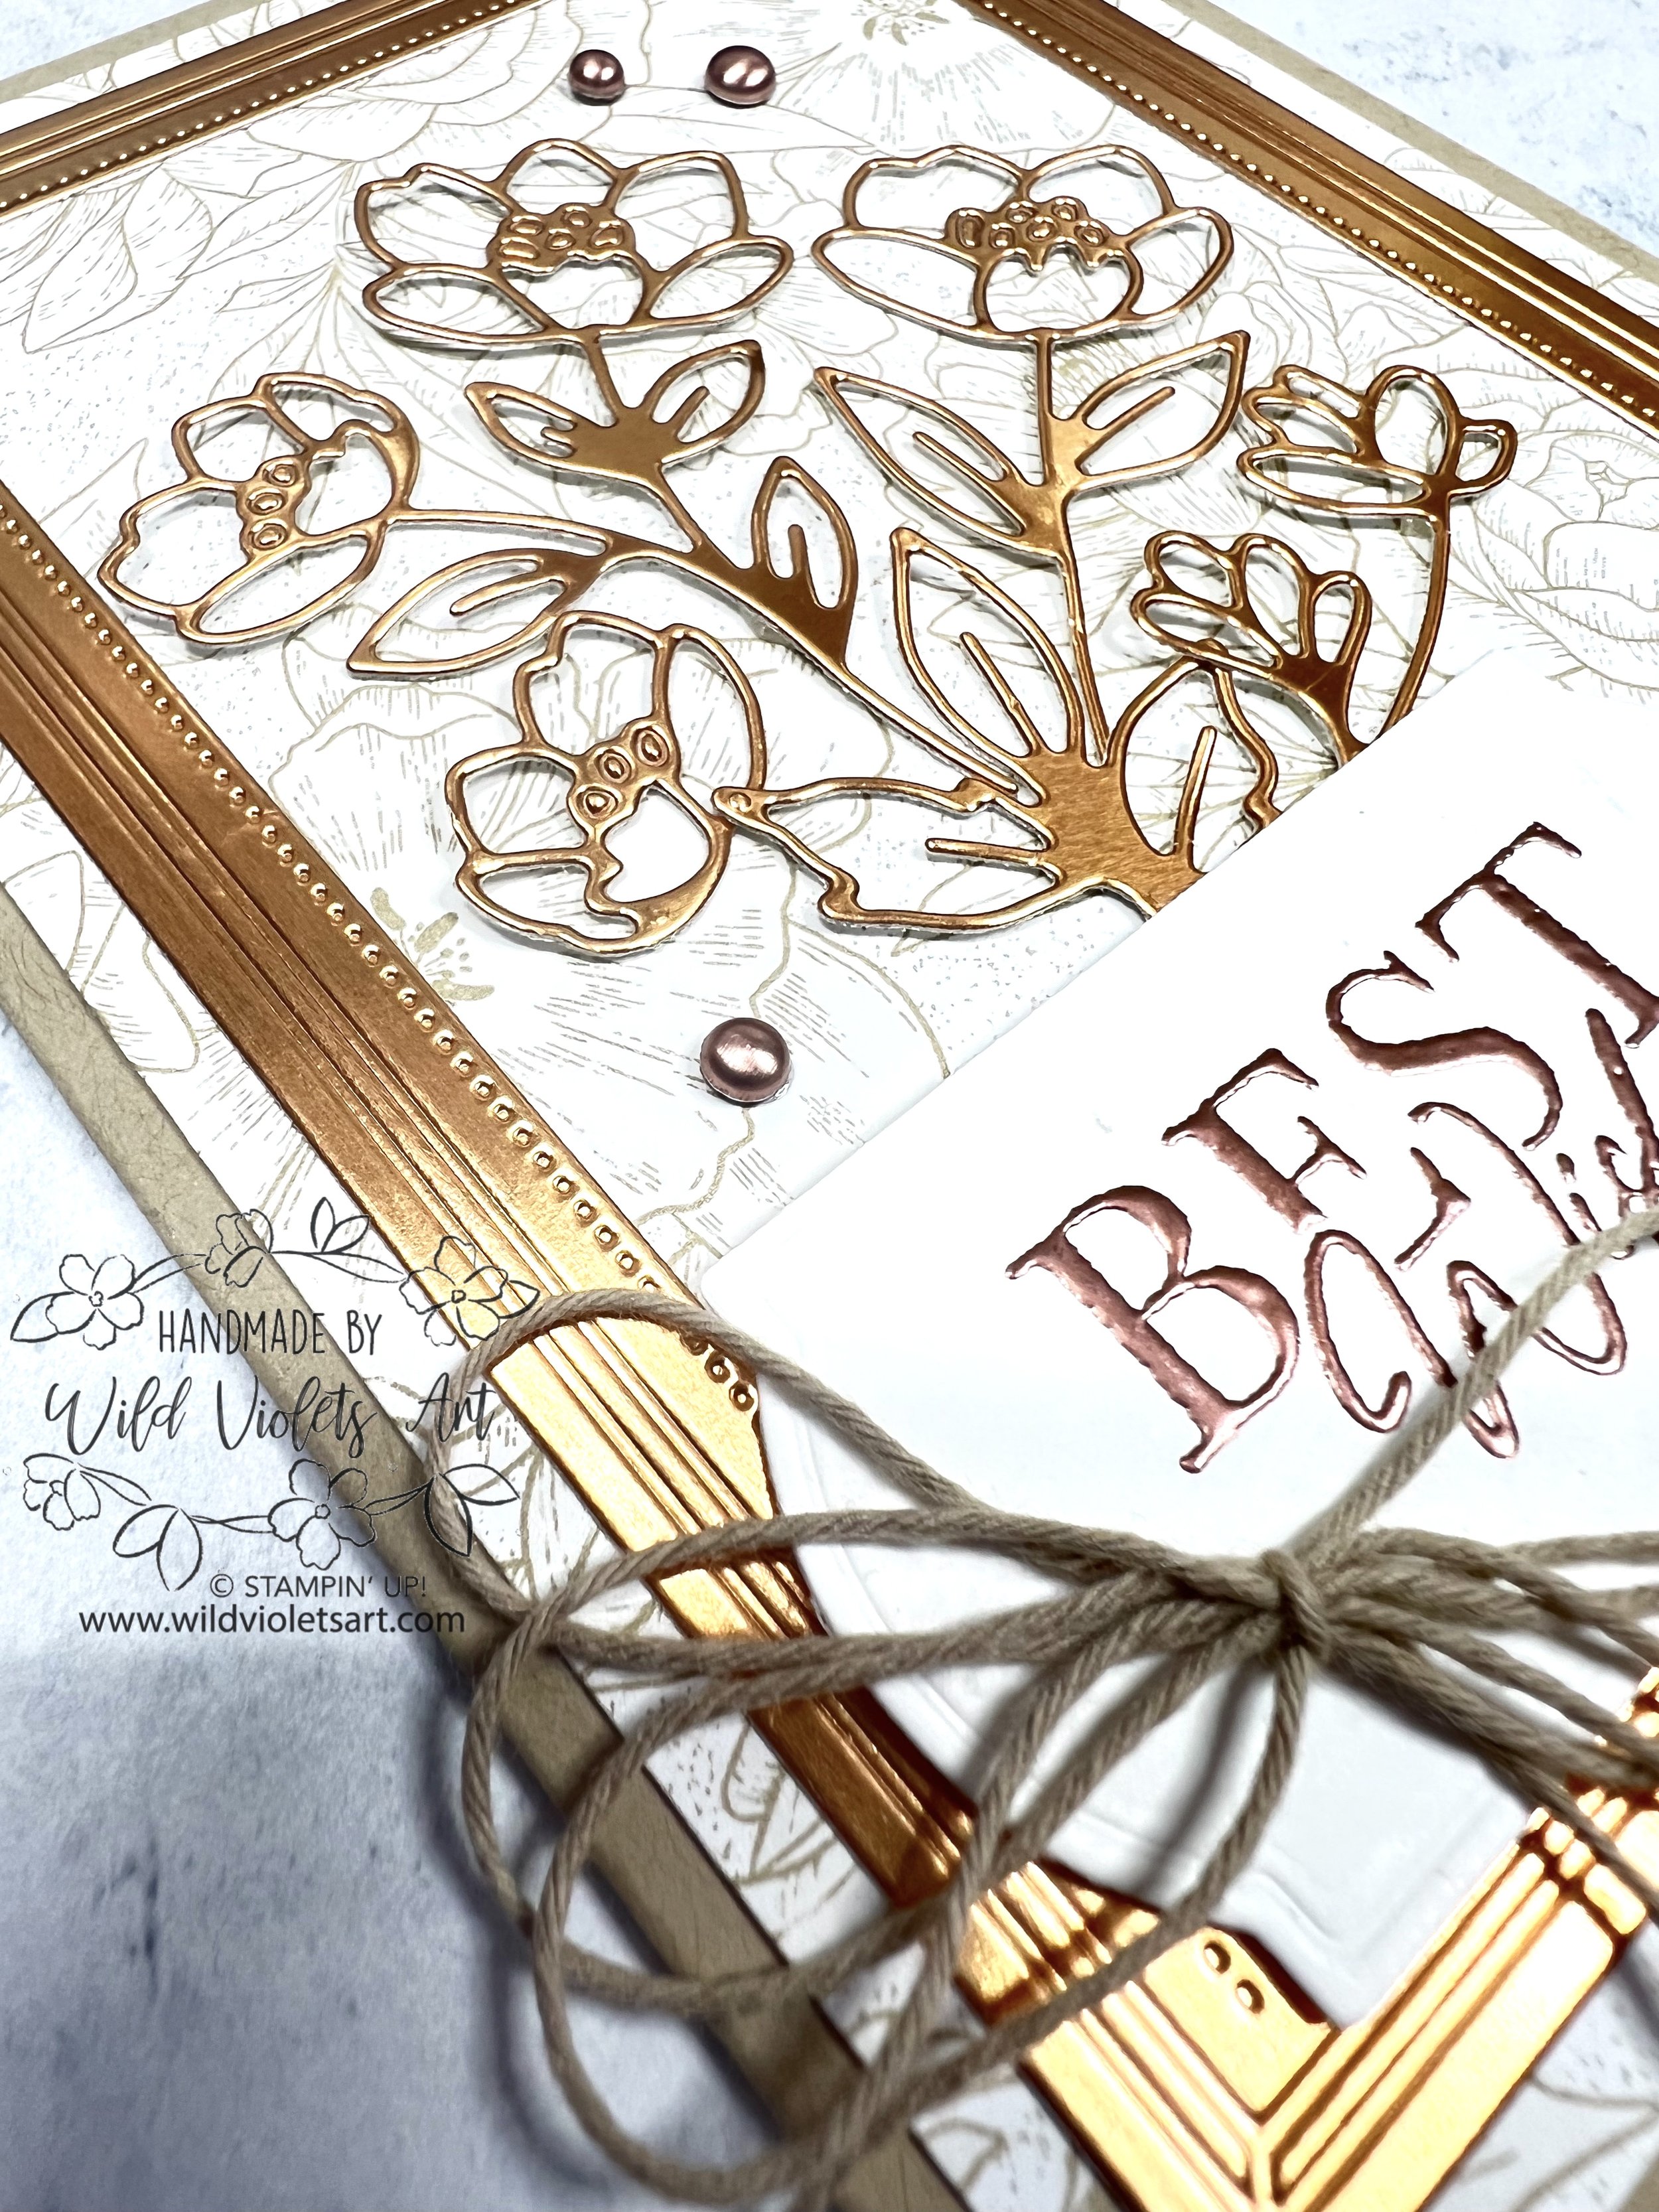
Best Wishes
This lovely, yet simple card is featuring the Foil Sheet in Copper over a subtle neutral rose print from the Abigail Rose 12”x12” Designer Series Paper.
Instructions:
Fold and braise your Crumb Cake CS card base at the score line. Glue DSP to card front. Add to the back of Copper Foil piece a full cover of Adhesive Sheets. Using the Frame die and placing all the flower outline dies from the Cottage Dies in the center, die cut the foil with the Stampin’ Cut & Emboss Machine. Using your Pick a tool, remove the adhesive back from the back of the die cut frame and add to card front and set aside.
Items needed to make this project
Versamark Ink #102283
Stampin’ Emboss Powders Metallics (Copper) #155555
Heat Tool #129053
Fabulous Frames Dies #159163 (die cut piece included in kit)
Painted Labels Dies #151605 (die cut piece included in kit)
Crumb Cake CS #120953 - (8-1/2”x5-1/2”, scored at 4-1/4”) (card base)
Basic White CS #159276 – scrap for sentiment
Medium Envelopes Basic White #159236
Abigail Rose 12”x12” DSP #159037 – 4”x5-1/4” (for card front)
Foil Sheets (Copper) #142020 – 4”x5-1/4” (for frame & flower die cuts)
Adhesive Sheets #152334 – (on back of Foil Sheet)
Brushed Metallic Dots #156506 – 3 each
Baker’s Twine (Crumb Cake) #155475

Using Versamark Ink, stamp your sentiment on the scrap of Basic White CS, then pore copper Stampin’ Emboss Powder over sentiment. Shake and flick off excess and use heat tool to set powder. Die cut out sentiment using the Painted Label Die, then pop it up in lower left corner using Stampin’ Dimensionals.
To set your flowers pieces, remove adhesive back from flowers and place on card as desired. Add the Brushed Metallic Dots, then add bow in the baker’s twine. Stamp the smaller rose on your envelope front or on the flap in Crumb Cake ink.

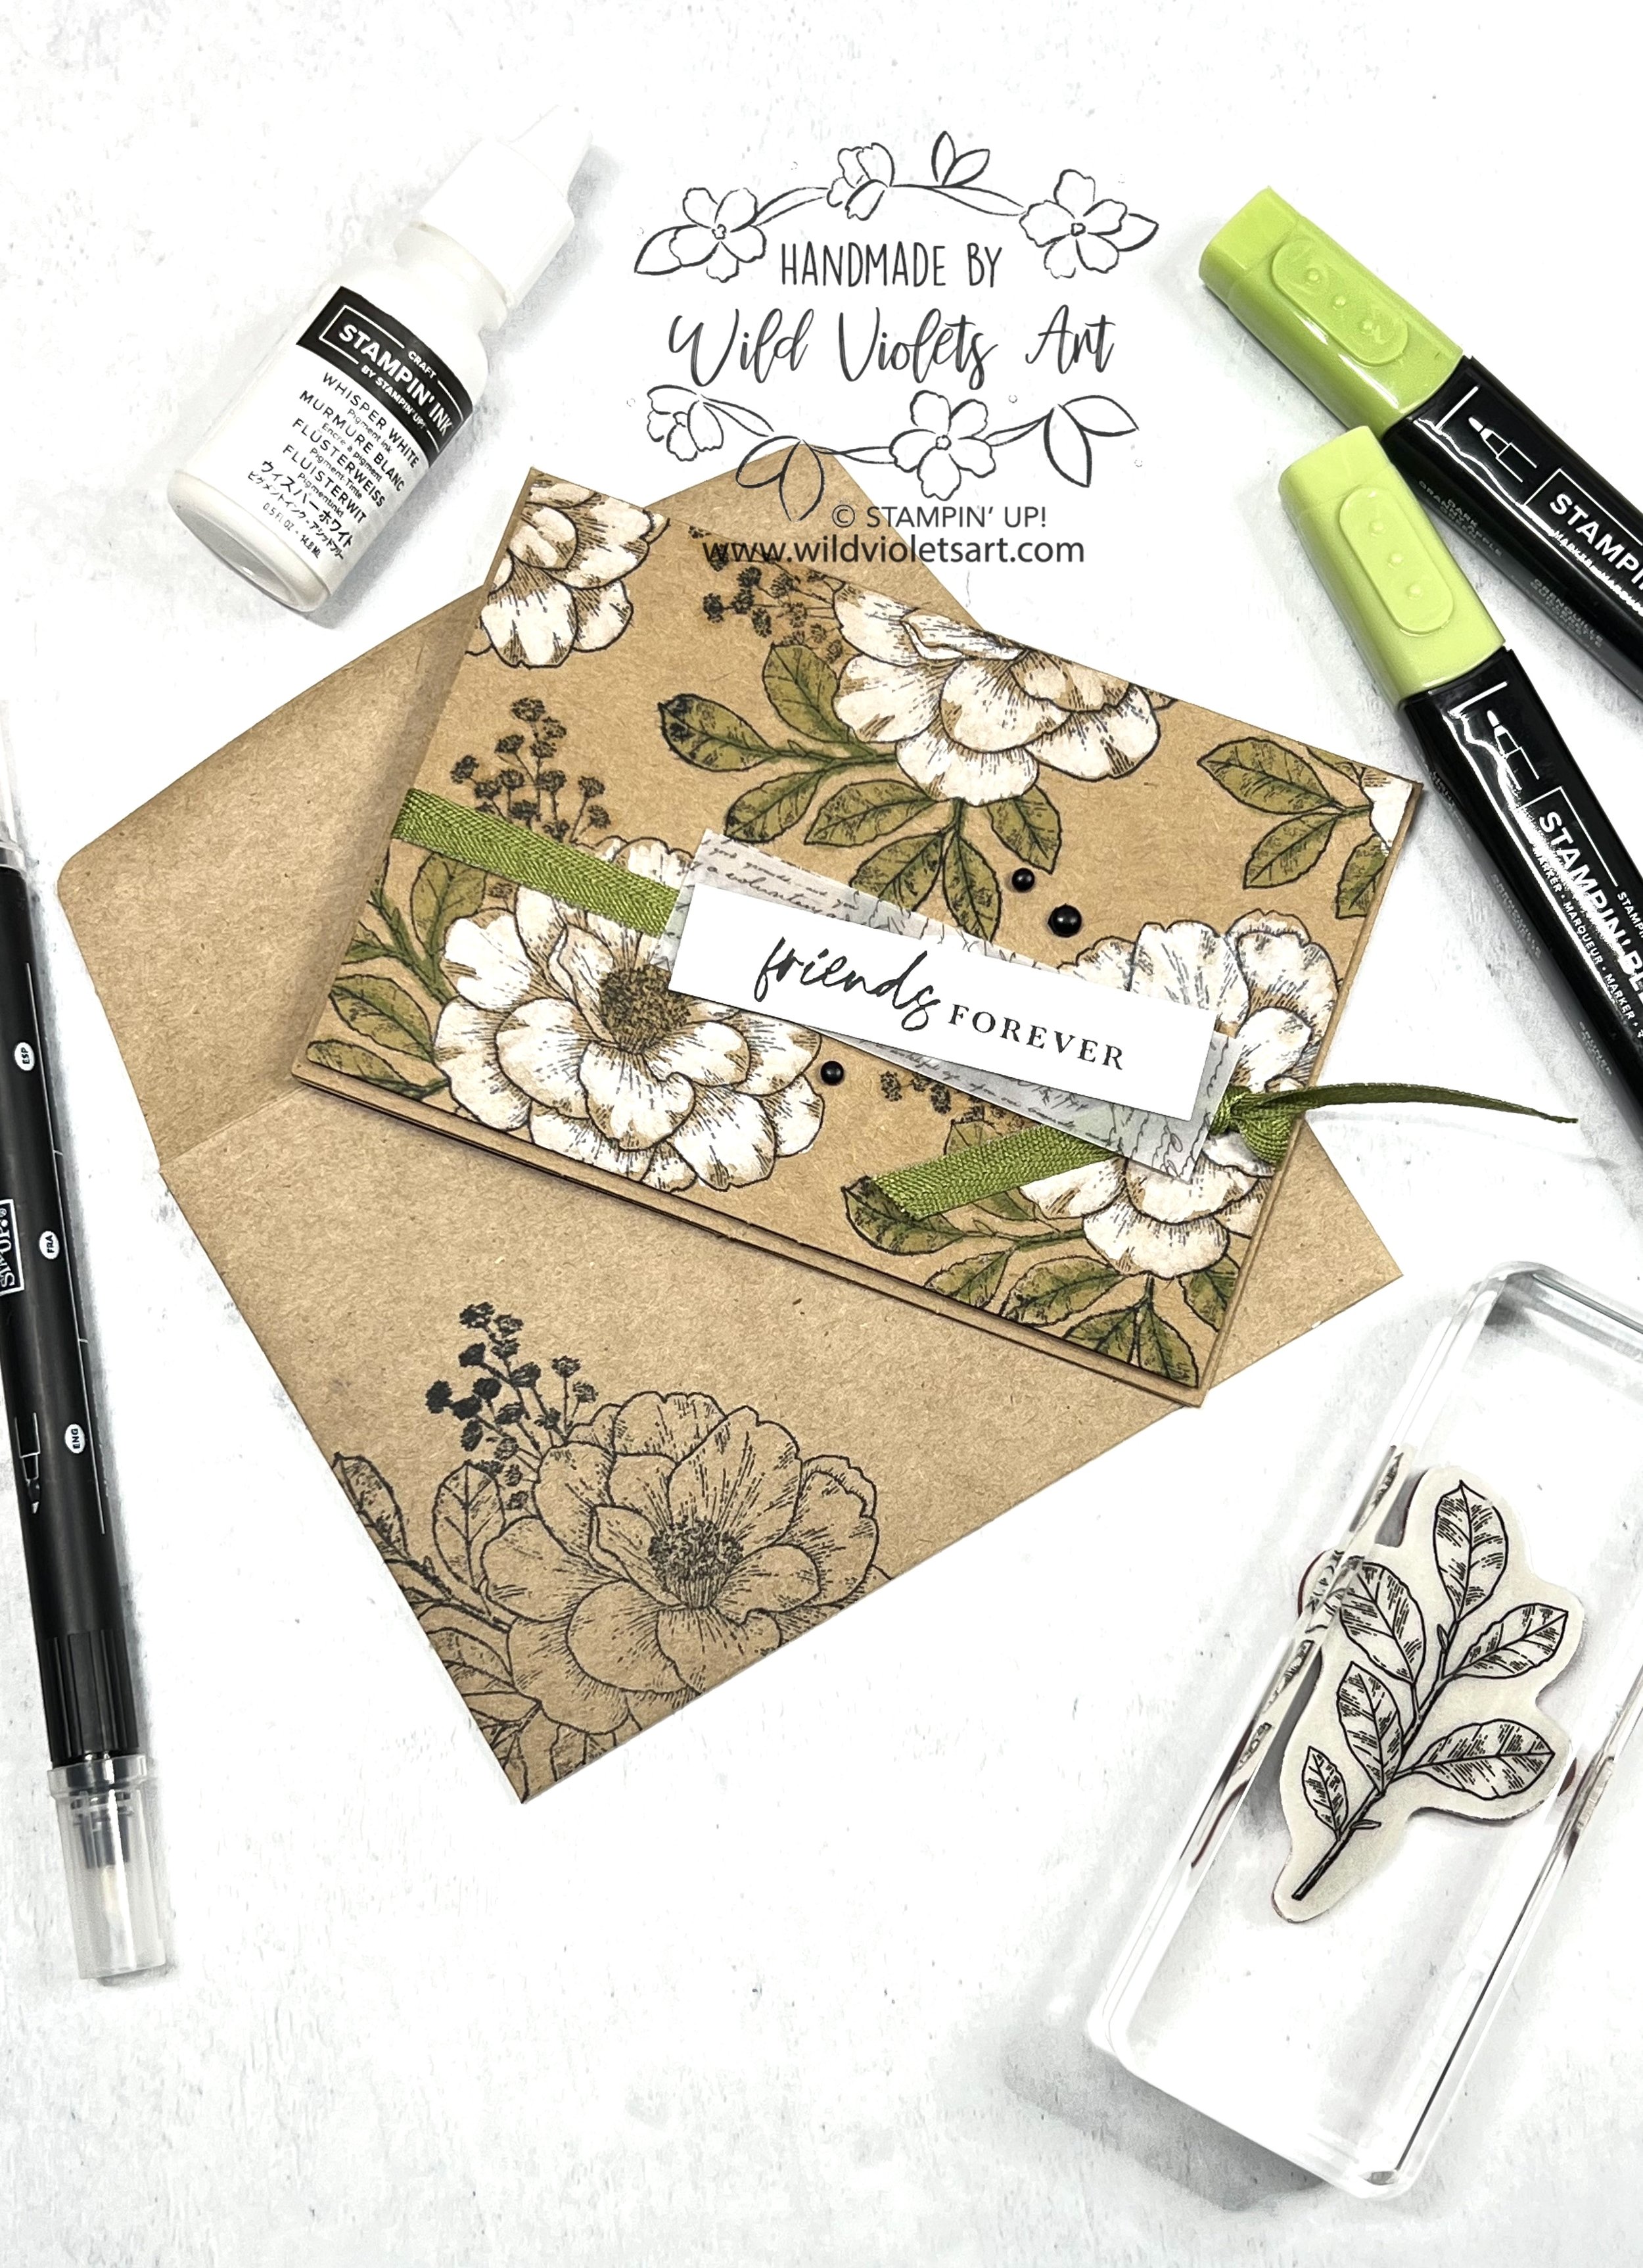
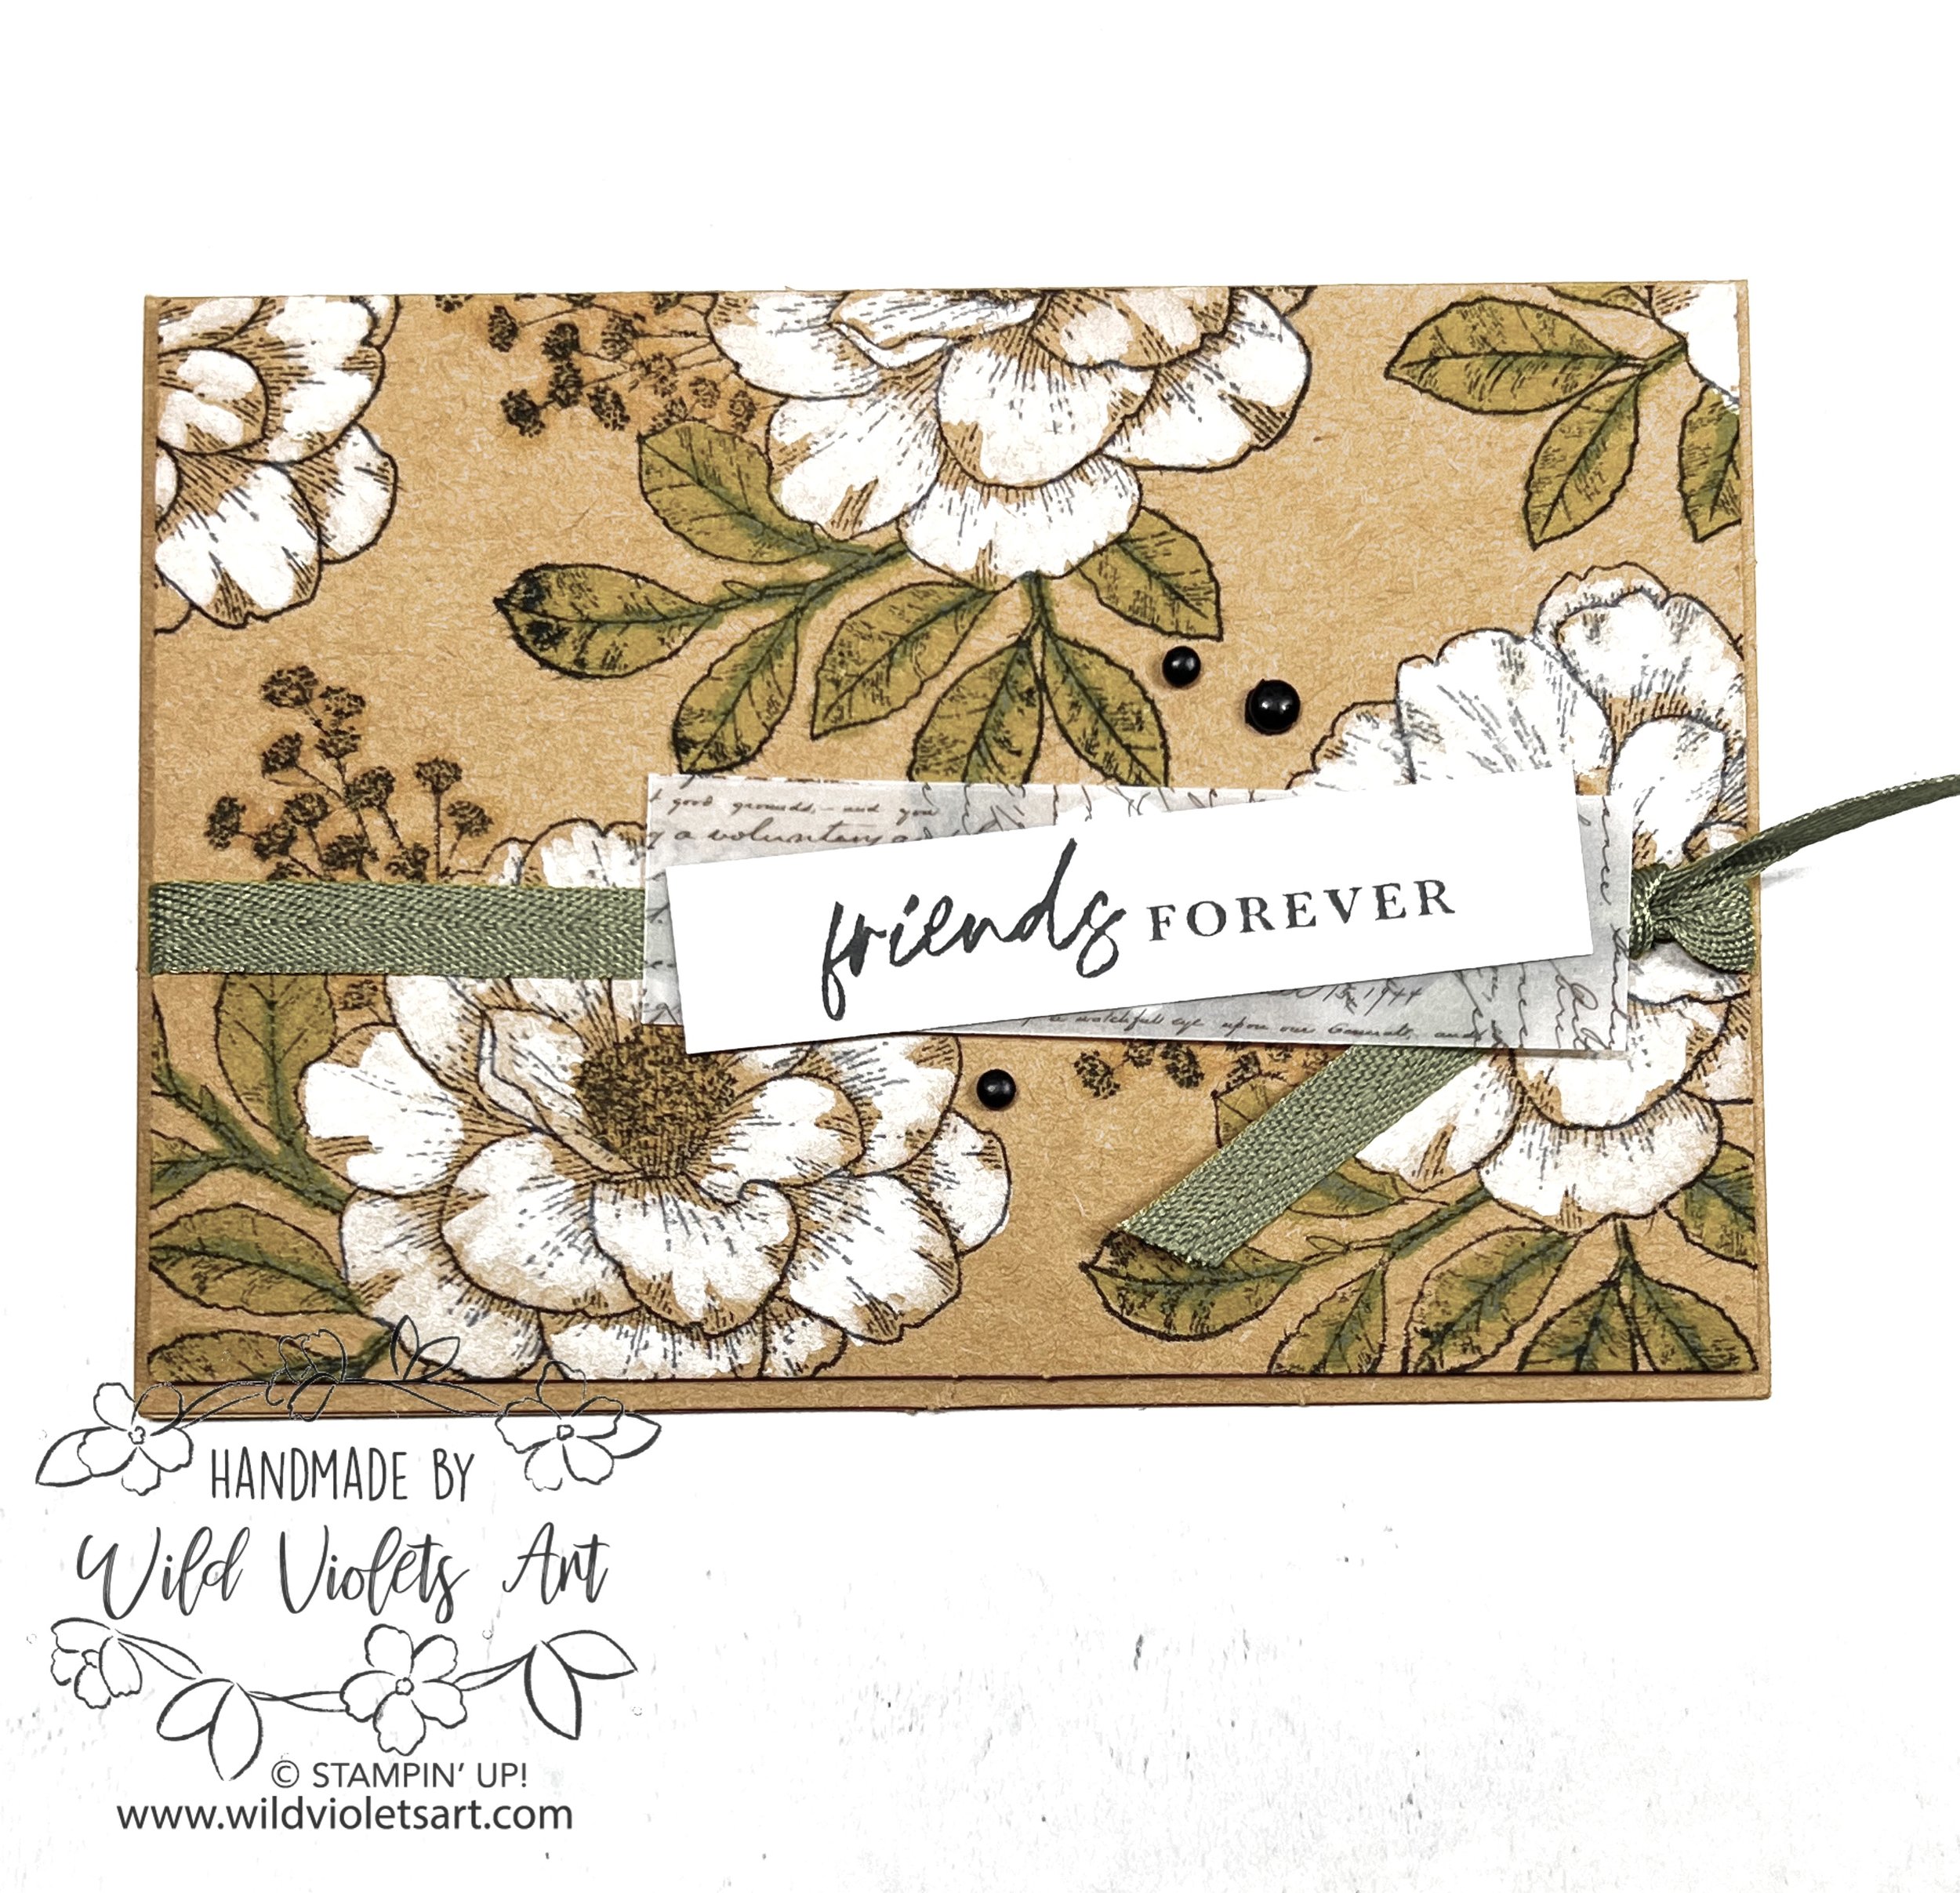
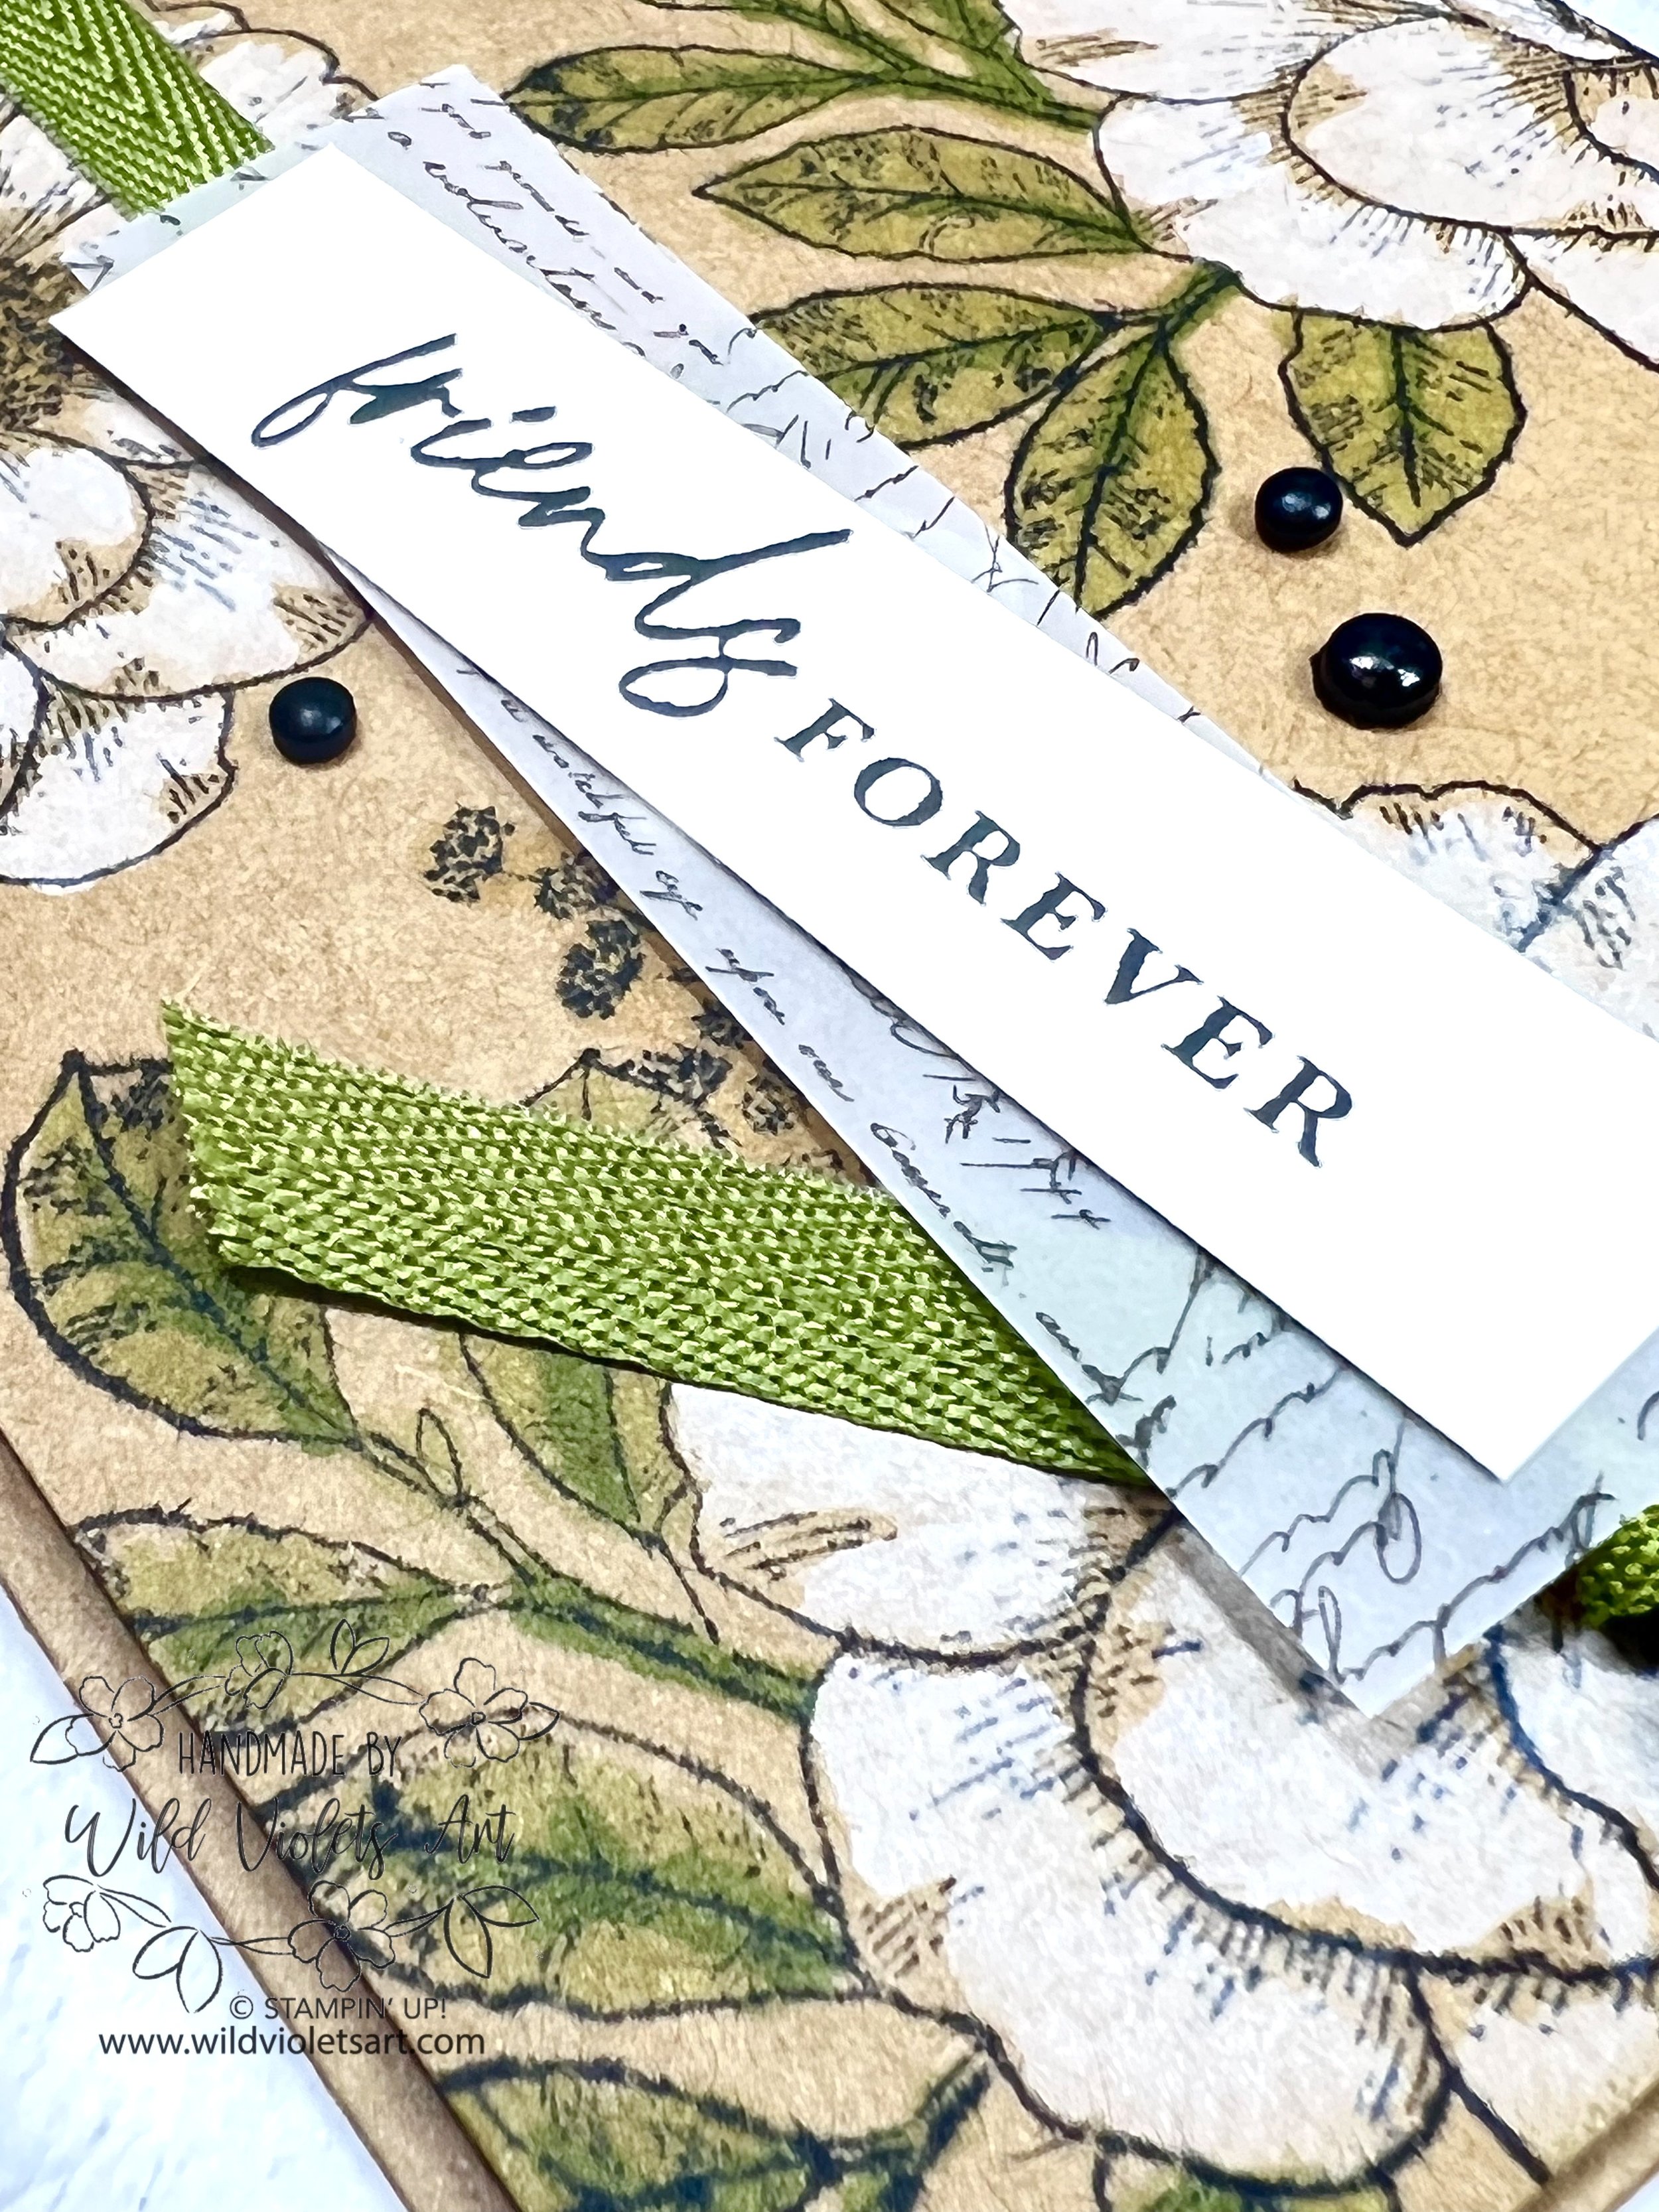
Friends Forever
This pretty card was CASE’d with a twist from page 56 from the 2022-23 Annual Catalog with a few changes. I have used this technique before with the Calming Camilia post from December 2021. It makes for a lovely pop of white on dark cardstock with any image you want.
Instructions:
I am using the new Kraft Note Cards & Envelopes for the first time and am really happy with the look of the card. Fold and braise your card base at score line then set aside. Using the Memento Tuxedo Black ink, stamp the large rose on the smaller Kraft CS card front in different directions.
Items needed to make this project
Craft Stampin’ White Ink refill #101780
Memento Tuxedo Black ink #132708
Granny Apple Green Stampin’ Blends #154885
Pumpkin Pie Stampin’ Blend (dark) #154897
Blender Pen #102845 or Water Painter #151298
Kraft Note Cards & Envelopes #159247
Kraft 6”x6” Paper #156325 – 3-3/8”x4-7/8” (for card front)
Basic White CS #159276 – ½”x 2-3/4” scrap for sentiment
Vellum 12”x12” Layering Designs #157764 – ¾”x3” scrap for layer under sentiment
Old Olive Twill Ribbon Combo Pack #158955 – 10”
Matt Black Dots #154284 – 3 each
Make it stand out
Place a few drops of the Craft ink on a block or paper plate, then using your blender pen (or Water Painter), add white ink to the flower petals and blend as desired. Use the Granny Apple Green Stampin’ Blends to ink the leaves and Pumpkin Pie Blend (light) to little blossom ends. Wrap Old Olive Twill Ribbon around card front and tie a knot on right side then pop up layer on card base with Stampin’ Dimensionals. Stamp sentiment on Basic White scrap, glue it to the Vellum scrap, then pop up with Stampin’ Dimensionals over the ribbon. Add Matt Black Dots as desired.

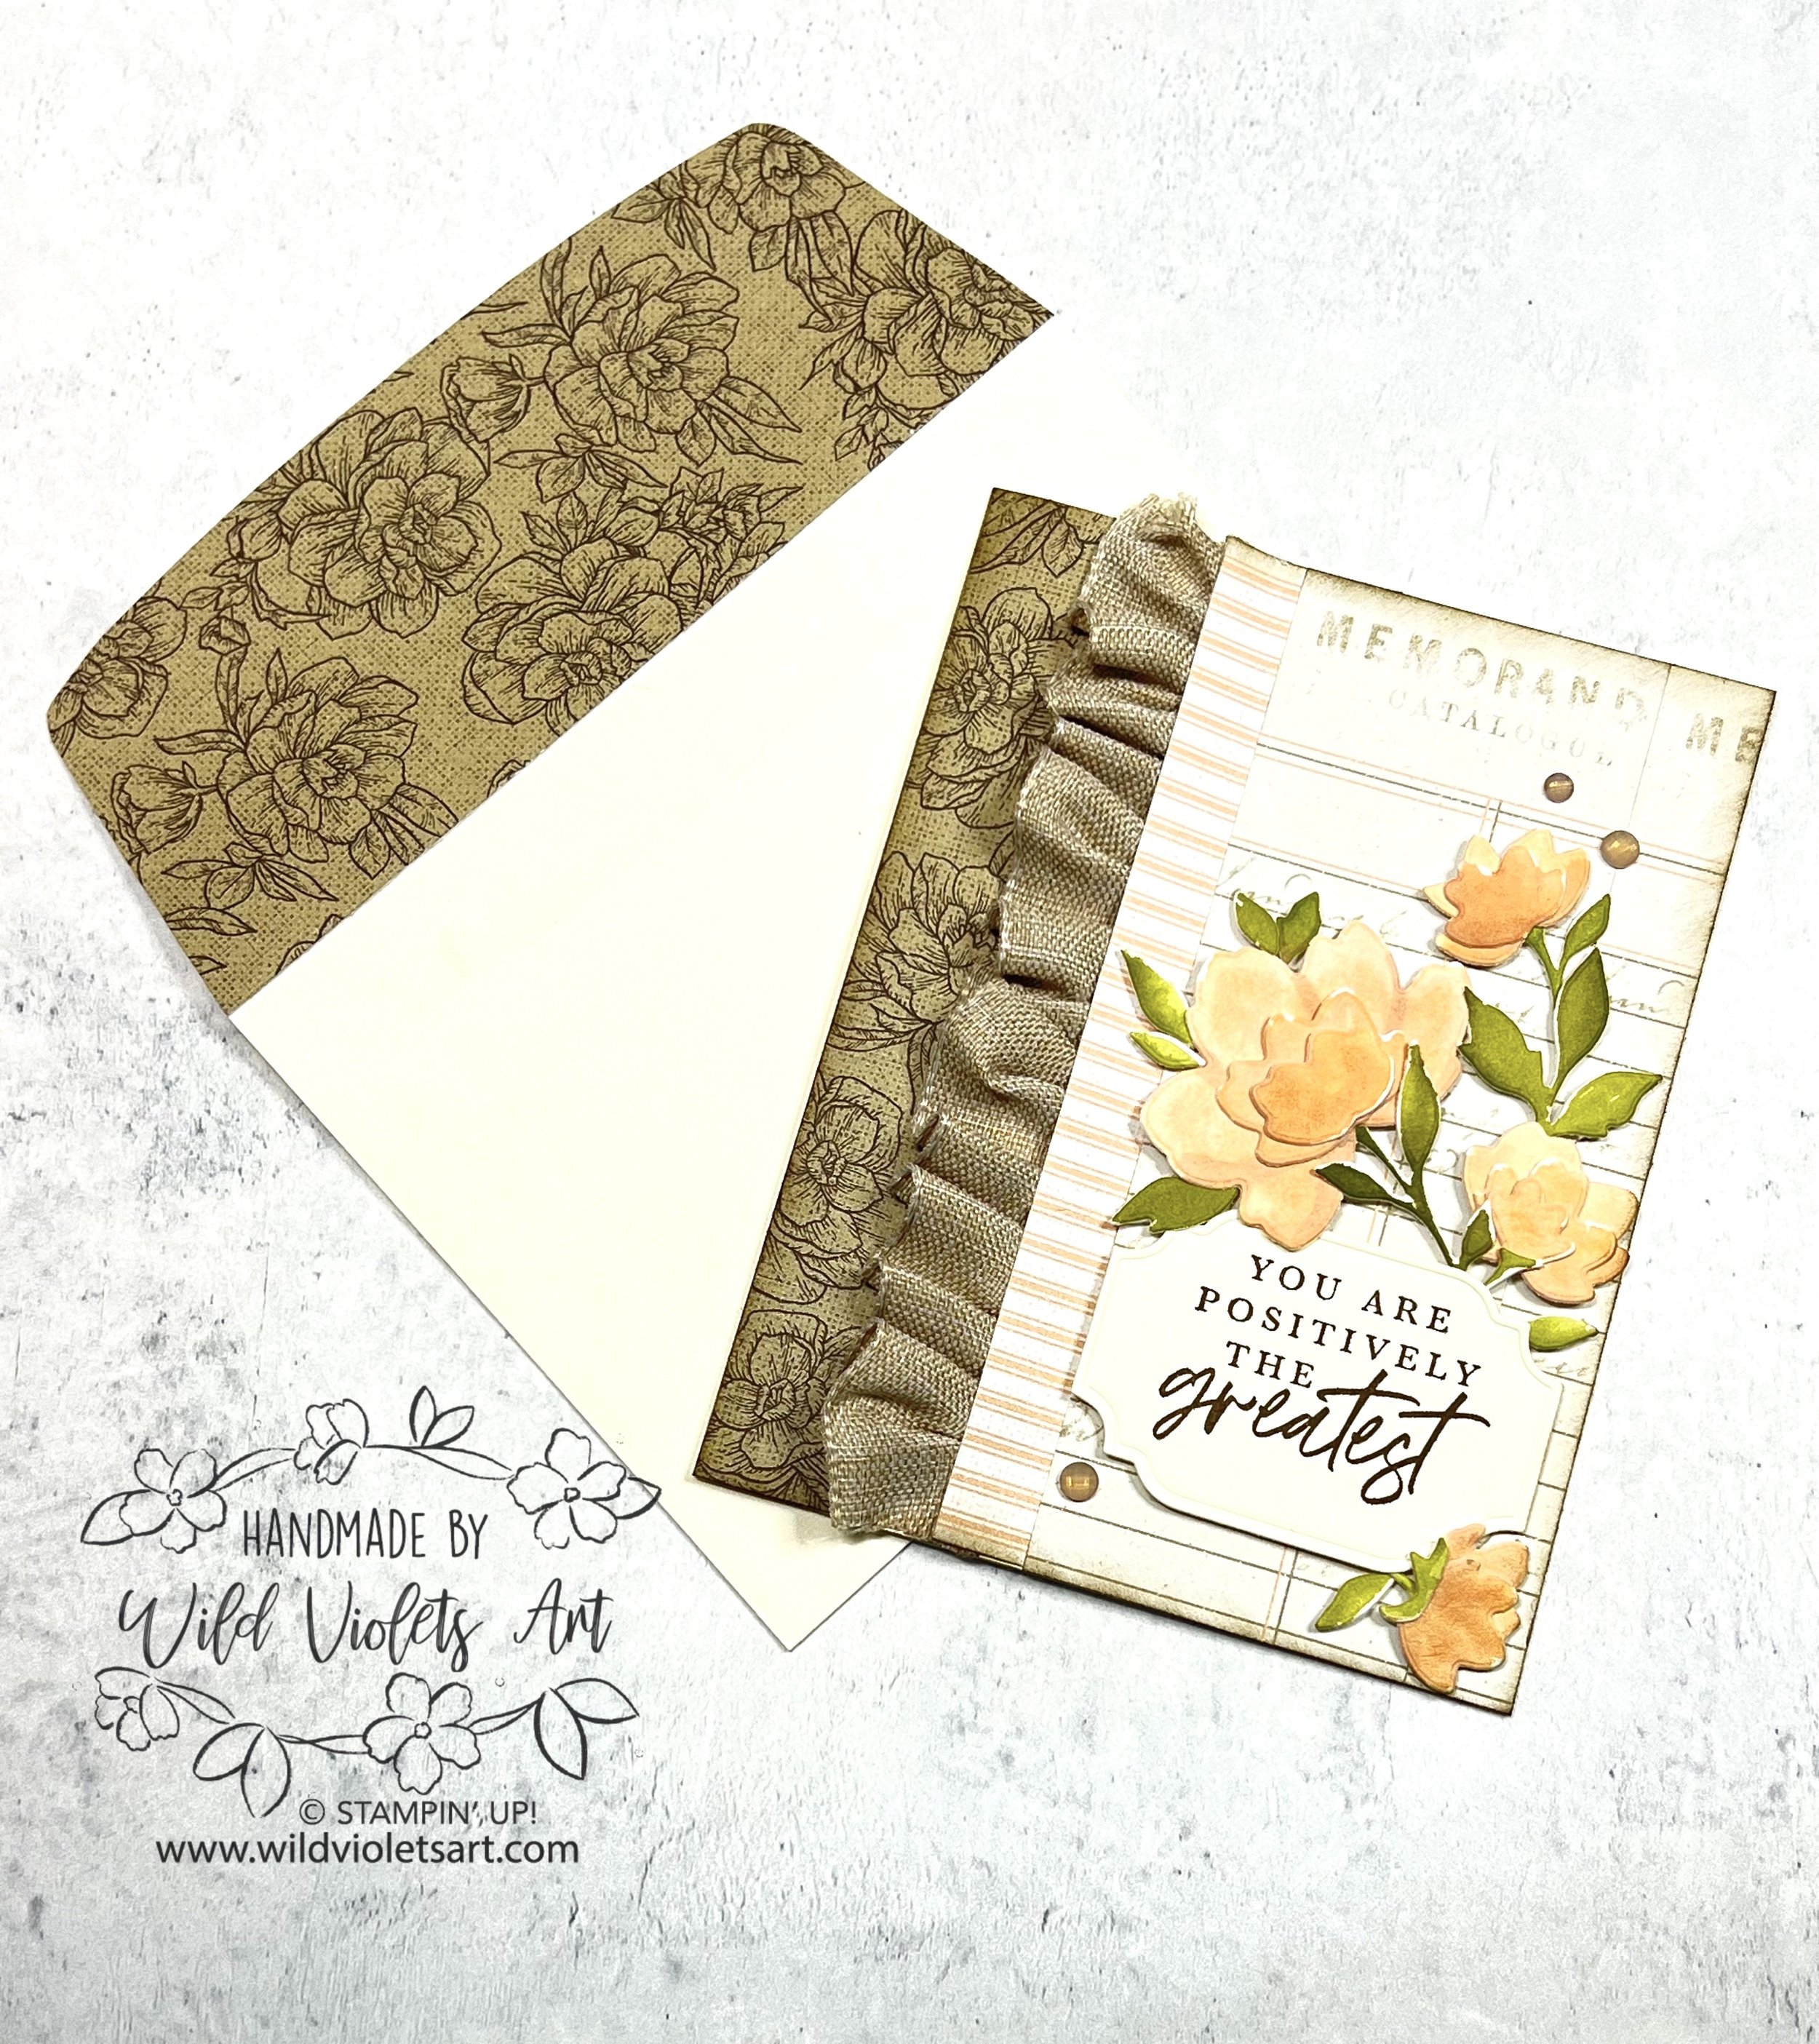
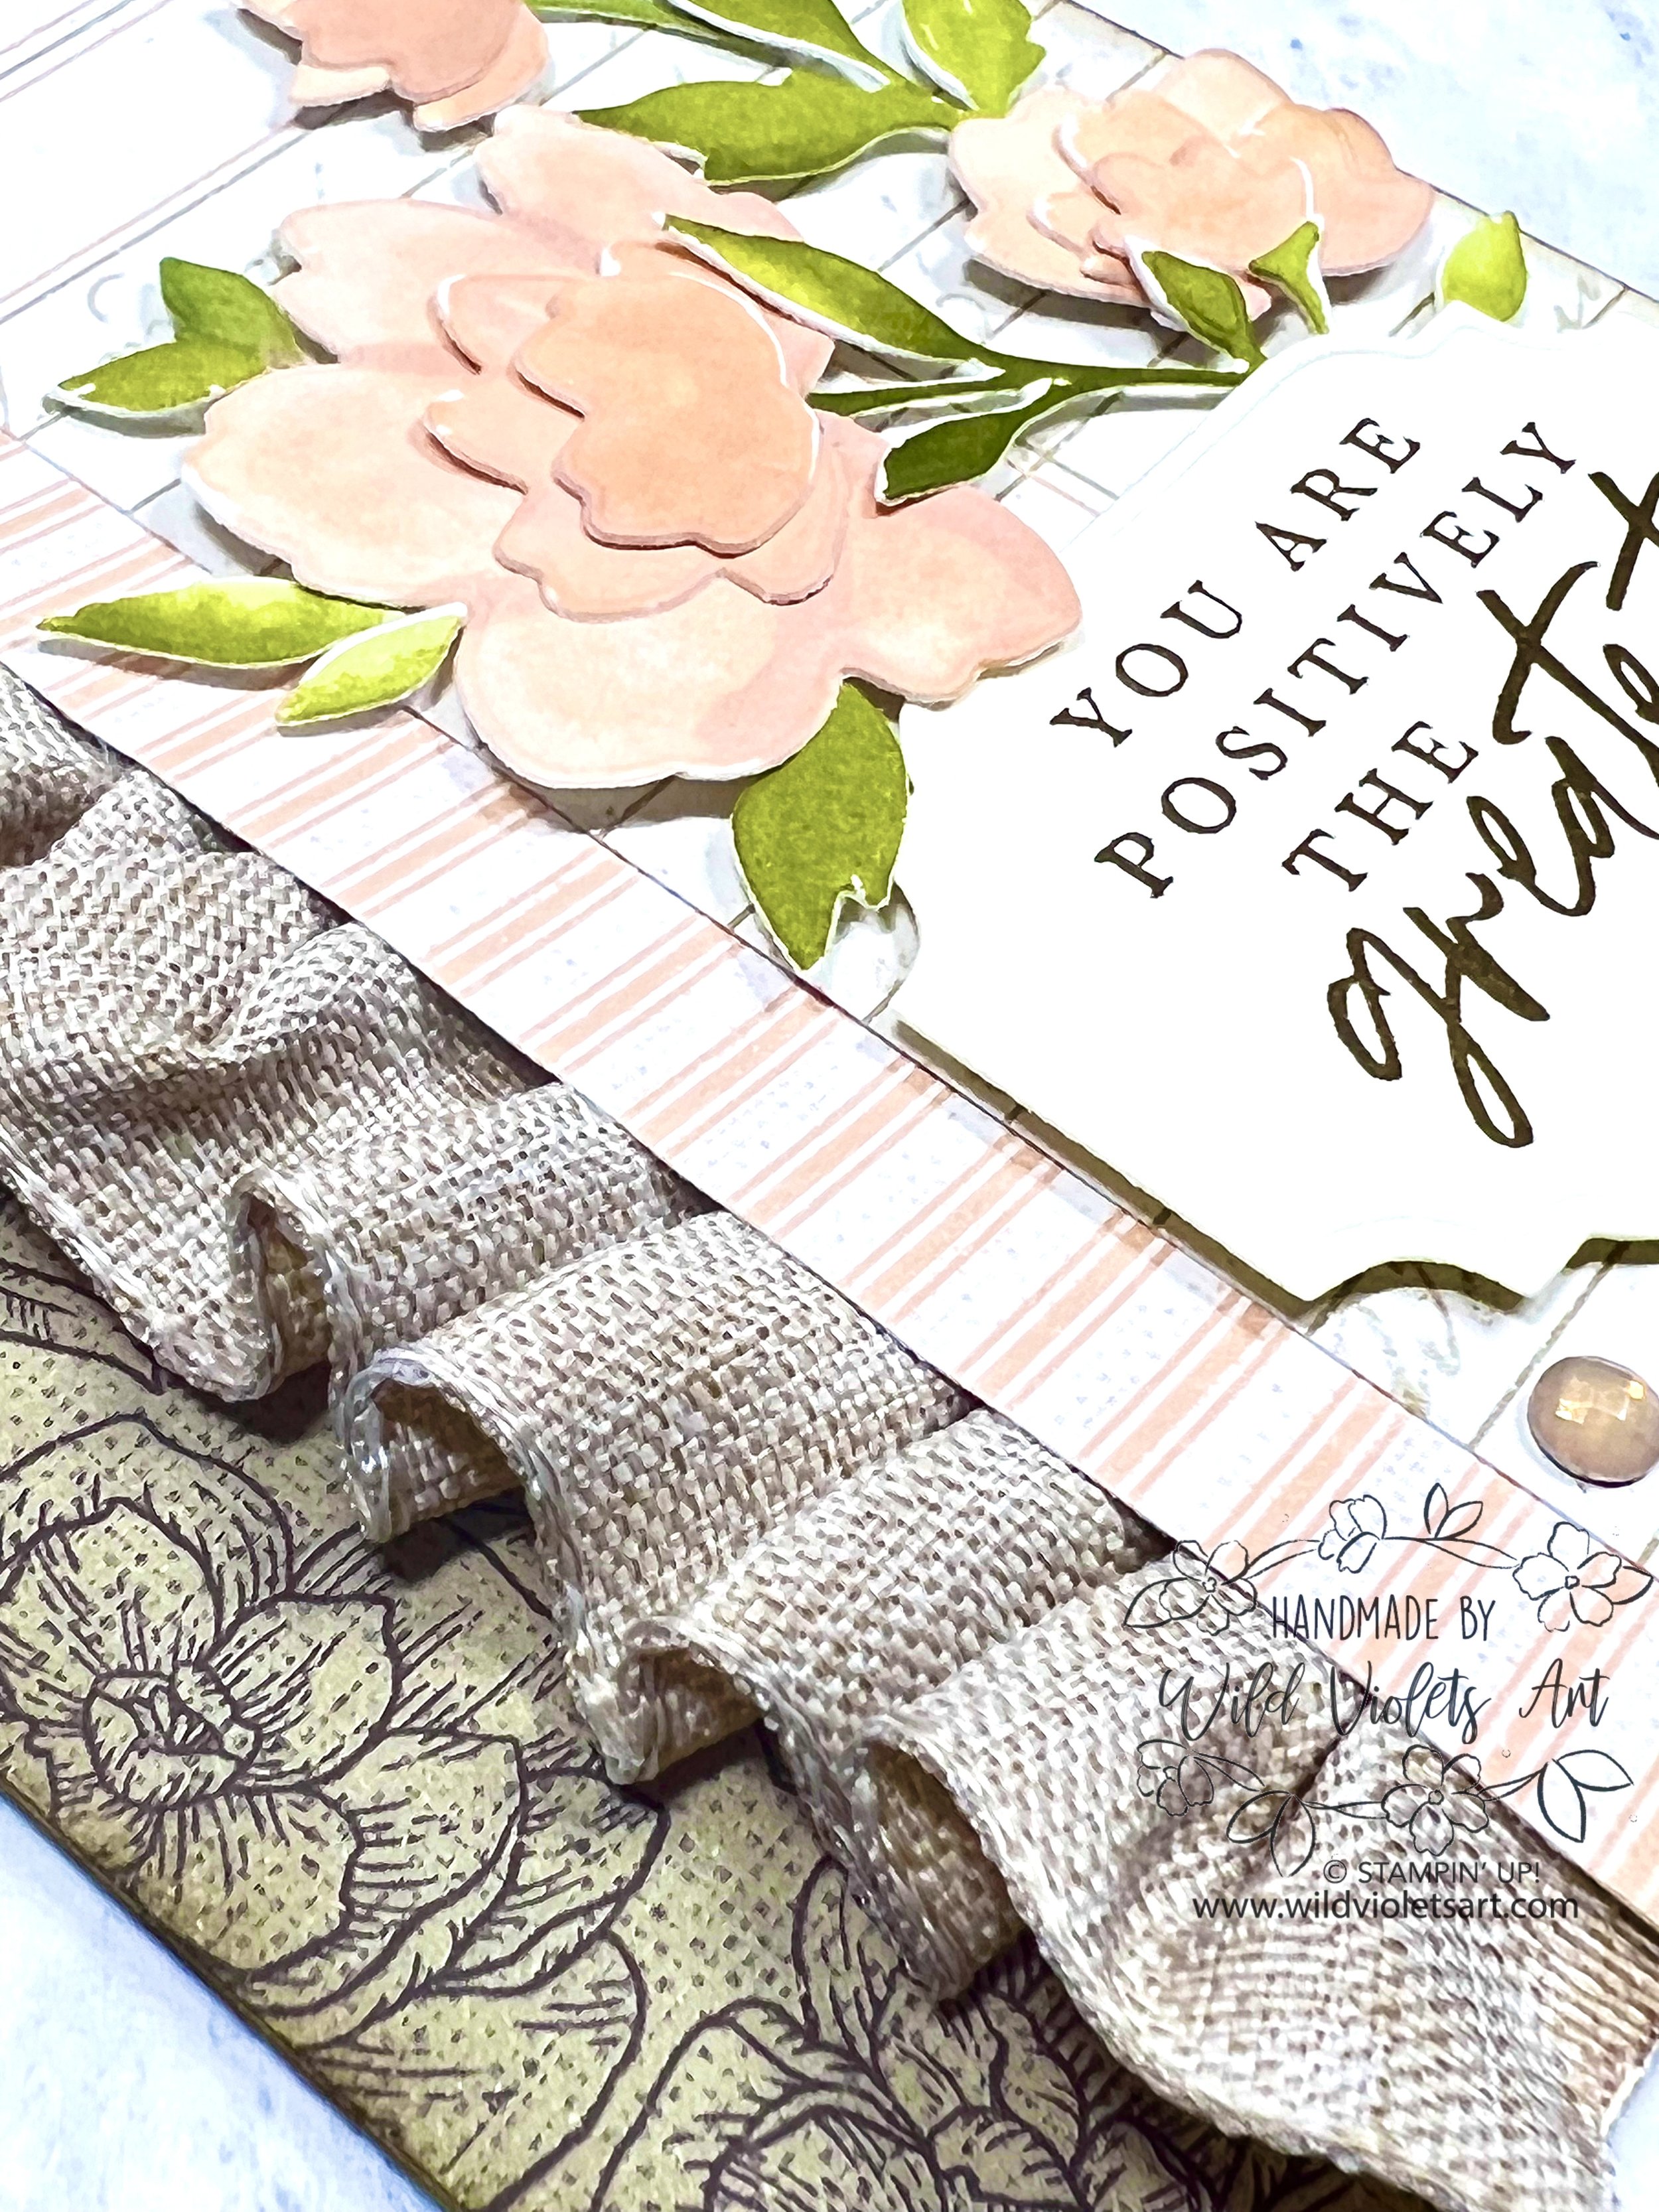
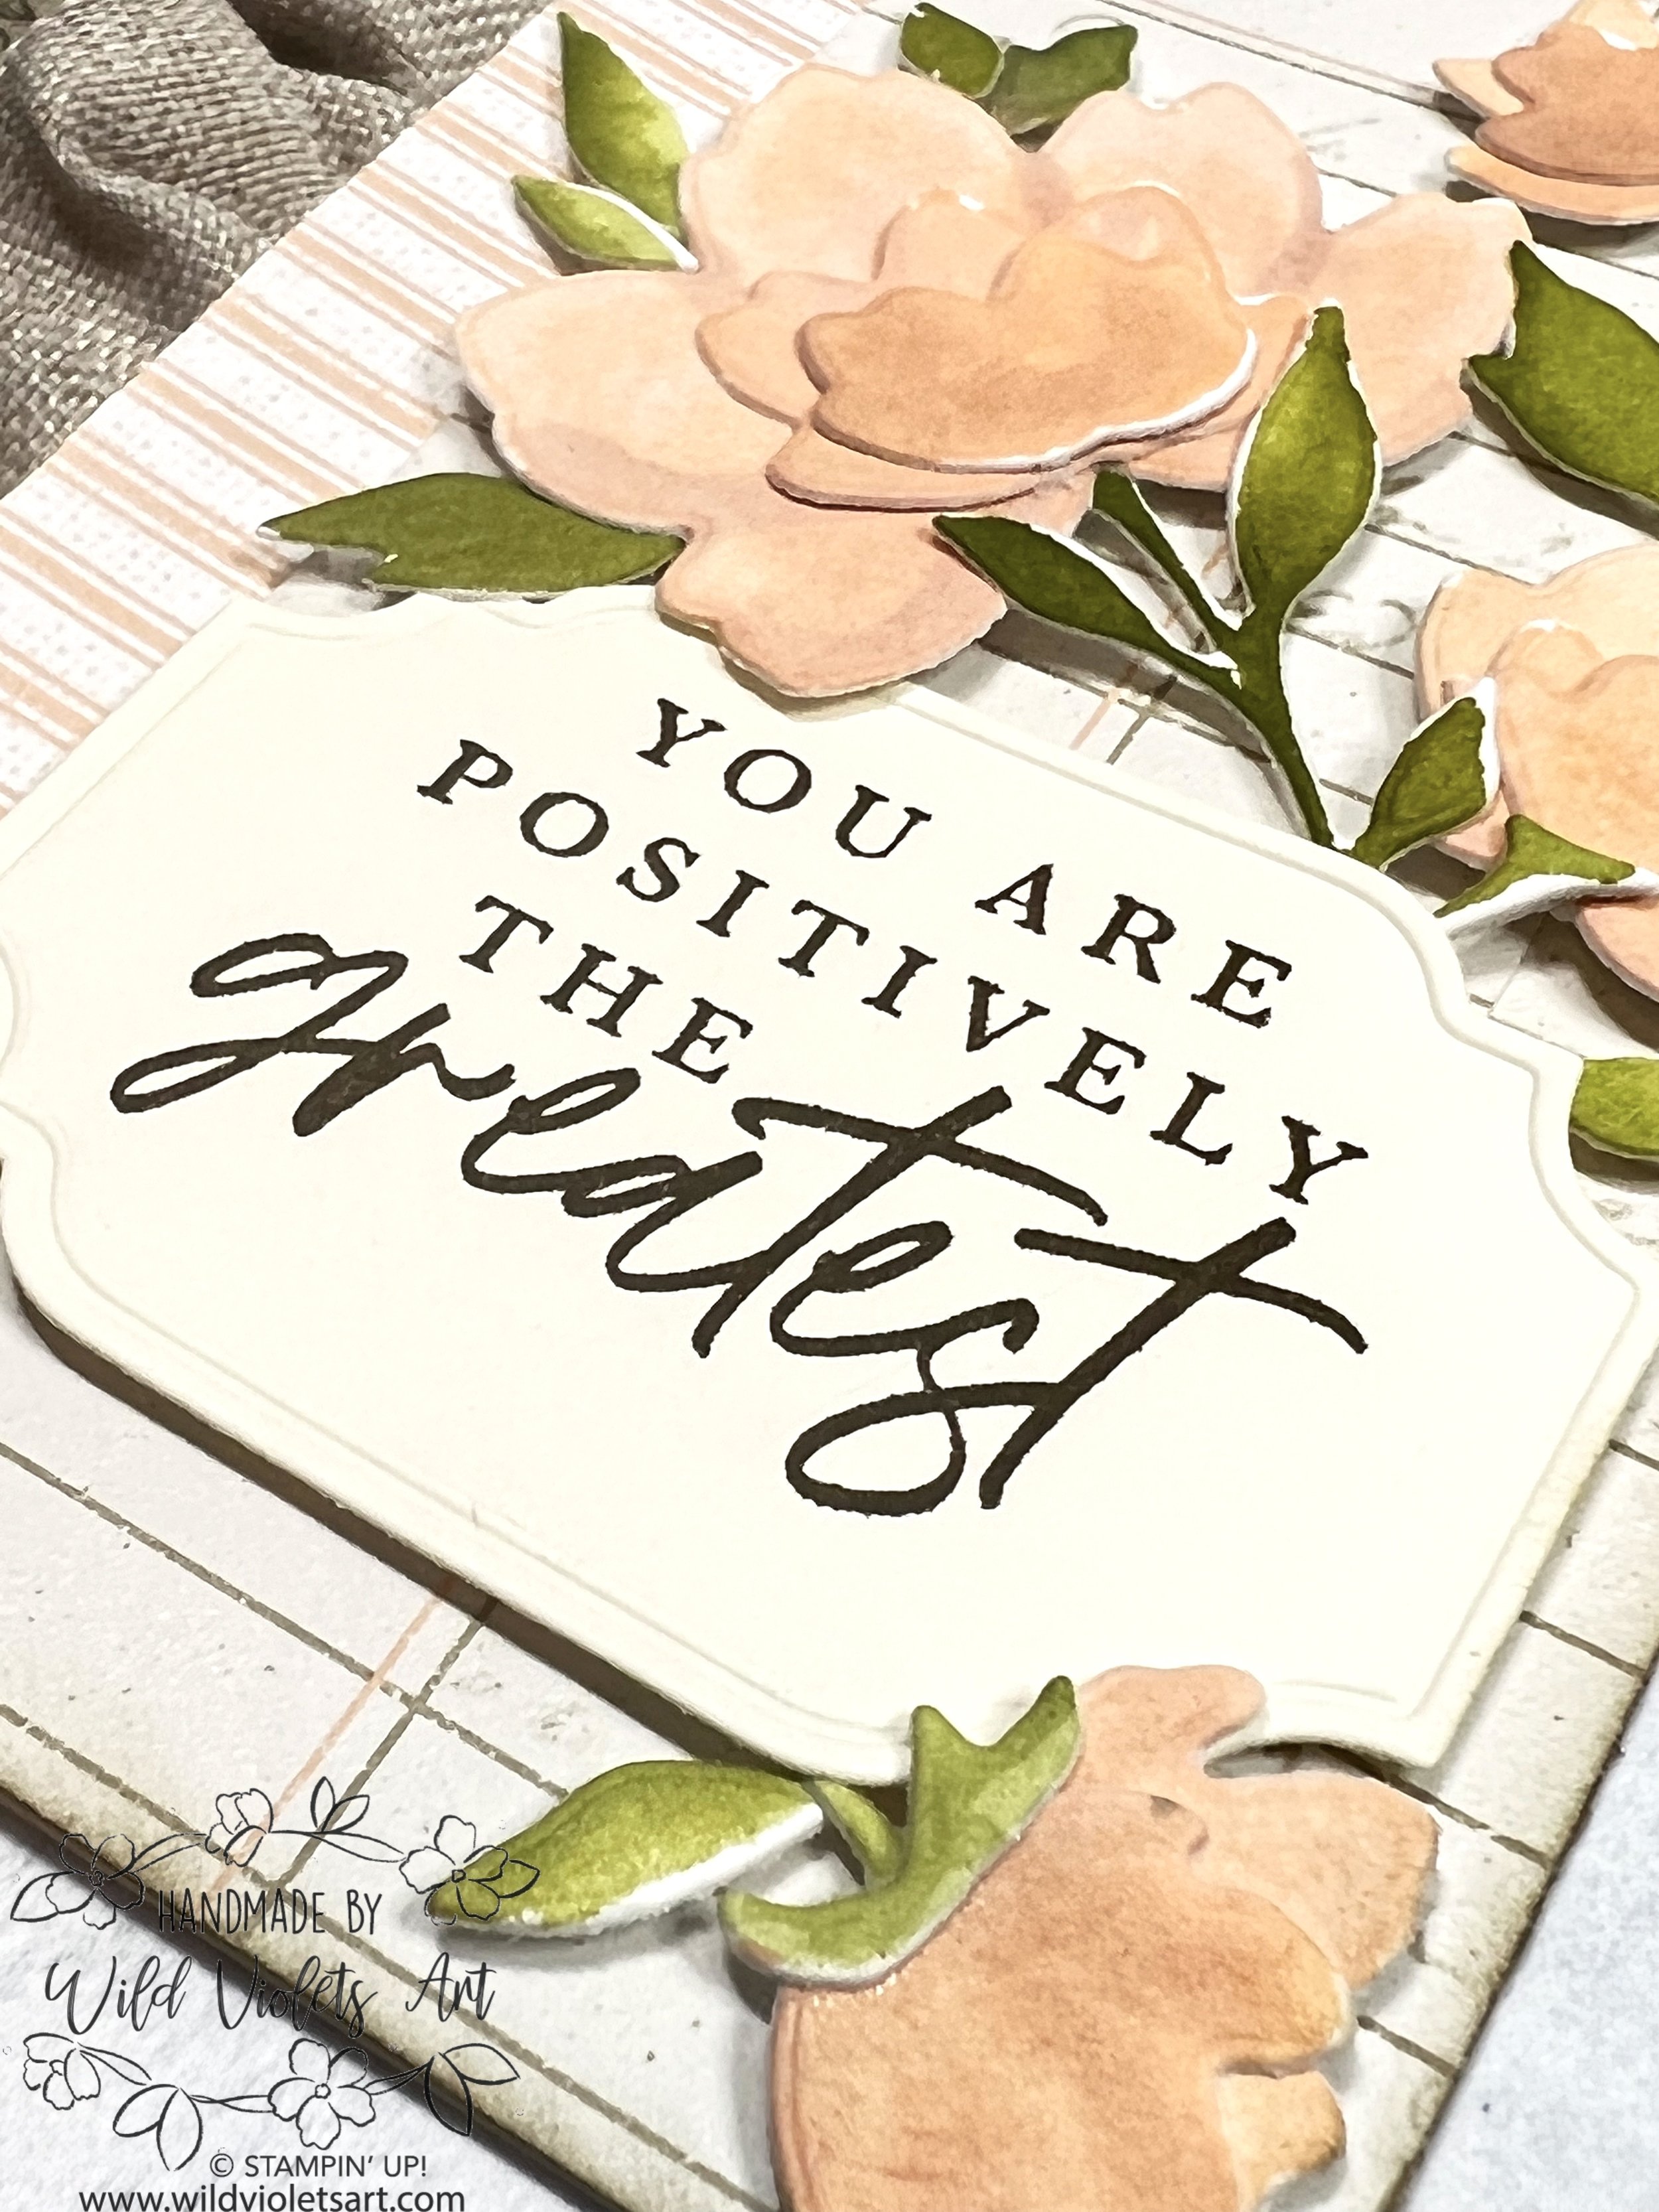
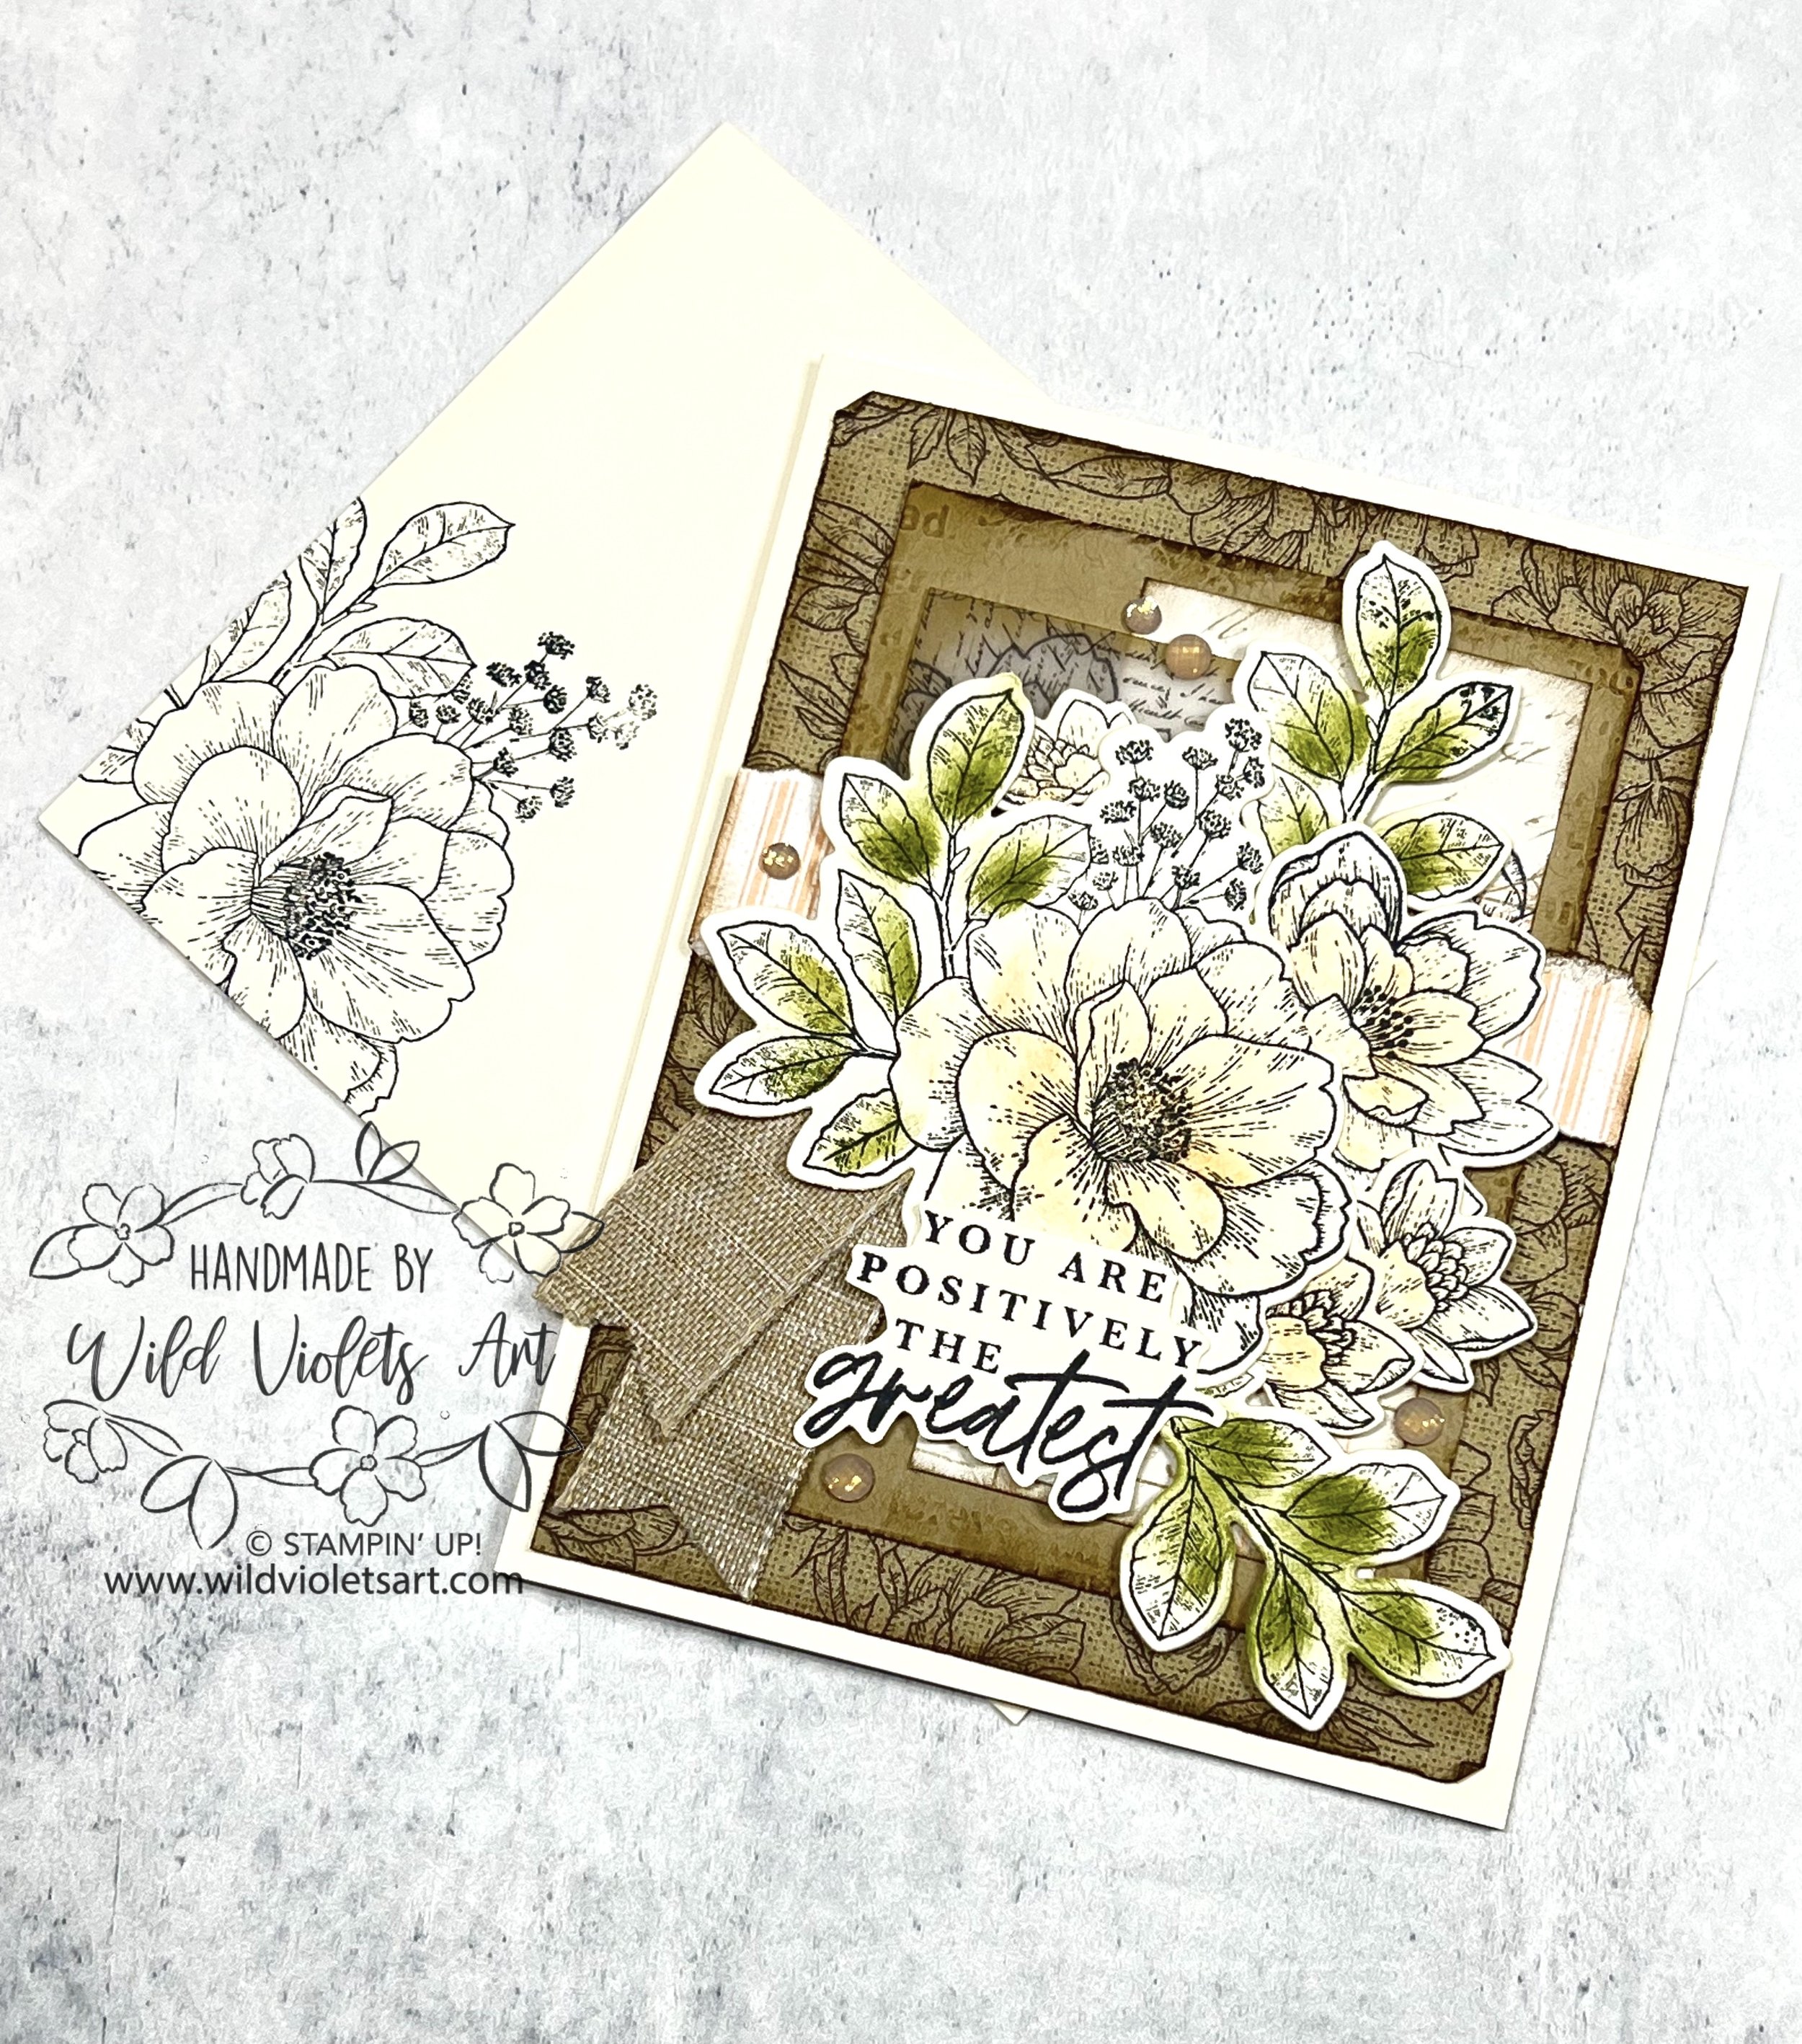
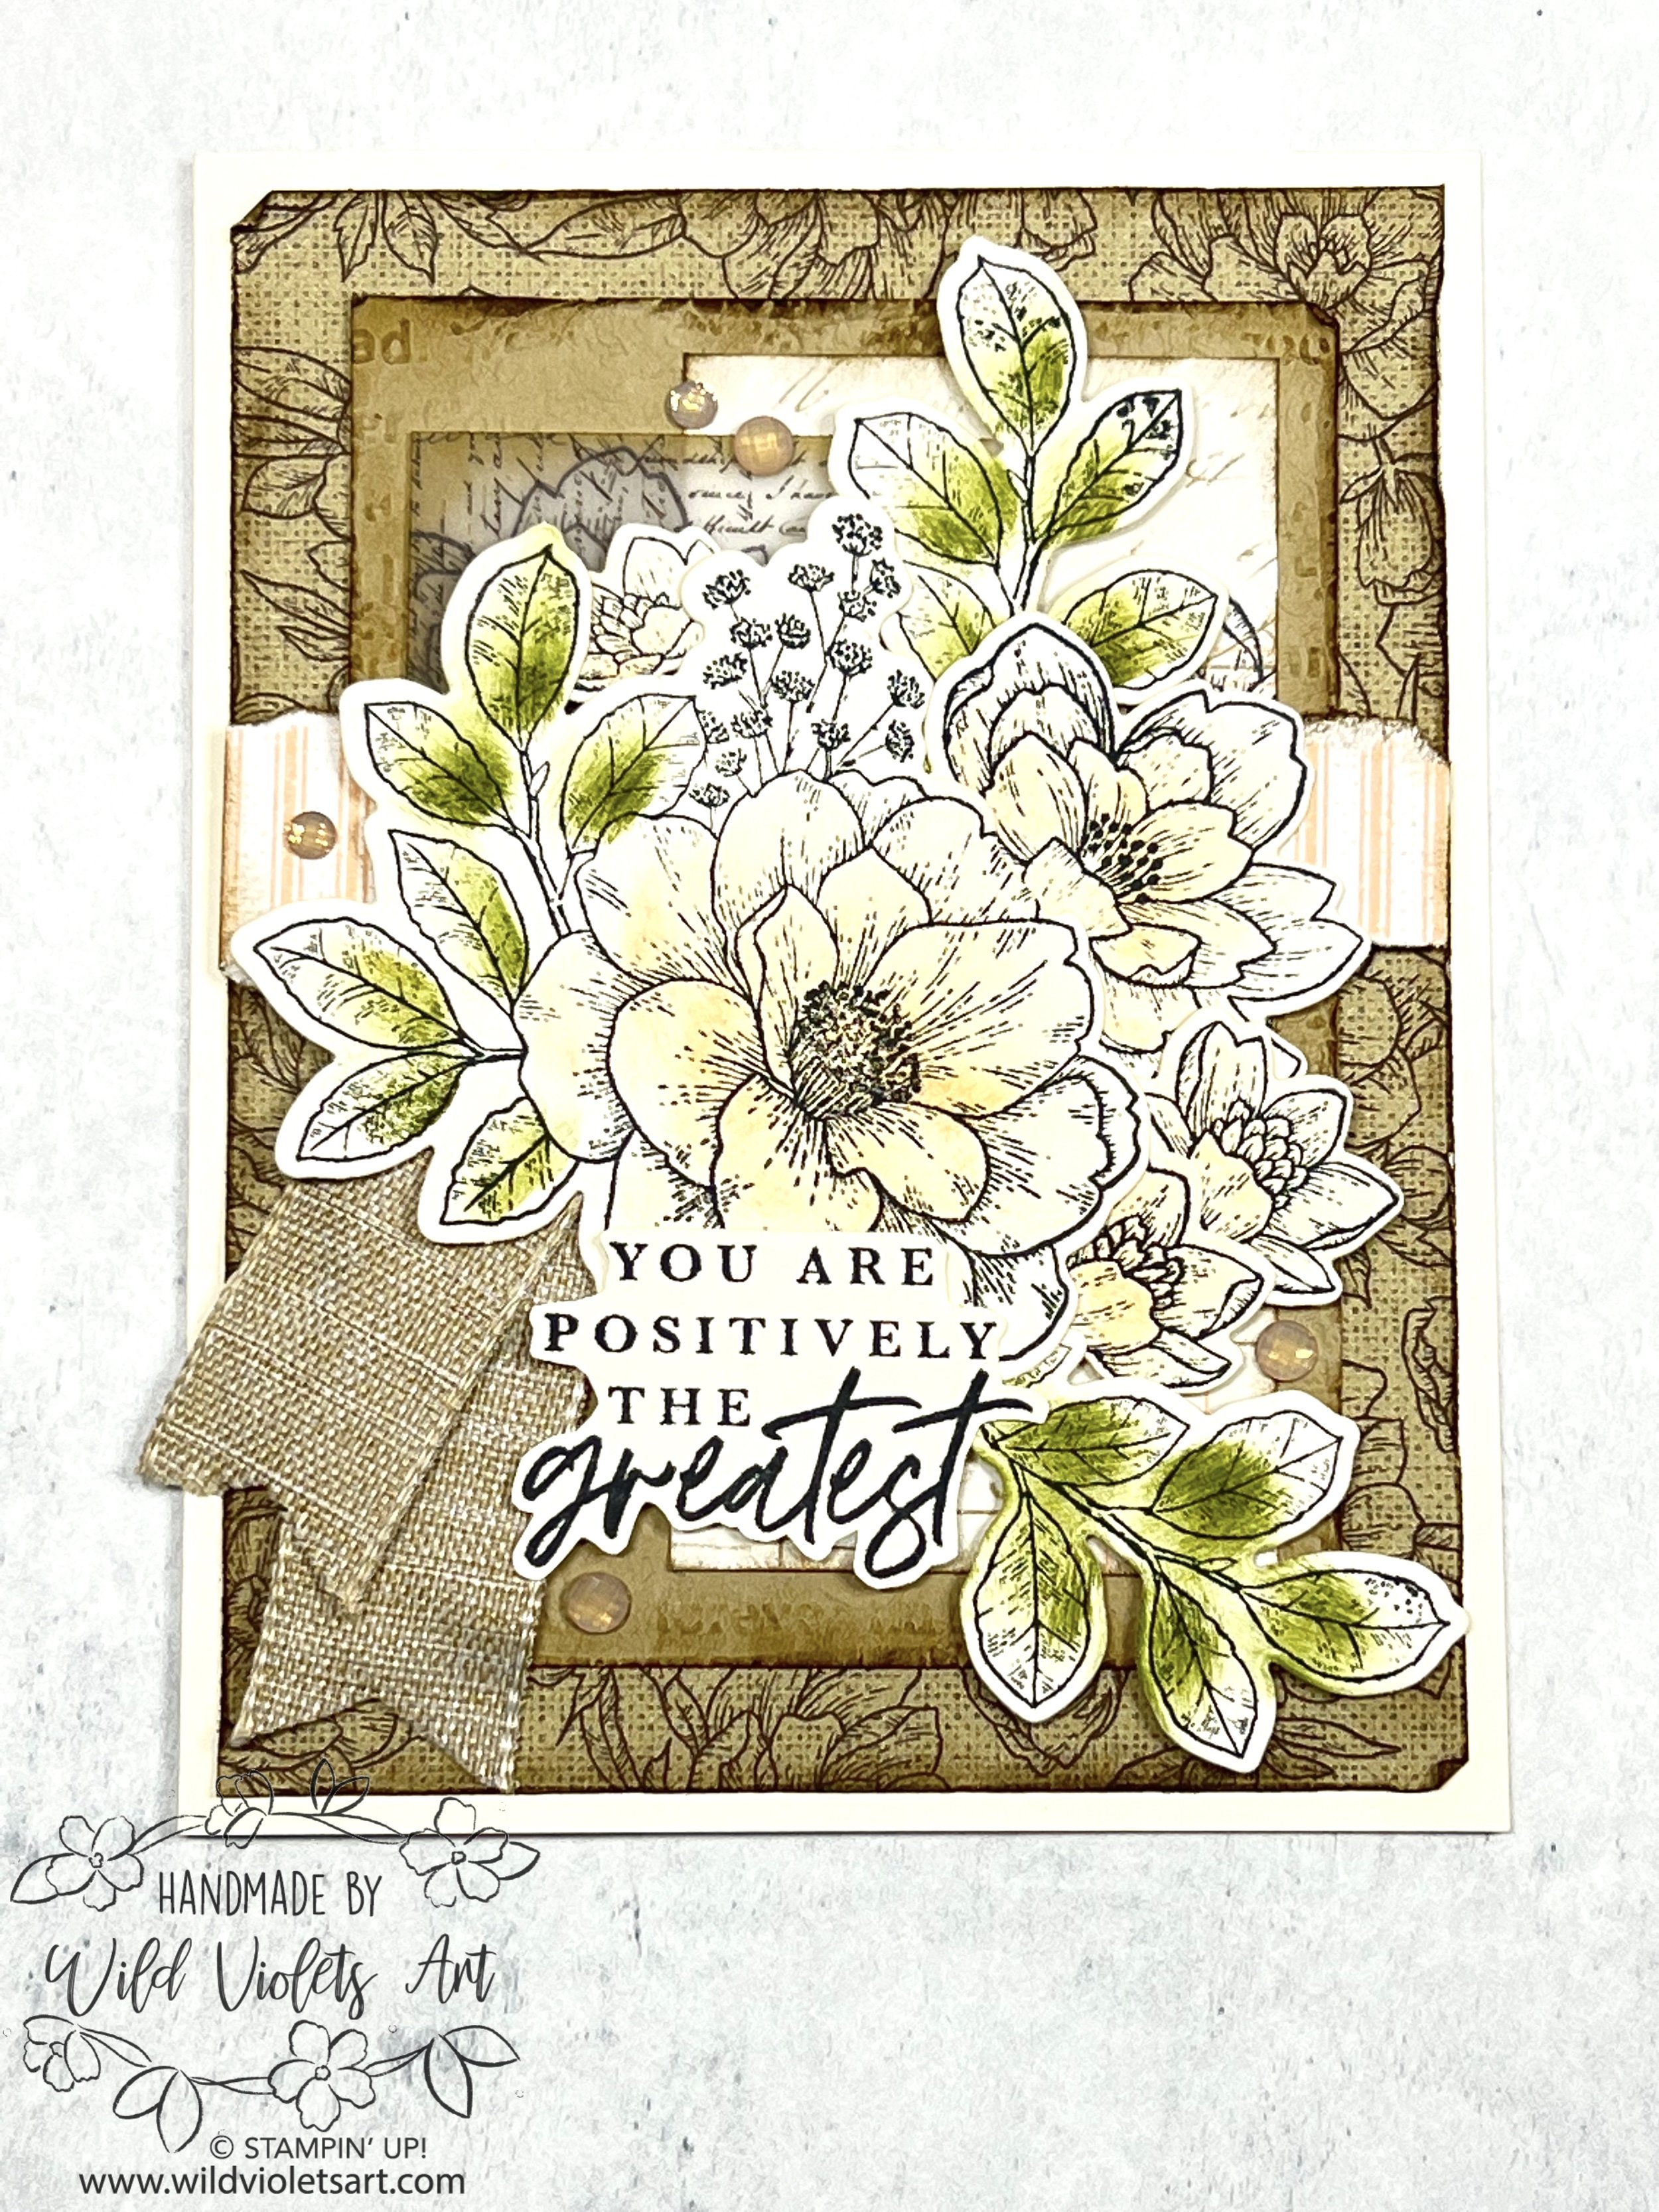
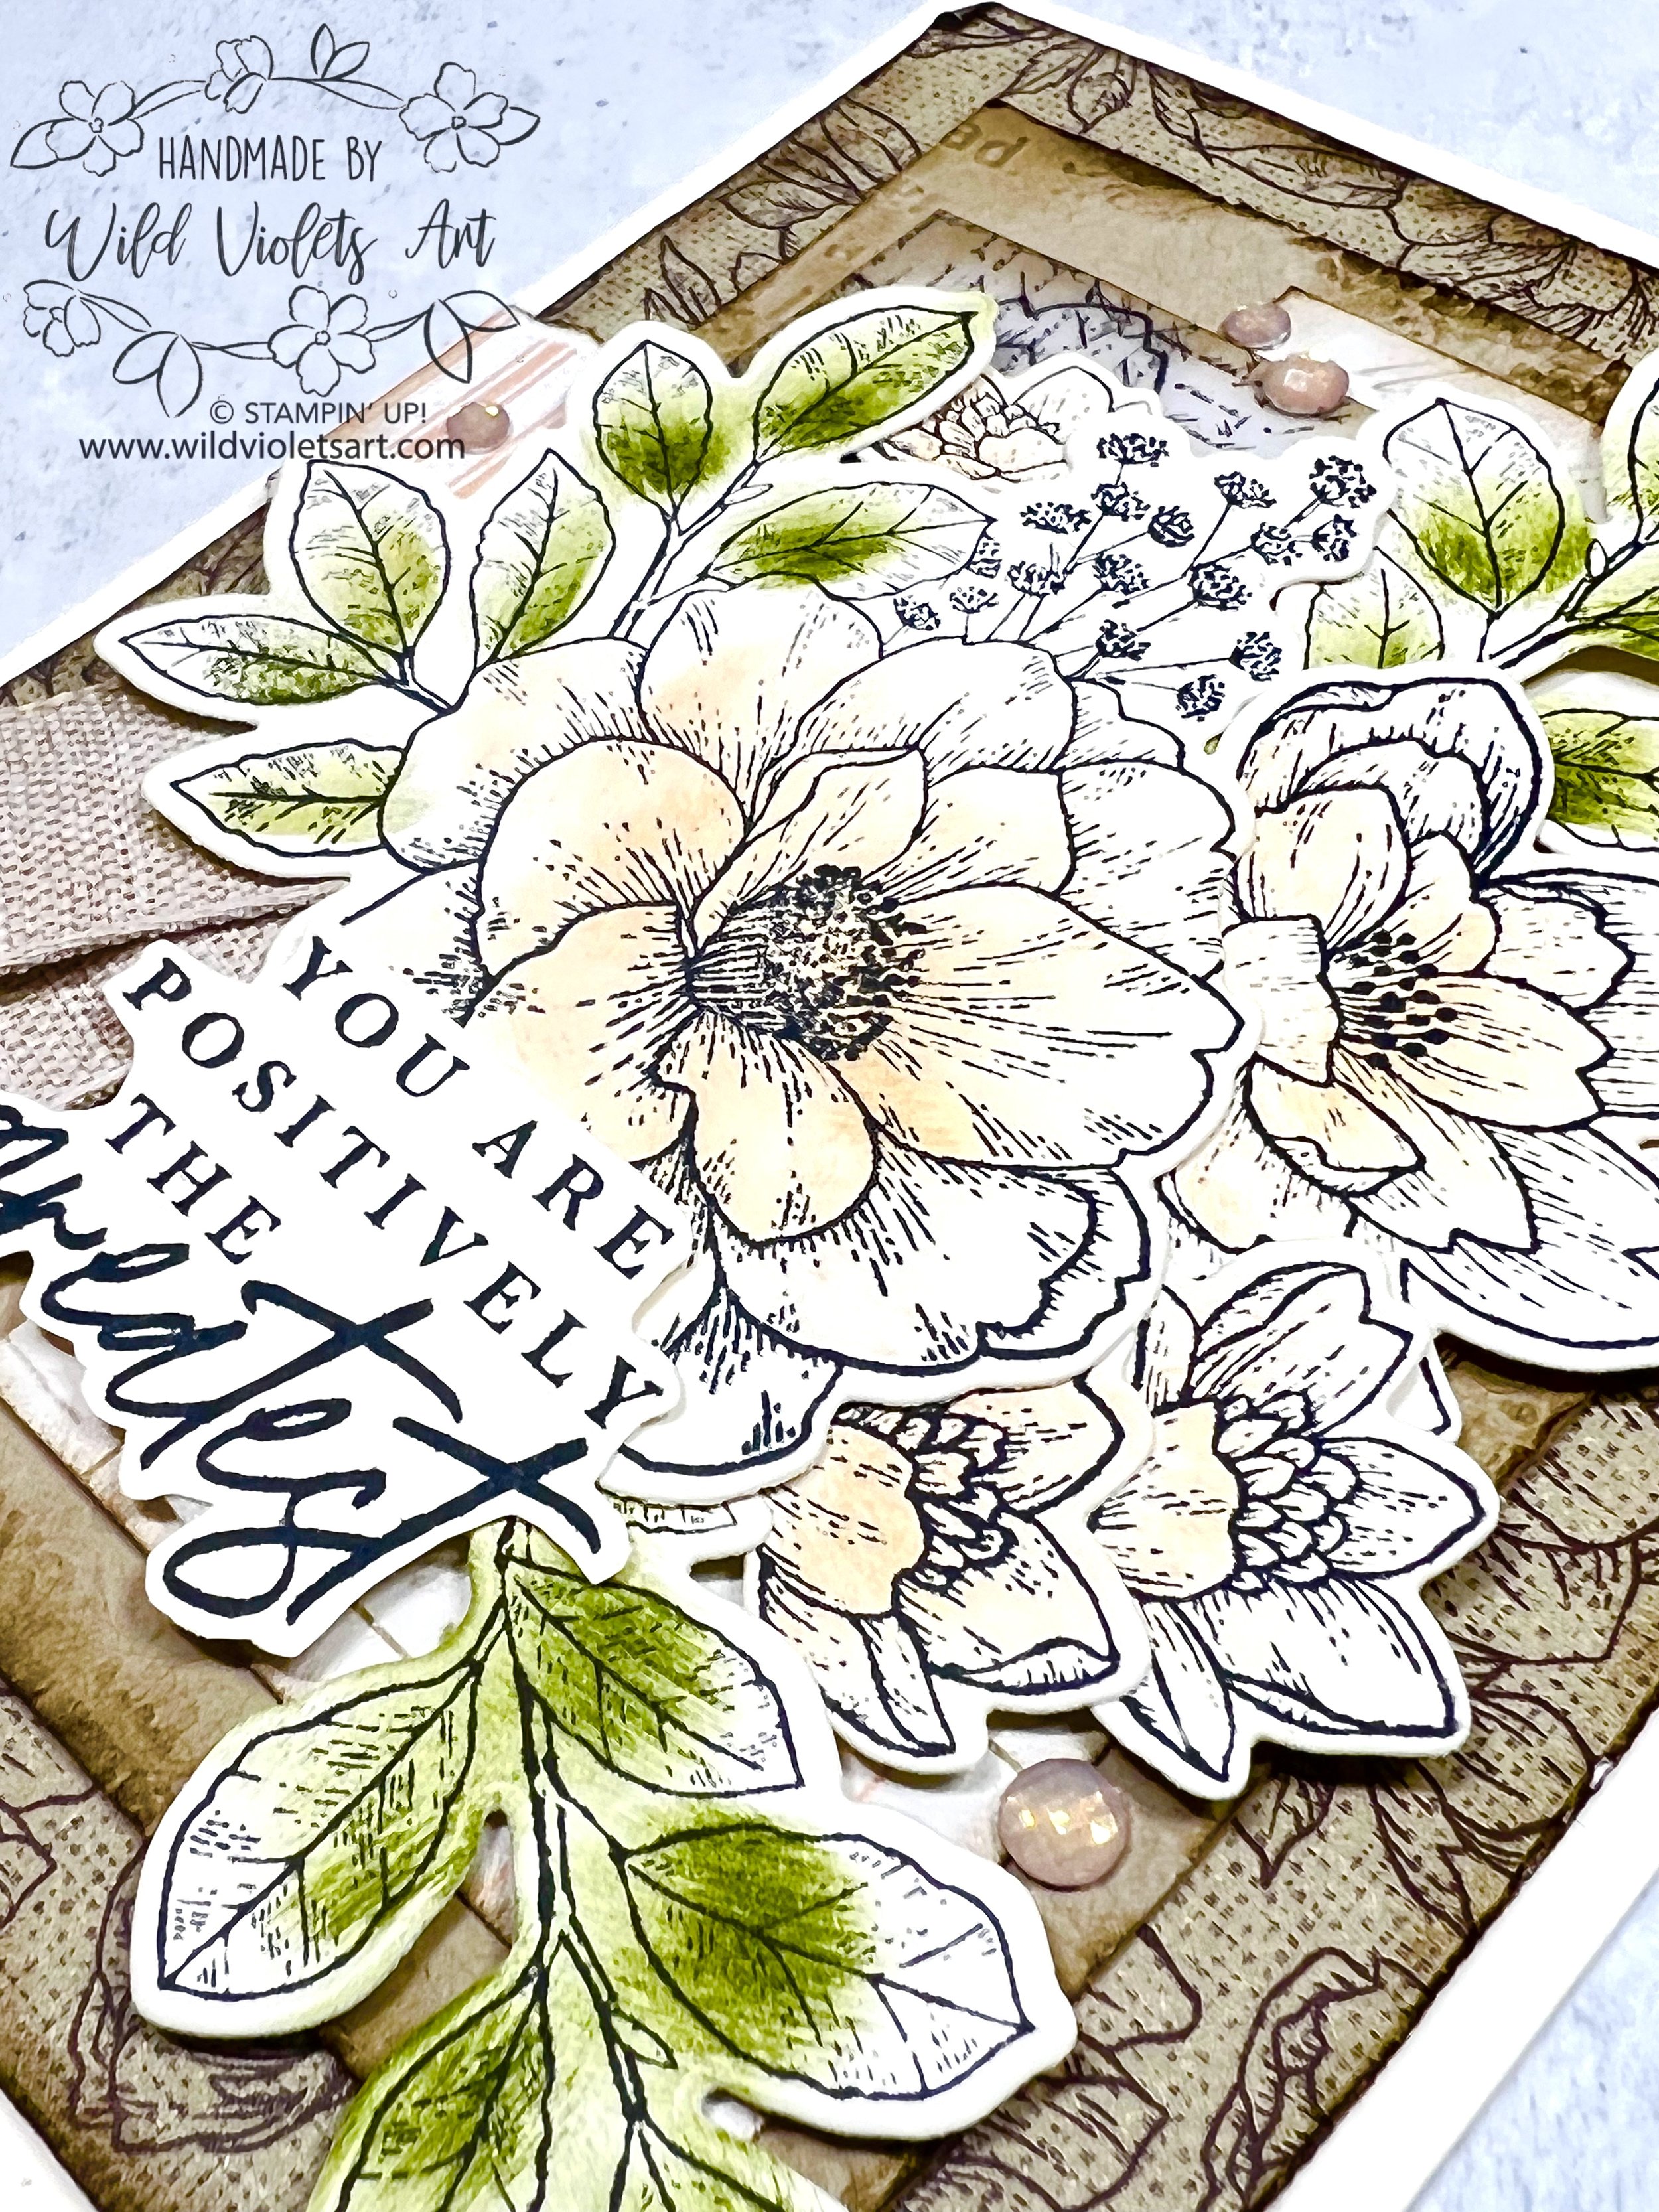
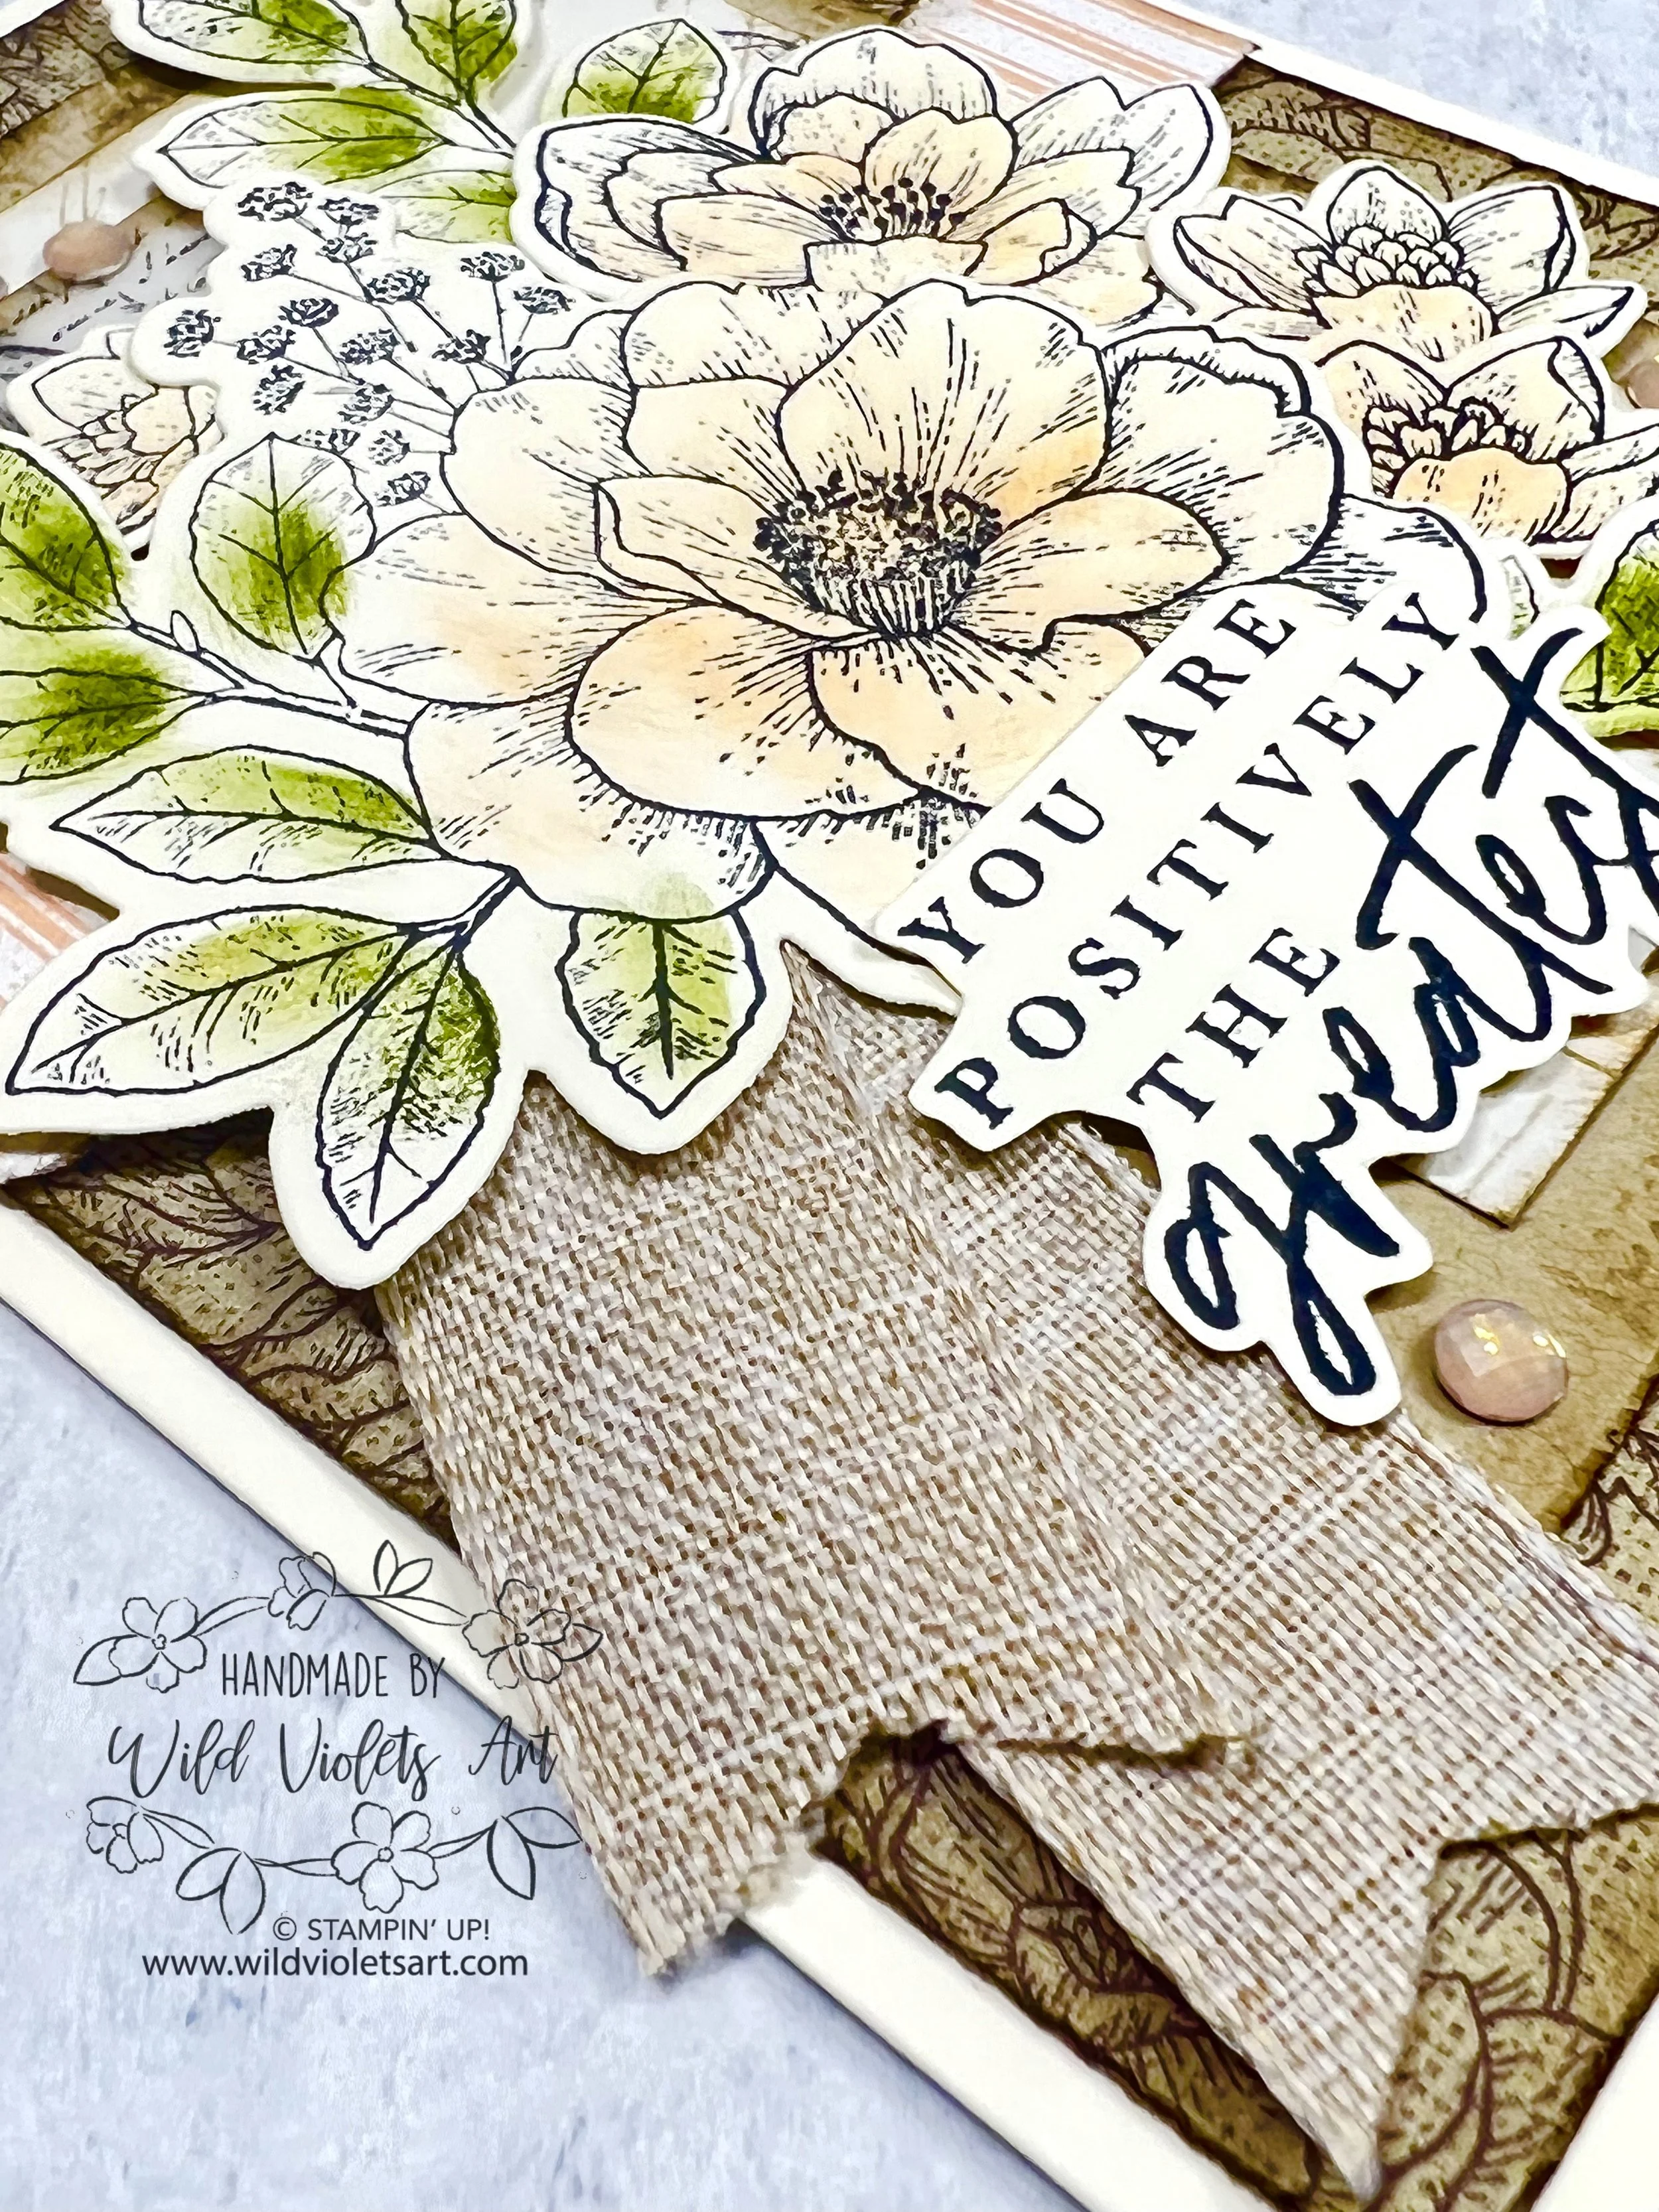
You Are…
This card features the largest of the dies included in the suite. it looks like a spray of multiple blooms and leaves (see below images). It actually coordinates with one of the sheets of DSP nicely (see page 56 of the 2022-23 Annual Catalog for the white card with “Its going to be FAB!” on Soft Succulent CS. However, after looking at the DSP, the Cottage Rose stamp set, I saw that there were few choices of how to use the dies. The stamps have 4 flowers (two stamps) that coordinate, but no leaves. The DSP, you can get maybe 2 cuts out of a 12”x12” sheet and that seems a waste (especially because the backside is a lovely vintage ledger), so I decided to be creative.
Items needed to make this project
Soft Suede Classic Stampin’ Pad #147115
Pear Pizzazz Classic Stampin’ Pad #147104 & refill ink
Petal Pink Classic Stampin’ Pad #147108 & refill ink
All That Dies #159078 (for sentiment)
Sponge Dauber #133773
Water Painters #151298
Very Vanilla Thick CS #144237- card base 8-1/2”x5-1/2”, scored at 4-1/4”
Medium Envelopes Basic Very Vanilla #107300
Very Vanilla CS #101650 – 2”x3” for sentiment
Abigail Rose 12”x12” DSP #159037 – 2-1/2”x5-1/2”, 1”x5-1/2” (2 each) & 2-1/4”x6” (for envelope flap)
Fluid 100 Watercolor Paper #149612
Natural Finish 7/8” Ribbon #159051 – 14”
Elegant Faceted Gems (Petal Pink) #152464 – 3 each
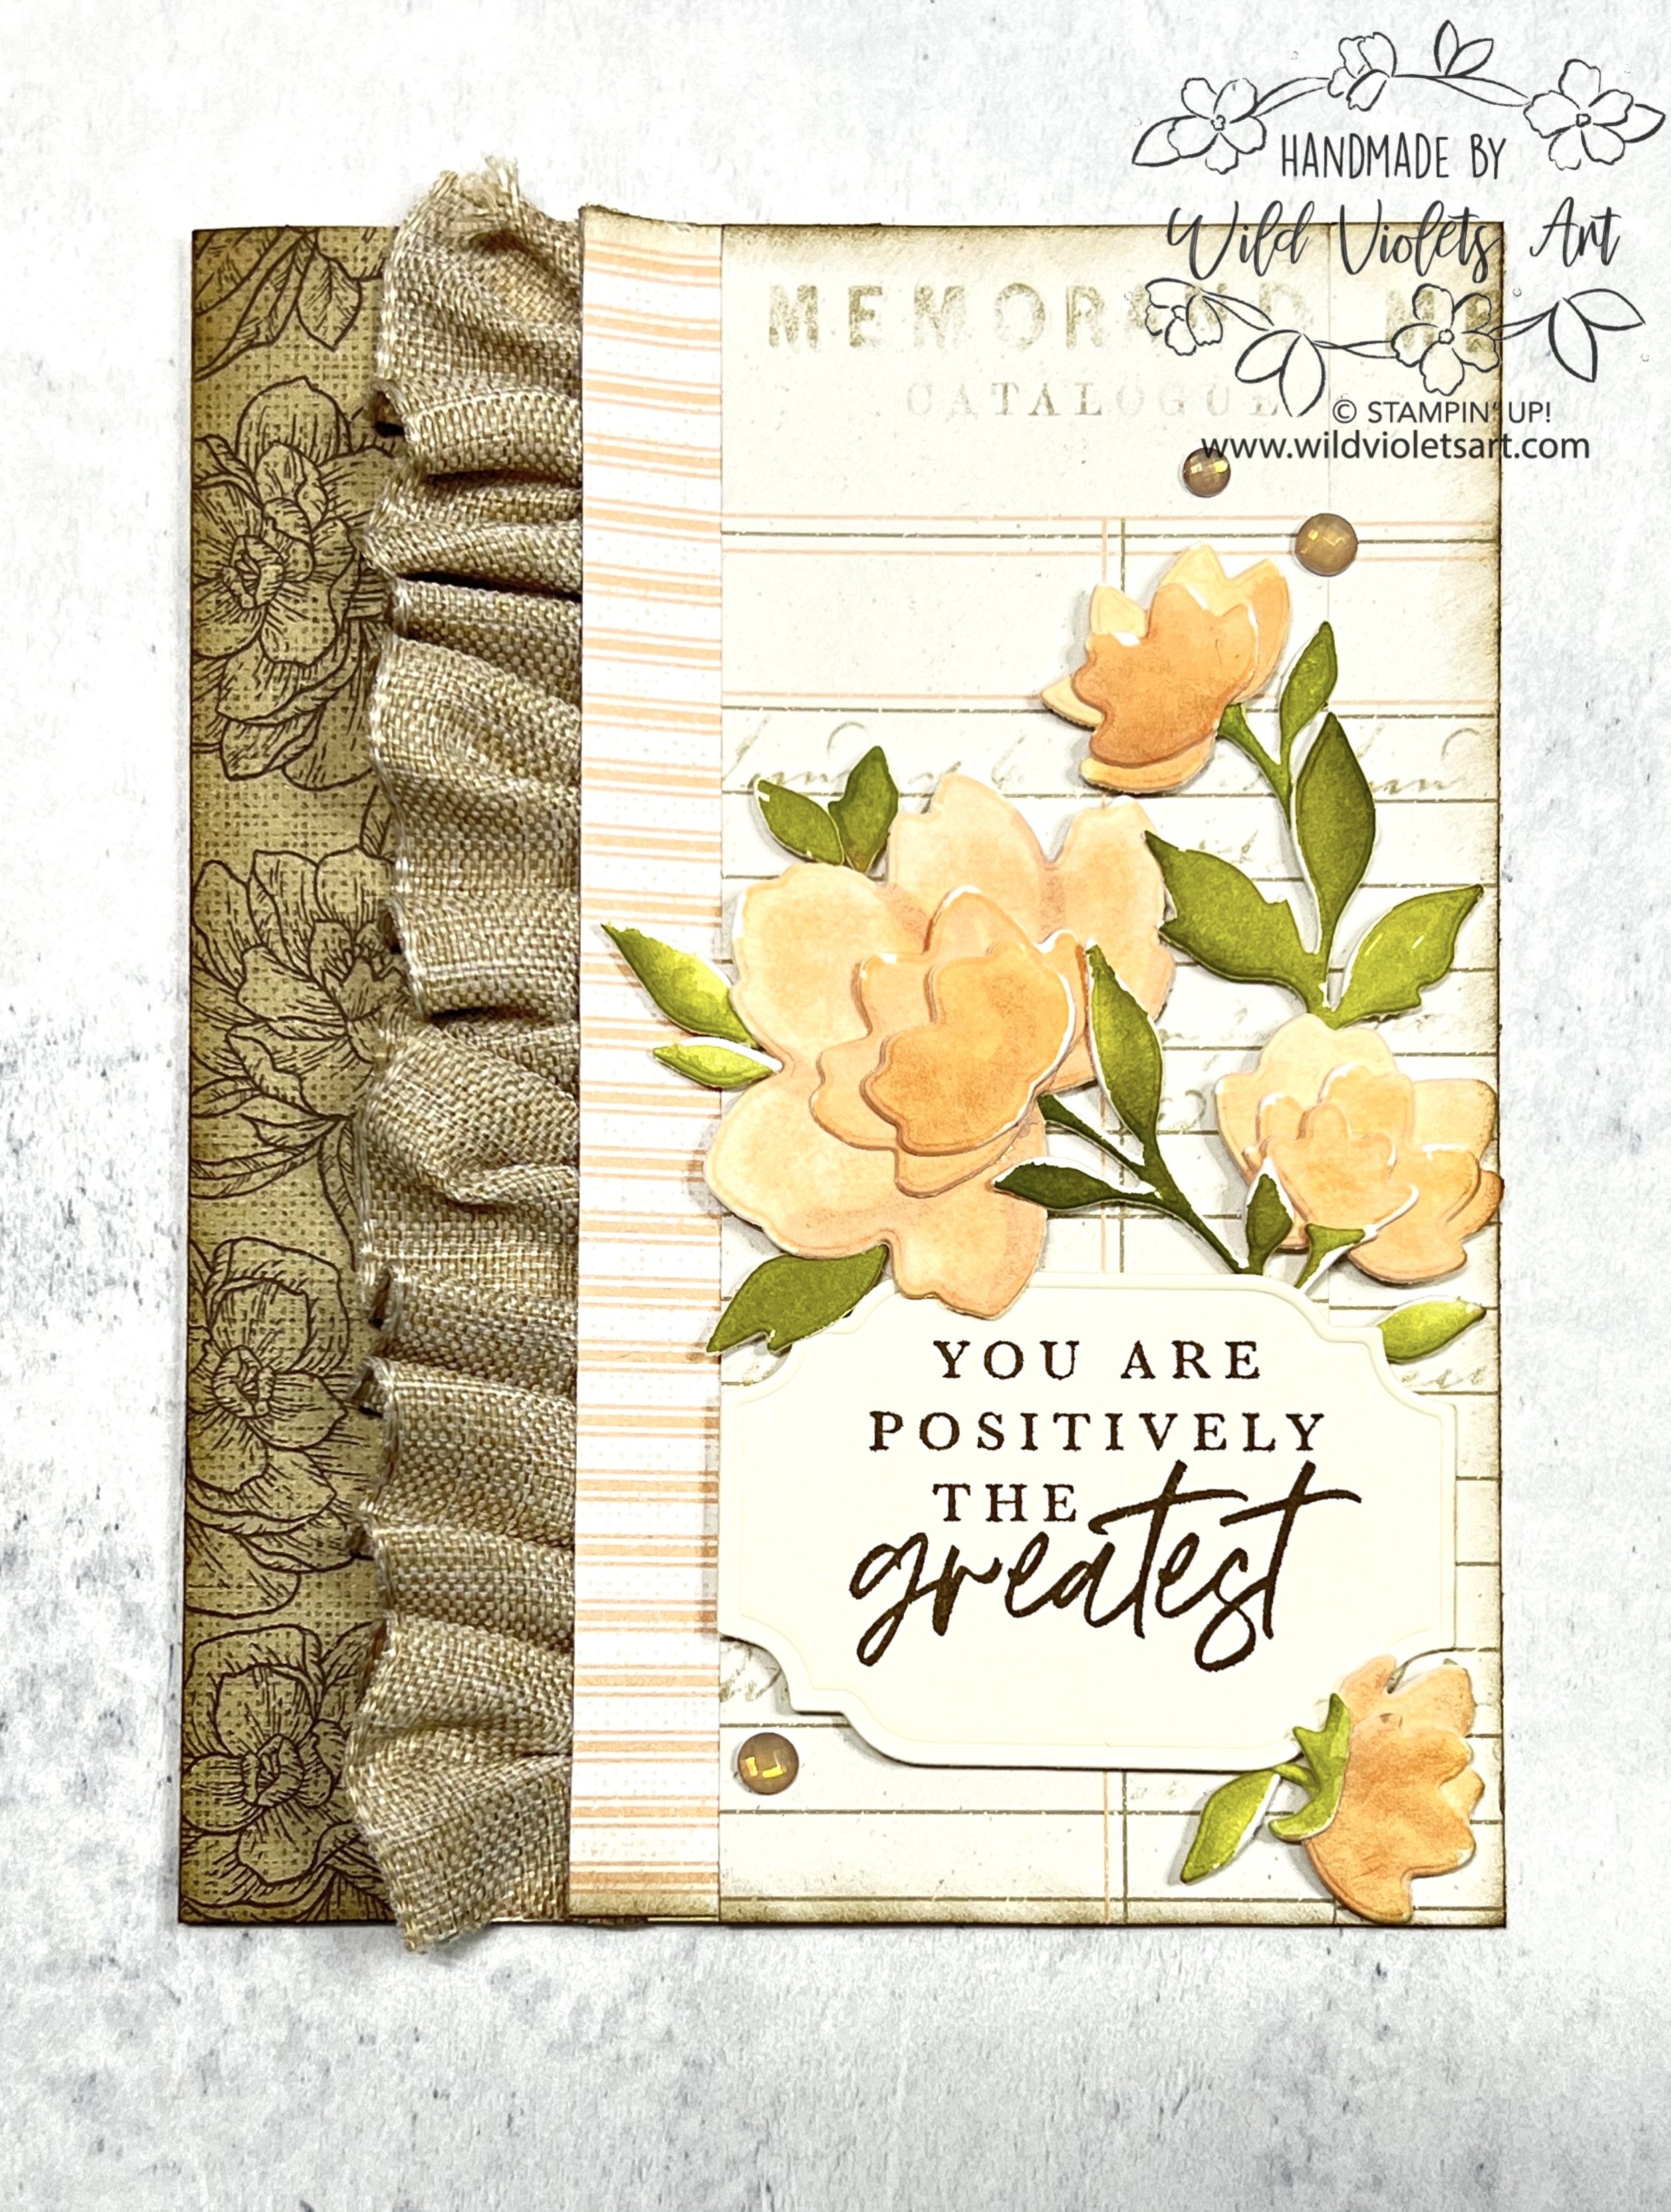
Fold and braise Very Vanilla CS card base at score line. Glue darkest 1” piece of DSP to left side of card front. On back side of 1” striped piece of DSP, put a strip of Tear & Tape, then place ribbon, folding every ½” or so. Place another piece of tear & tape on card front, right next to dark DSP strip. Put glue on other side of striped DSP (not side of ribbon), and lay it down about ¾” away from the left side of the card. Press down on ribbon to adhere. Take ledger print DSP and glue on right side of card front, then set aside.
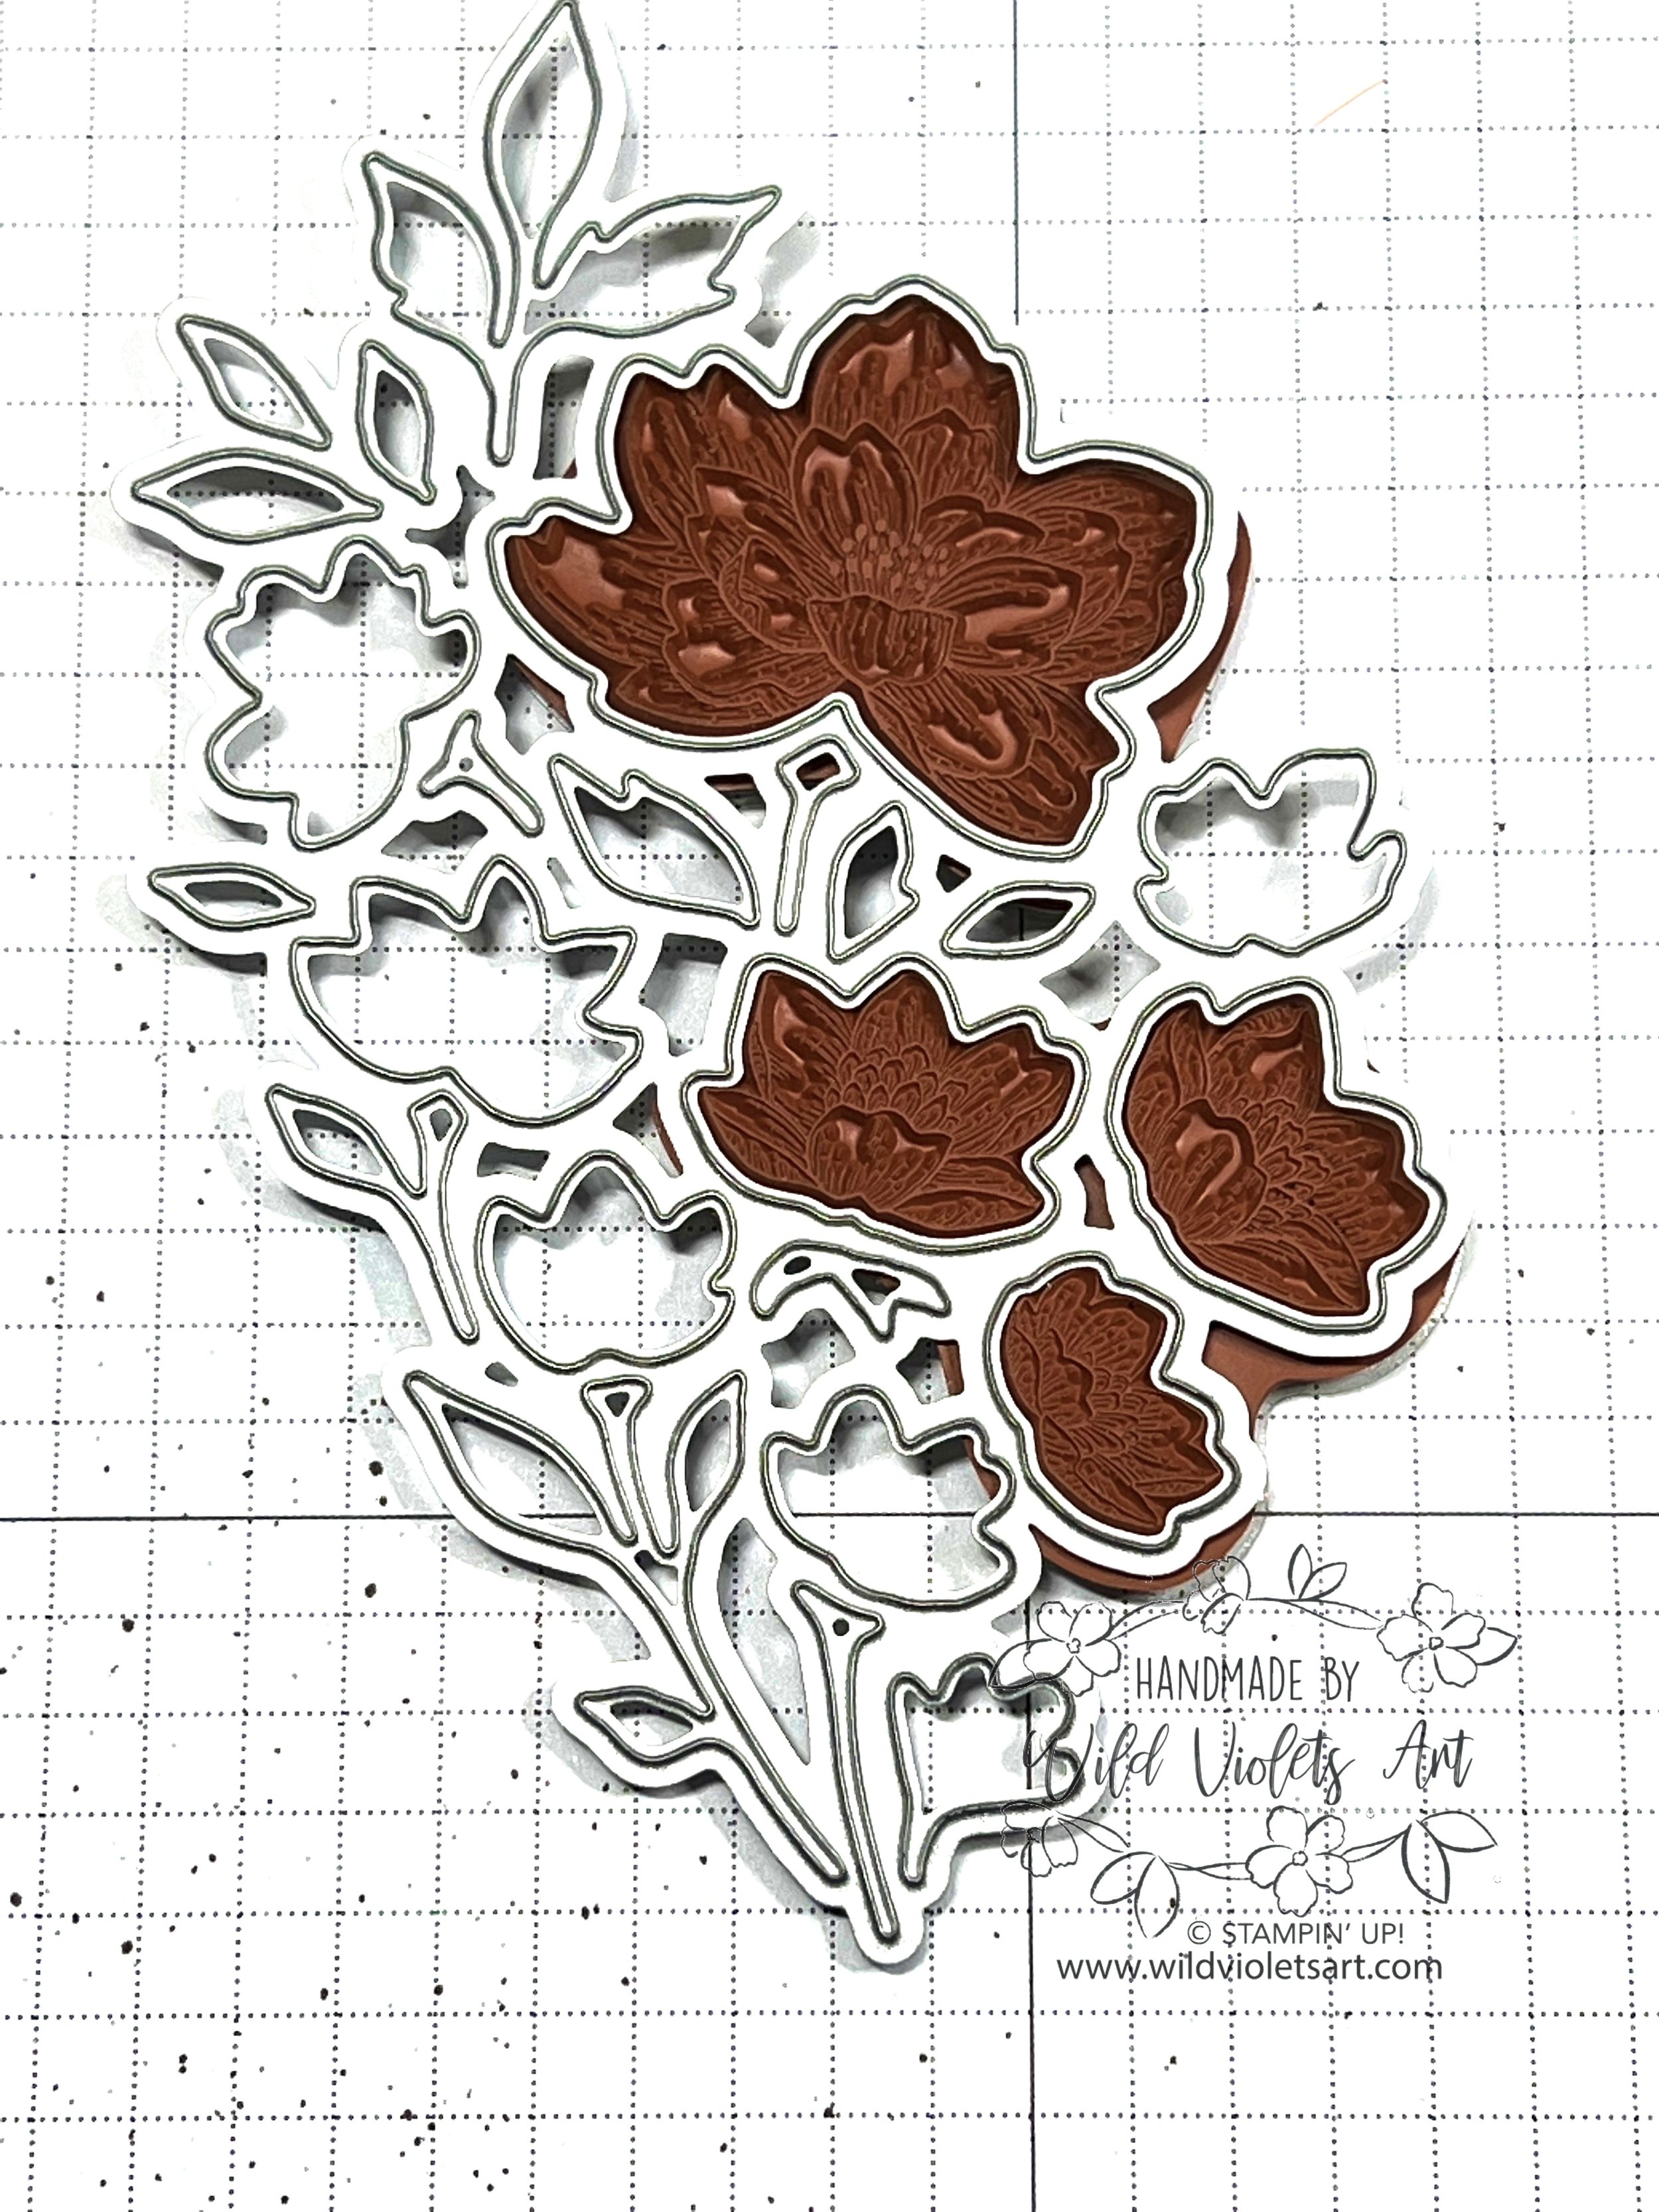
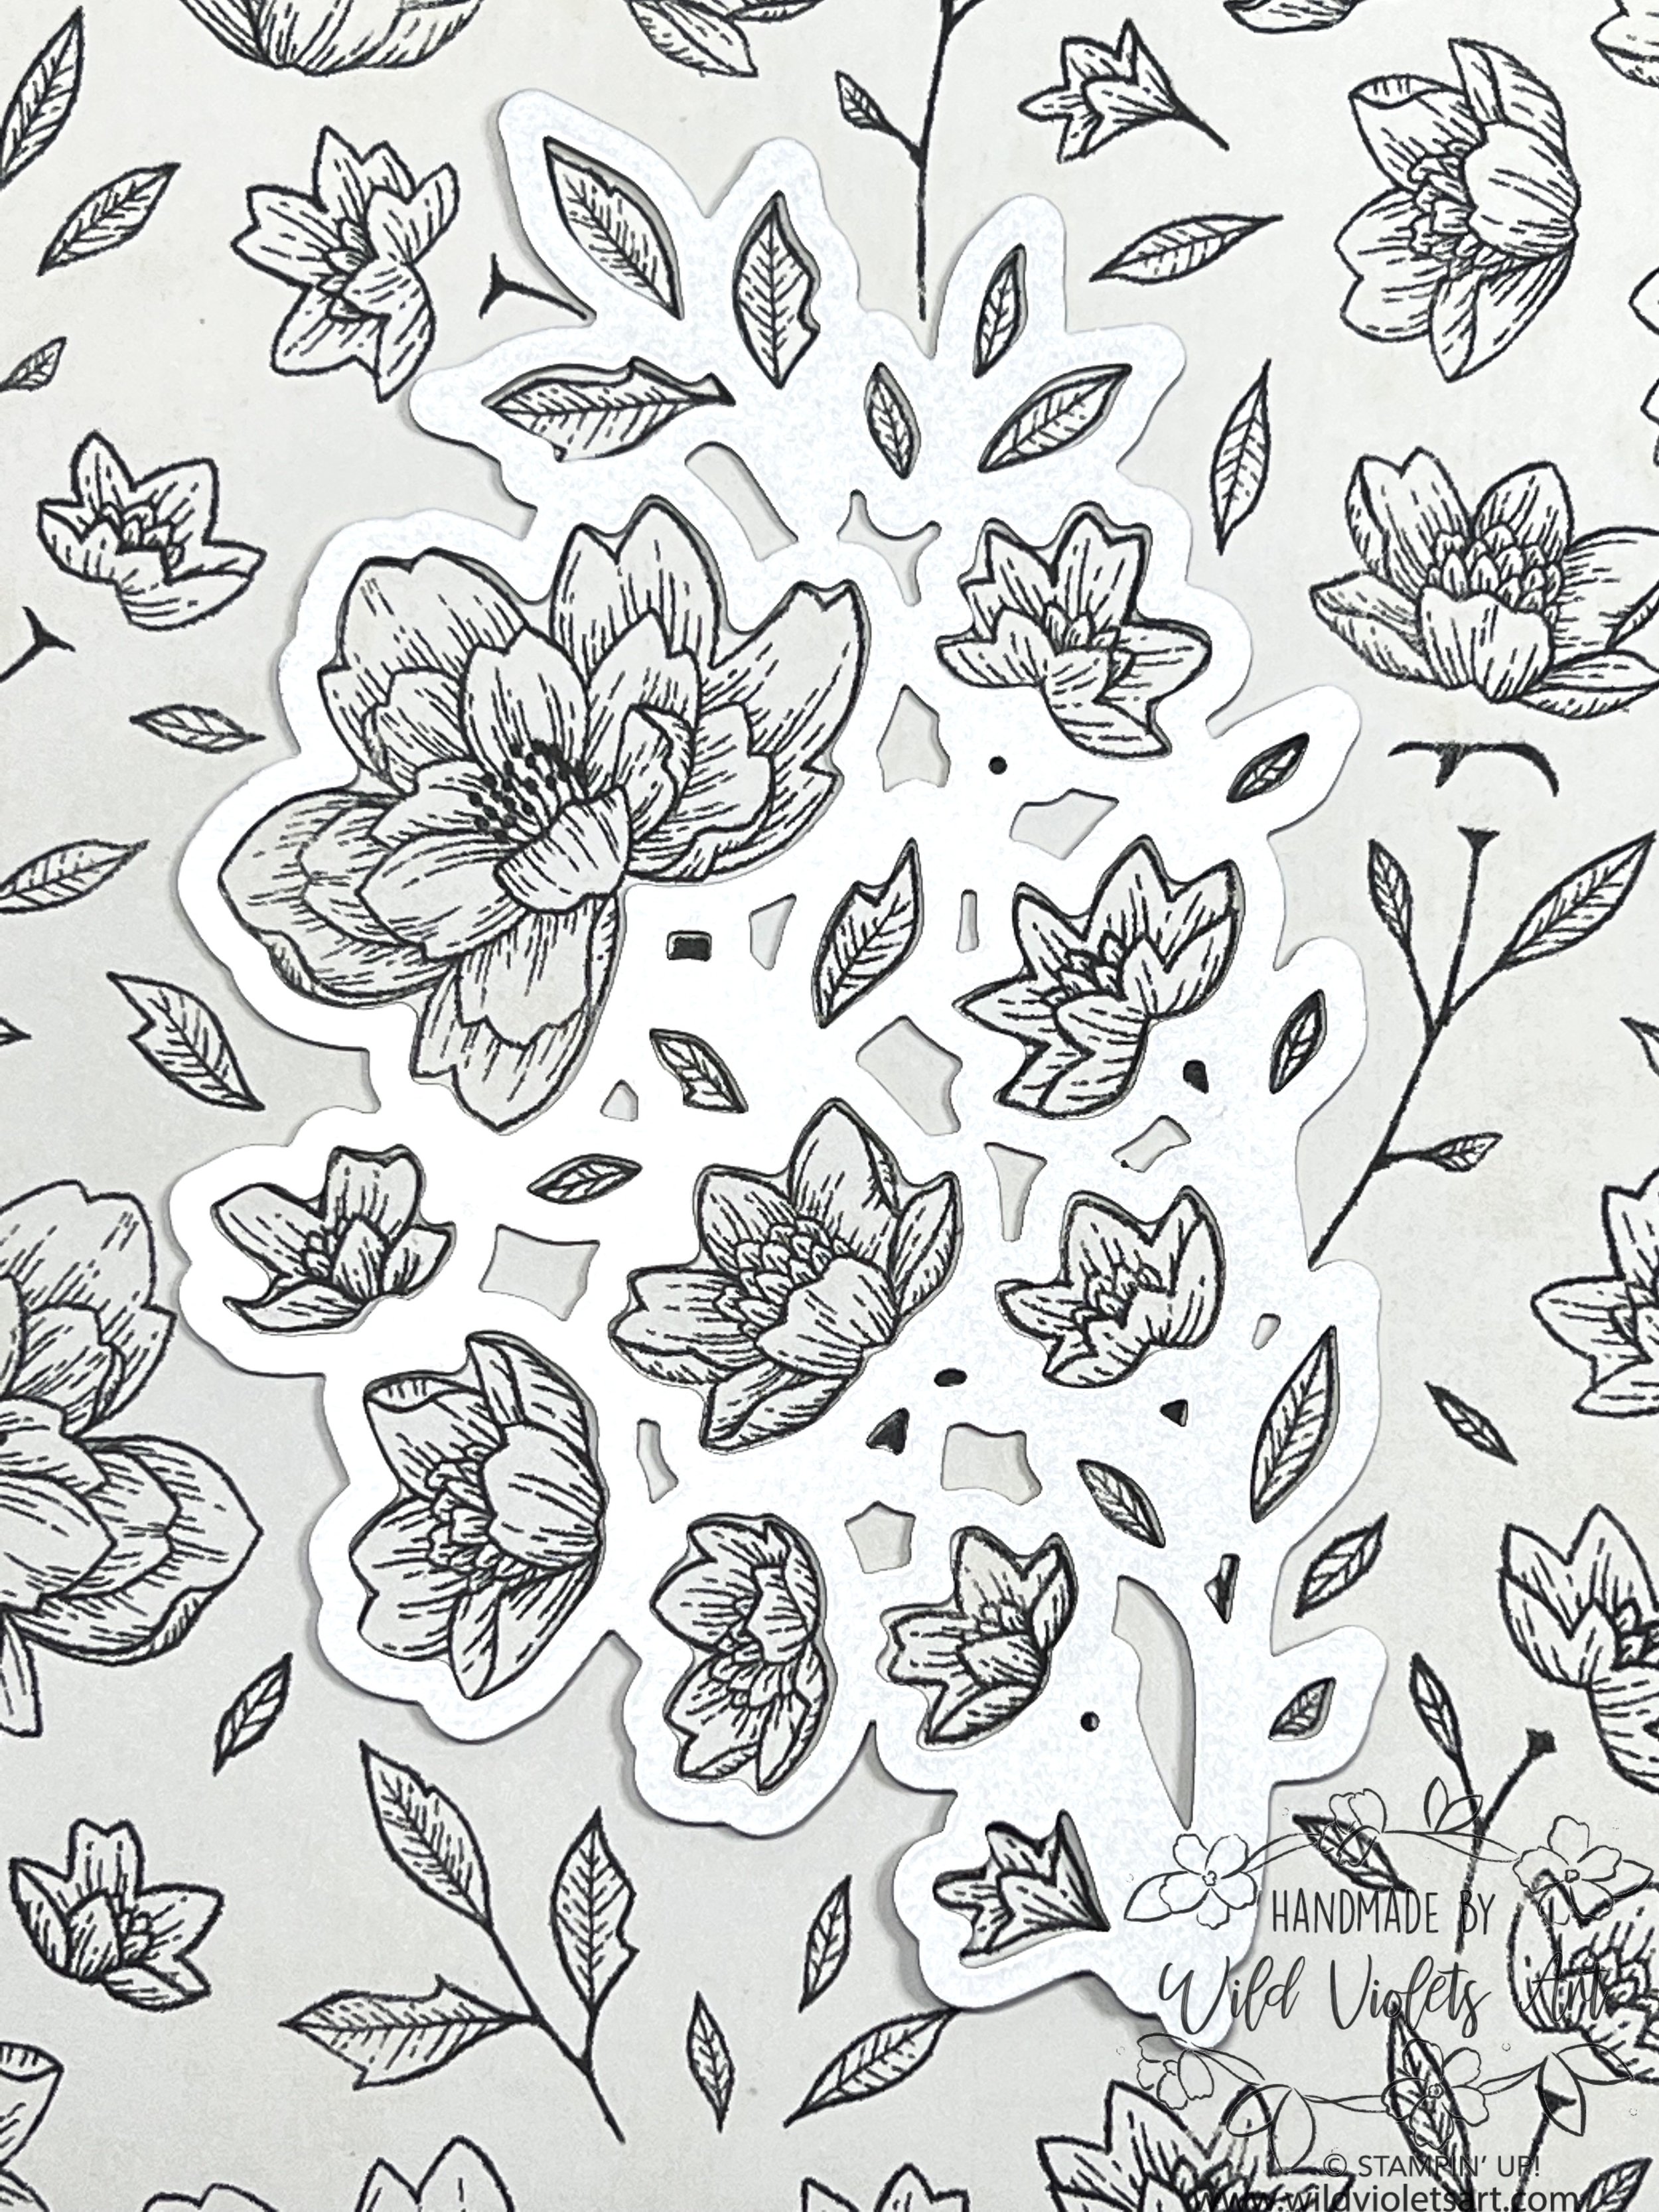


Watercolored flowers & Leaves: For the next step, use the largest die to cut out the flower and foliage pieces from a scrap 4-1/4”x5-1/2” piece of CS (toss out the pieces and keep the base - see image above). Take die cut piece and use as a template over the Fluid 100 Watercolor Paper, and tape down with Washi Tape. Using your Water Painters and Petal Pink reinker, paint the flowers, putting most of the color on the bottom of each flower, making sure entire blossom is colored. Do the same with the Pear Pizzazz reinker on all the stems and leaves. Set aside until dry, then die cut blossoms and foliage and set aside.

Using the Soft Suede ink and a Sponge Dauber, lightly antique the edges of the card front on all sides. Then stamp the sentiment on the Very Vanilla CS with the Soft Suede ink, then die cut it with the All That dies. Pop it up on the lower right side of the card with Stampin’ Dimensionals. Stack and glue the blossoms together as shown or as desired, then glue stems on the flowers. Pop up blossoms and leaves with Stampin’ Dimensionals as shown or as desired, tucking some of the stems under the sentiment. Add the Elegant Faceted Gems as desired. Glue DSP to the Very Vanilla Medium Envelope.