

Florals In Bloom Suite Collection

For this weeks Marvelous Monday, I featured the beautiful Florals In Bloom Suite Collection to create some gorgeous cards using the suite in 3 different ways! First, l let the DSP do the hard work, then created my own DSP, and finally used the dies to create a stunning 3D bouquet to send to my sweet friends & family! I let the DSP inspire colors for the cards, and to show the versatility of what you can create!
I love how the suite is great for both cards and memory keeping! These cards turned out so great, I cannot wait to see where my creativity takes me.
If you’re looking for flowers, take a look at the Florals in Bloom Suite Collection. It’s filled with flower stamps, flower dies, and flowered paper. Put them together for a totally floral look. The lovely Florals In Bloom 12x12 DSP does all the heavy lifting. Just add ink, cardstock, and adhesive to complete your beautiful projects. You can also create your own lovely creations by using the Sweet Blooms Bundle and Pretty Florals Bundle to take your projects to the next level! Finish your project off with the pretty 2025–2027 In Color Flat Pearls.


you make me smile
This sweet and easy card was created with the sentiment from the Sweet Blooms Bundle and is a great card for any occasion!
I am including this card (and 11 others) in my upcoming OPEN HOUSE CARD BUFFET coming May 31, 10 am. to 4 pm., here in Eagan, MN. The event is free, but the cards are $3 each, or 4 for $10, 5 for $12, etc. You can make as many as you want, come when you want and stay for a little bit or the whole time! I am excited to meet you and make new local friends!
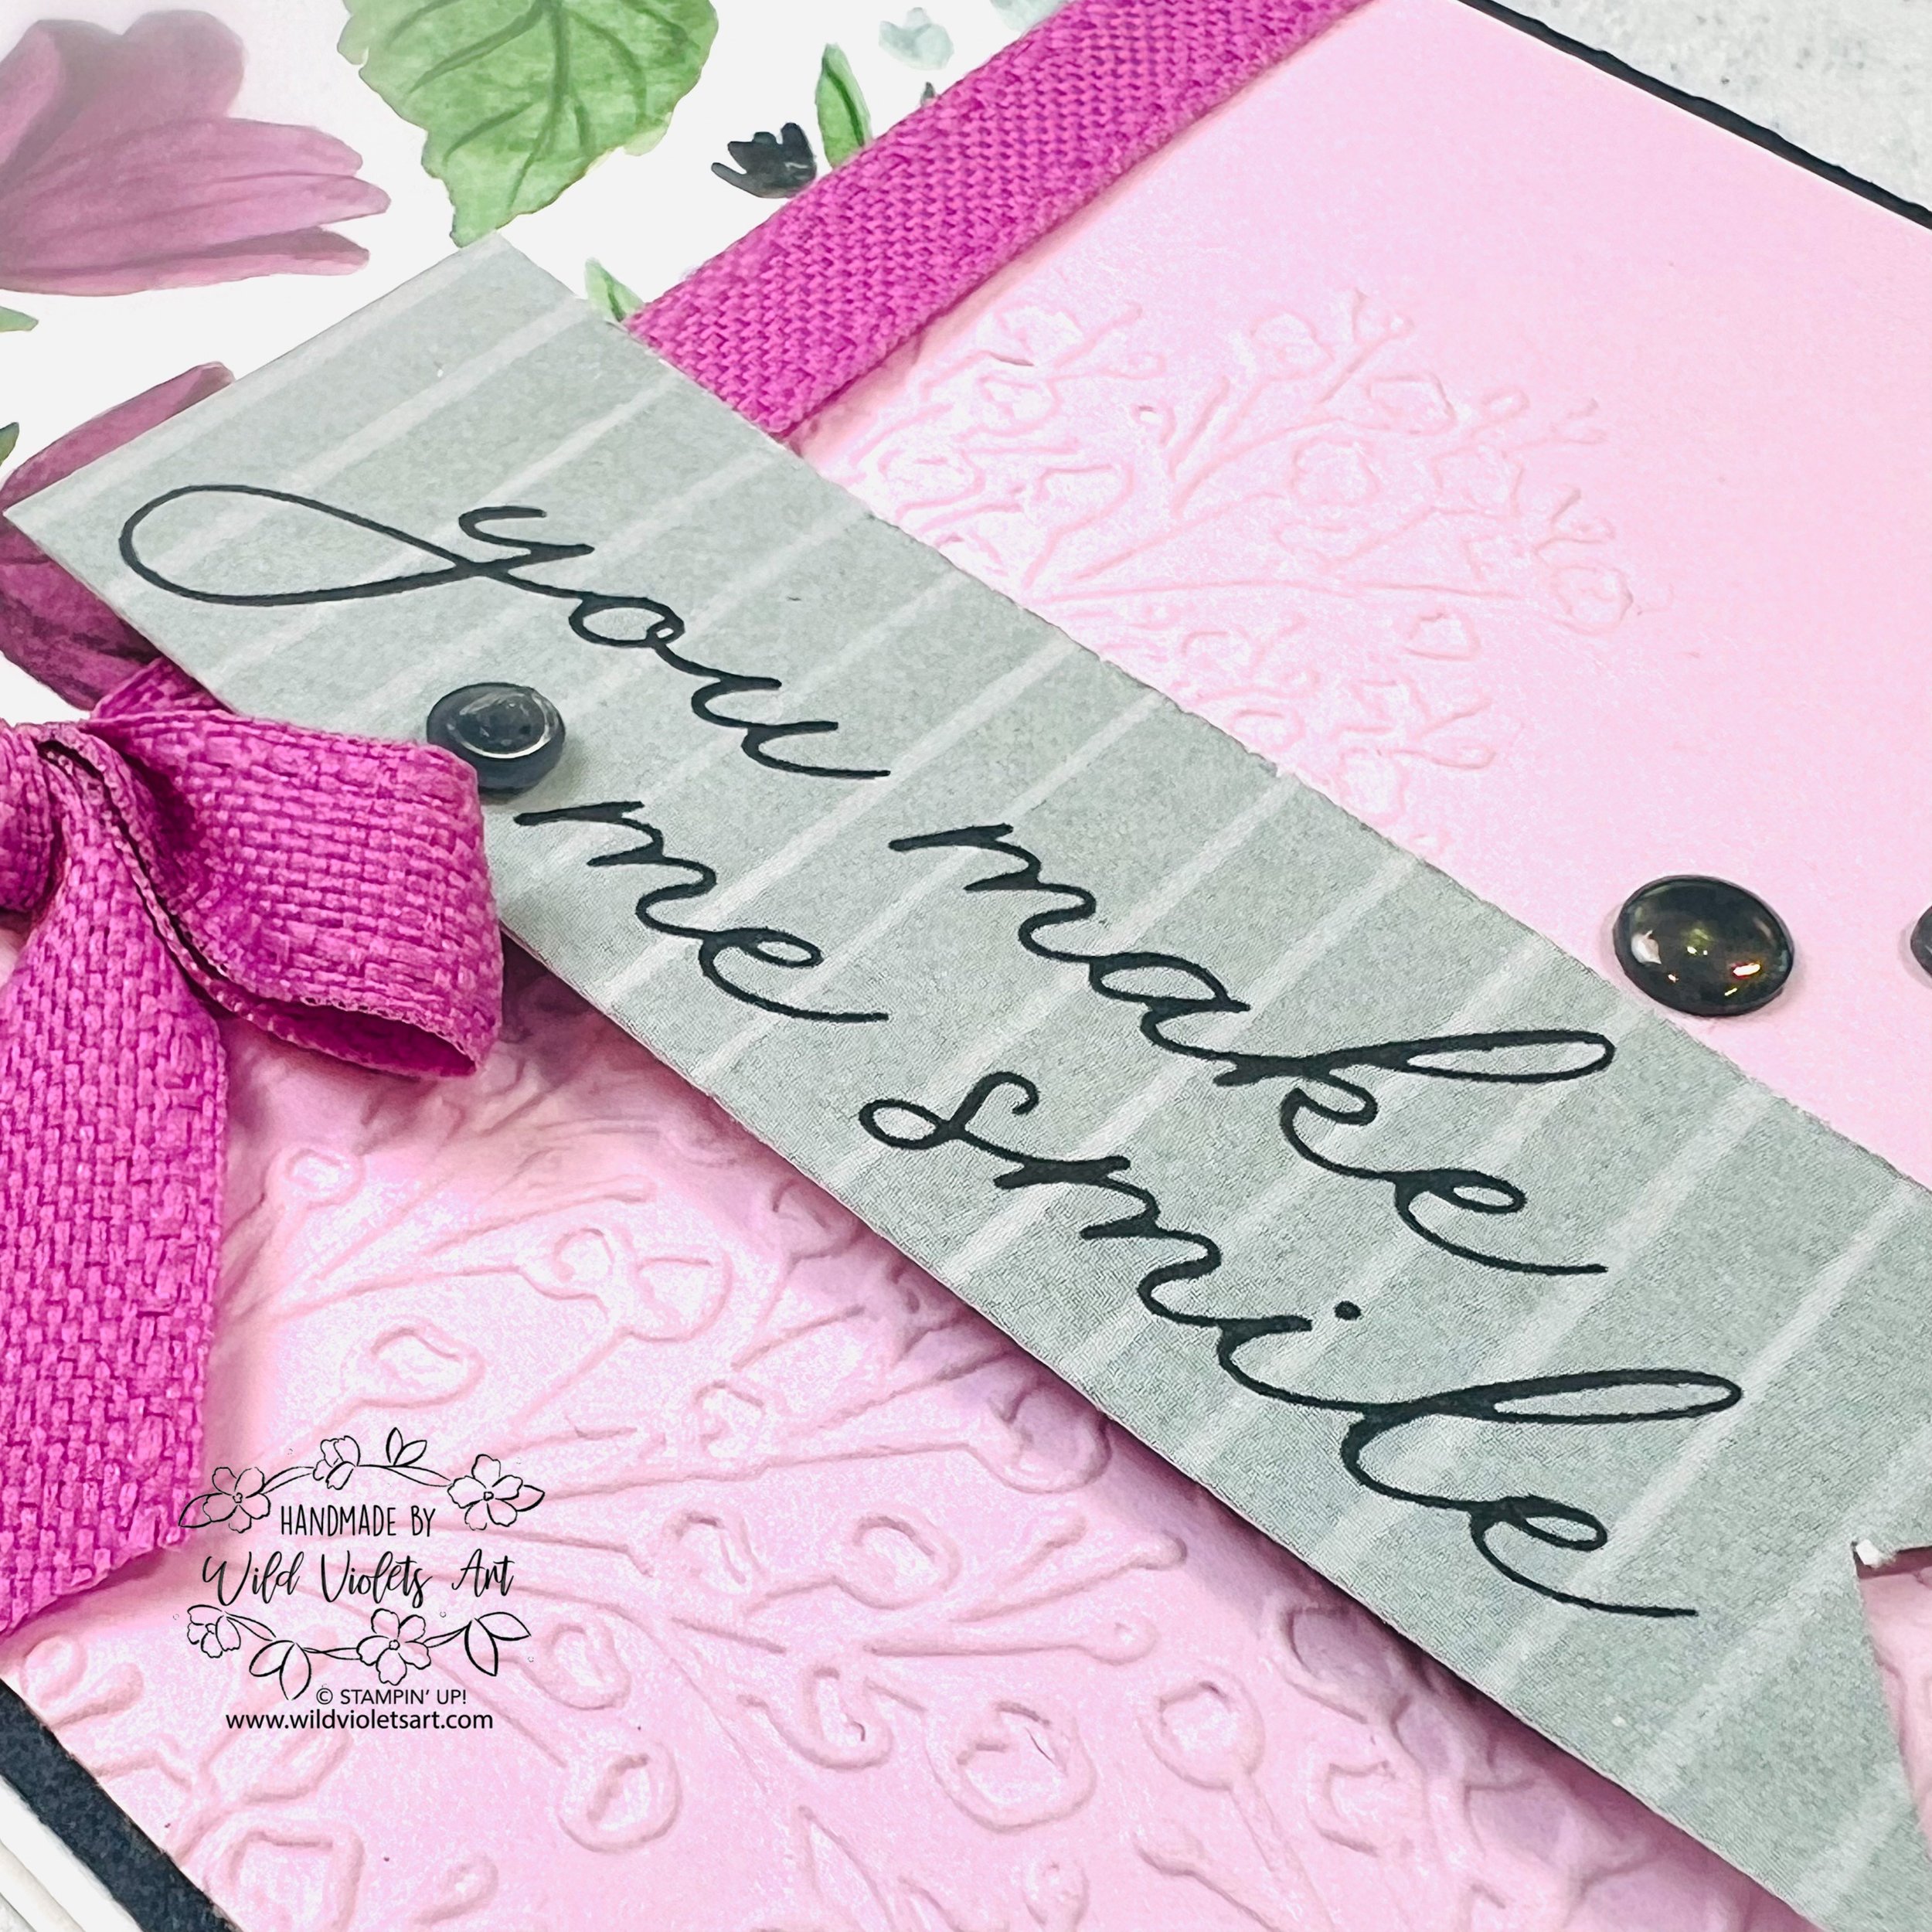
To create this card, I used an A2 card base from Basic White Thick cardstock. I took a 4-1/8”x5-3/8” layer of Secret Sea cardstock and glued a 2-1/4”x4” layer of the Florals In Bloom DSP shown, along with a 3”x4” layer of Bubble Gum cardstock, embossed with the new Pressed Flowers Embossing Folder. I then wrapped a 16” piece of Petunia Pop Bordered Ribbon and tied it into a bow, and adhering it all to the card front.
For the sentiment, I used the back side of the same DSP for the sentiment (1”x3-1/4”), stamped in Secret Sea ink and snipped for the flag. I popped it up using Stampin Dimensionals. I then added the Secret Sea Flat Pearls. Sweet and easy!

let joy bloom
I decided to recreate the DSP for this sweet card. While all the DSP imagery is not available in the suite, I was able to create a beautiful card by adding the Memories In Bloom stamp set as well as the Sweet Blooms Bundle and Pretty Florals stamp set. Watch my video for how-to details for each of the images on this card. I used Blackberry Bliss, Bubble Gum, Cloud Cover, Garden Green, Petunia Pop and Secret Sea inks. I also used my Bubble Gum, Secret Sea, Granny Apple Green, and Cloud Cover Stampin’ Write Markers to add more detail and depth.

I started with an A2 card base using Secret Sea cardstock. I used Basic White die-cut using the Textured Notes dies (I just love the lovely detailed edges), and then layered a 3-3/8”x4-7/8” piece of Garden Green cardstock with a 3-1/2”x5” layer of Petunia Pop cardstock. I added and tied a bow using a 20” piece of Faux Linen Ribbon in Cloud Cover, then adhered it to the card base.
I stamped “bloom” in Petunia Pop ink and “let joy” in Secret Sea ink, the popped both up using Stampin’ Dimensionals. My final touch was adding the Brushed Brass Butterflies to the card front. So sweet!

hello
My final card was this lovely 3D card utilizing the dies from the Pretty Florals dies and the sentiment from Sweet Blooms stamp set. For this card I used an A2 card base from Basic White Thick cardstock. I then added the 4”x5-1/4” Florals In Bloom DSP. I used a 3-3/8”x4-7/8” layer of Blackberry Bliss cardstock to frame the Textured Notes die-cut Basic White cardstock. Please note that I did not stamp my sentiment until all my florals were in place.
Watch my video for how-to details…

The florals and foliage are die-cut using Blackberry Bliss, Bubble Gum, Garden Green, Granny Apple Green and Petunia Pop cardstock using the Pretty Florals dies. I wanted this card to be portrait, but it is also lovely in landscape as well.
After assembling the floral pieces of the rose and tulips (watch my video for detailed how-to instructions), I then started layering them upside down with Stampin’ Dimensionals to keep them in place, building up the bouquet as I wanted, then placing on the card top die-cut layer. I then stamped the sentiment in Petunia Pop ink and added Rainbow Adhesive-Backed Dots in Bubble Gum. Lovely!
If you want me to personally show you how to make these cards and you are local to Eagan, MN, I can help you create a CRAFT TOGETHER with your friends. At this get-together, I can show you how to make one of these cards or one you choose, with all the material needed for a fun filled time with your friends!


